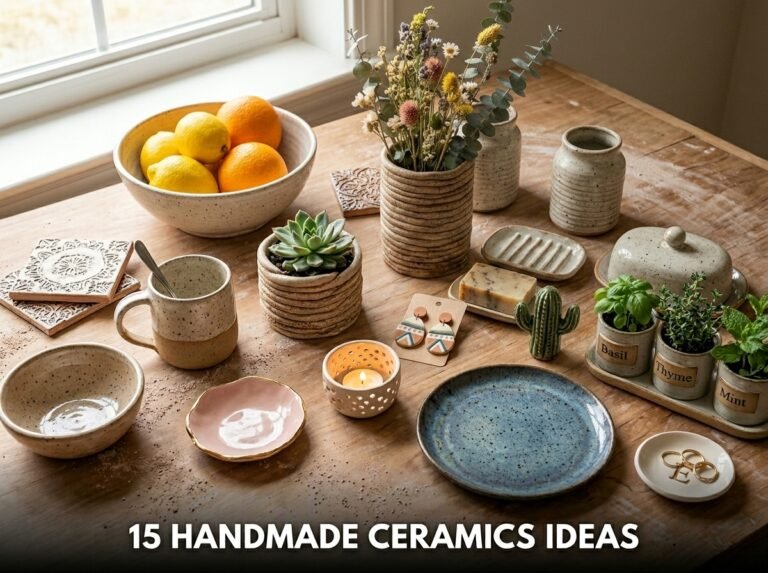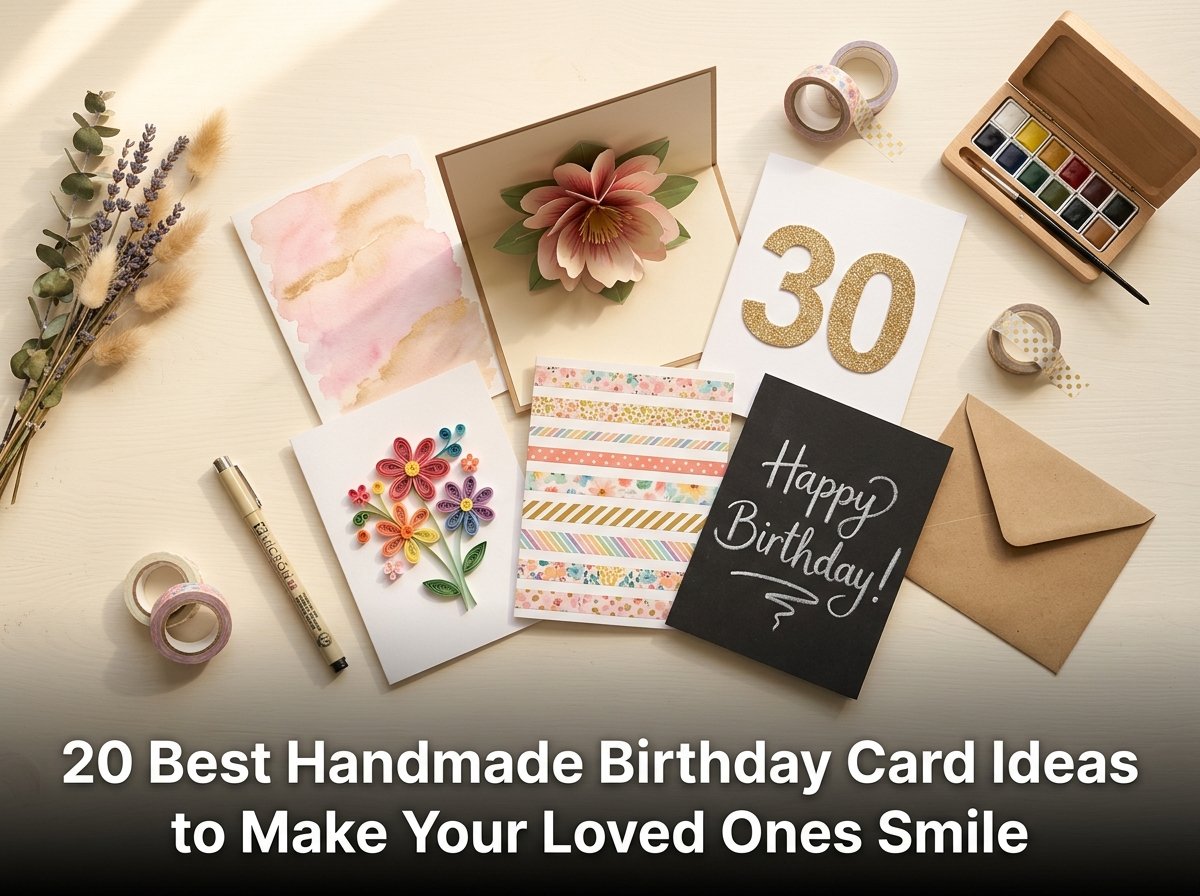
20 Best Handmade Birthday Card Ideas to Make Your Loved Ones Smile
I made my first handmade birthday card in seventh grade using notebook paper, a red marker, and some star stickers I found in my school bag. It looked nothing like the cards at the store. But my mother kept it in her drawer for six years. That told me everything I needed to know about what a handmade card actually does to a person.
A handmade birthday card works better than a store-bought one because it carries personal effort, and people feel that effort when they hold it. You do not need art skills or expensive supplies. Cardstock, scissors, markers, and glue get the job done for most of these ideas.
I have spent a lot of time making cards for friends, family, and coworkers. Some took 10 minutes. Some took an hour. All of them landed better than any card I ever bought at a shop.
In this guide, I put together 20 handmade birthday card ideas that I have personally tried or studied in detail. These ideas cover every skill level, from complete beginner to someone who already enjoys paper crafts. Whether you are making a card for a best friend, a child, or a coworker, you will find the right idea here.
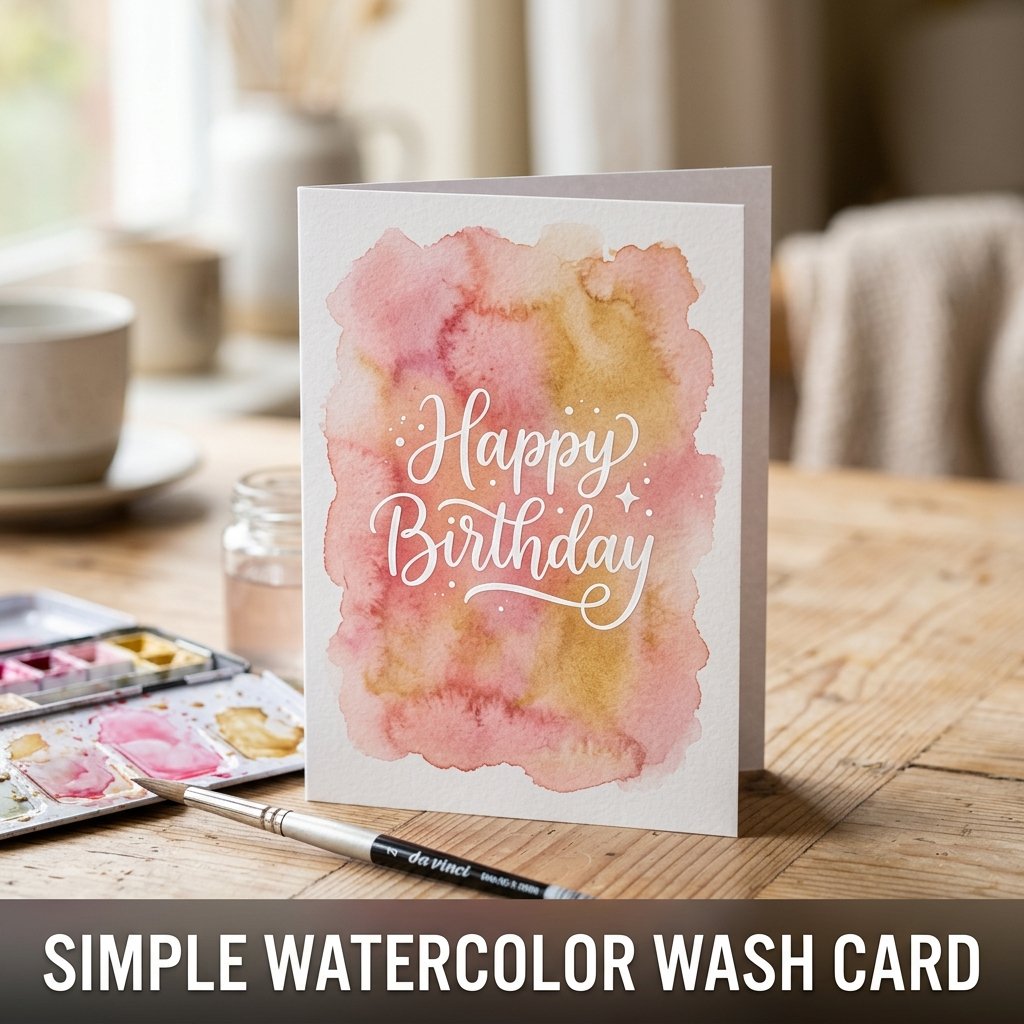
1. Simple Watercolor Wash Card
A simple watercolor wash card uses diluted paint brushed across white cardstock to create a soft, colorful background. Once the paint dries, you write a birthday message on top using a black marker or a white gel pen. I made one of these for my cousin’s birthday and it took under 15 minutes. The result looked like something from a stationery boutique.
Supplies You Need
You need white cardstock, watercolor paints, a medium brush, clean water, and a black marker. Fold the cardstock in half first, then paint only the front panel. Use two or three colors and let them bleed into each other naturally. Allow full drying time before writing on it, which takes about 20 minutes.
Writing the Message
Write the birthday message in the center of the dried watercolor background. Keep the text short and centered. A single line like “Happy Birthday” in large letters works better than a paragraph. I used a white gel pen on a dark wash background and the contrast made the text stand out clearly.
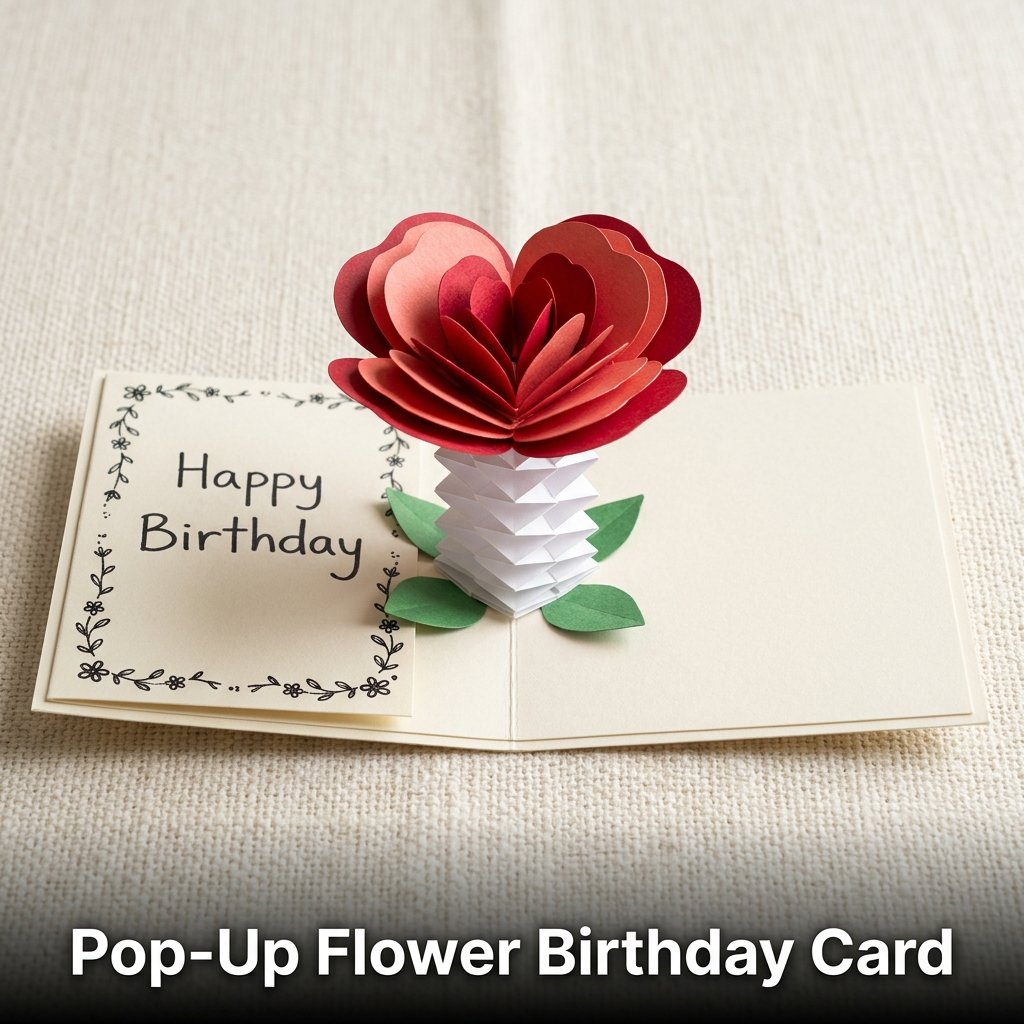
2. Pop-Up Flower Birthday Card
A pop-up flower birthday card has a 3D paper flower that rises when the recipient opens the card. This is one of the most well-known creative birthday card designs because the surprise element adds to the experience of opening it. I made one using two folded paper strips and a flower cut from colored paper.
Building the Pop-Up Mechanism
Cut two strips of cardstock, each about half an inch wide and four inches long. Fold them into a square spring shape by alternating folds at 90-degree angles. Glue one end to the inside base of the card and the other end to the paper flower. When the card opens, the spring pushes the flower upward.
Decorating the Card Front
Keep the front of the card simple so the inside pop-up becomes the main feature. Use a single printed or handwritten “Happy Birthday” on the front with a small floral border. I added three small leaf cutouts around the text. That small detail tied the outside design to the flower inside.
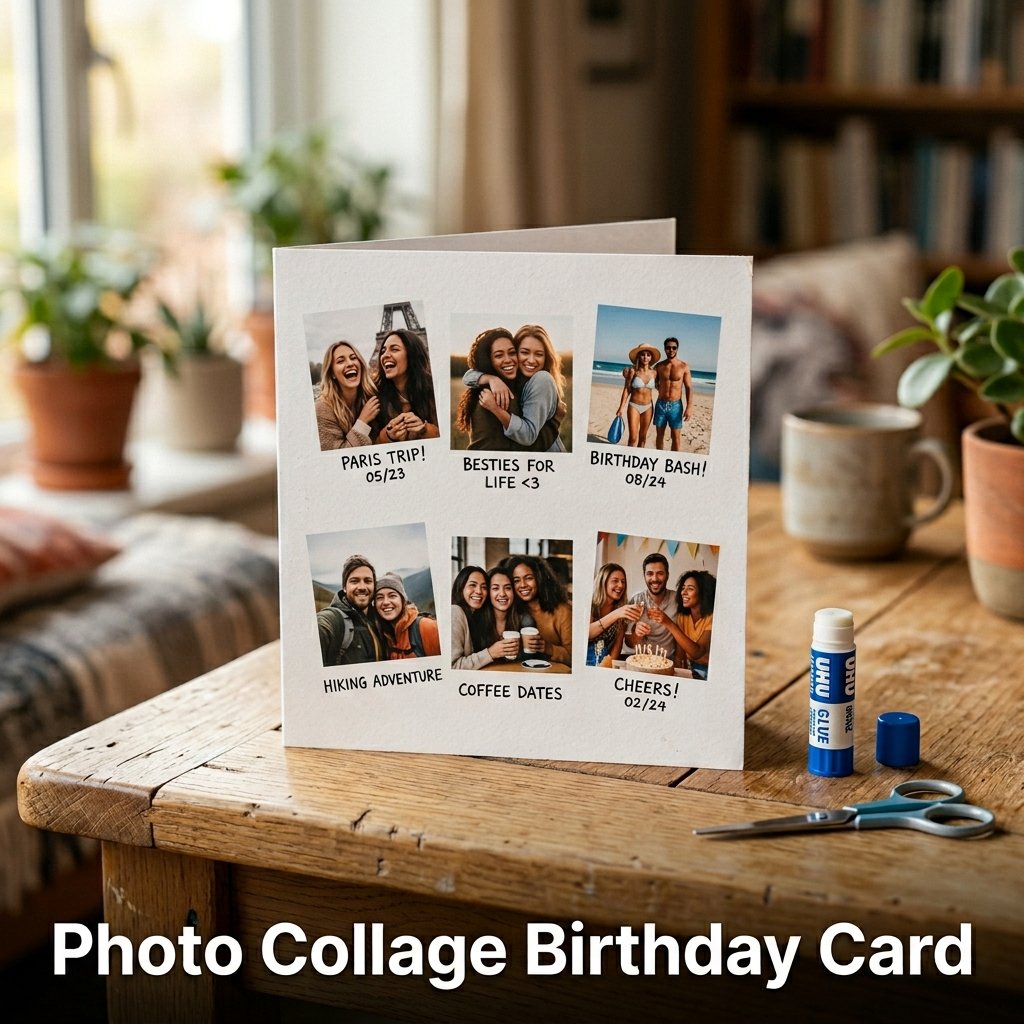
3. Photo Collage Birthday Card
A photo collage birthday card uses printed photos arranged on the front of a folded cardstock base. This is one of the most personalized handmade birthday cards you can make because it references shared memories directly. I printed six small photos on standard paper and cut them into squares for my best friend’s card.
Selecting and Printing Photos
Choose four to six photos that feature the recipient. Print them at a small size, around 2×2 inches, on regular printer paper. Cut them cleanly with scissors or a craft knife. Matte photo paper gives a better look than glossy for handmade cards because it does not reflect light unevenly.
Arranging the Layout
Lay the photos out on the cardstock before gluing anything. Overlap the edges slightly for a scrapbook-style look. Once the arrangement looks right, glue each photo down with a glue stick. Add a handwritten date or short caption under each photo using a fine-tip marker.
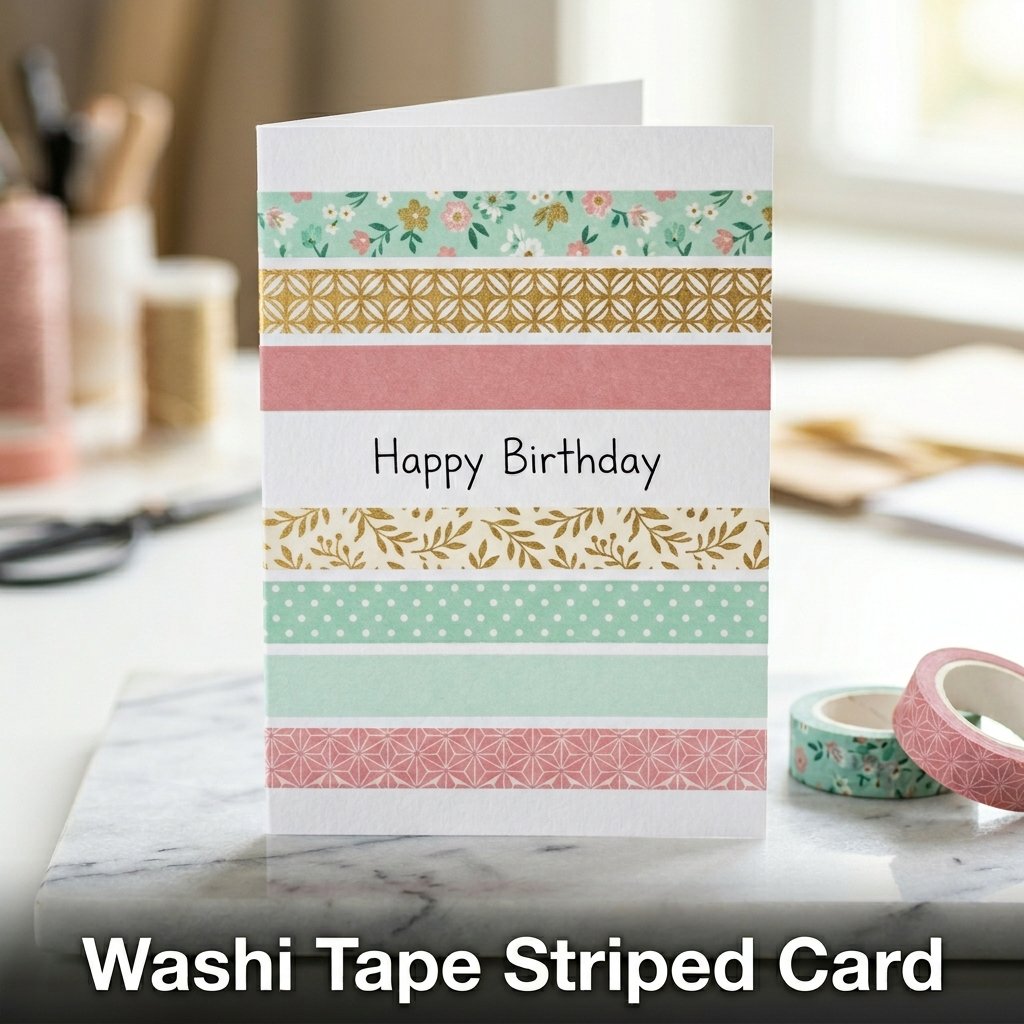
4. Washi Tape Striped Card
A washi tape striped card uses rows of decorative tape applied across a white cardstock base to create a colorful, patterned design. This is one of the easiest birthday card making projects because it requires no drawing or painting skills. I completed one in about eight minutes using three rolls of washi tape.
Applying the Tape
Fold the cardstock in half. Apply strips of washi tape horizontally across the front, leaving small gaps between each strip for a clean, striped look. Press each strip down firmly from one end to the other to avoid air bubbles. Trim the excess tape at the edges using scissors.
Adding the Text
Write “Happy Birthday” or the recipient’s name in the white gaps between the tape strips. Use a fine black marker for clear, readable lettering. Alternatively, write the message on a small white label and stick it in the center of the card over the tape pattern. Both approaches produce a neat result.
5. Stamped Balloon Card
A stamped balloon card uses a circular stamp or a hand-cut sponge shape dipped in ink to print balloon shapes across the card front. I cut a small circle from a kitchen sponge, dipped it in acrylic paint, and stamped it repeatedly across a white card. It took six minutes and looked like a printed design.
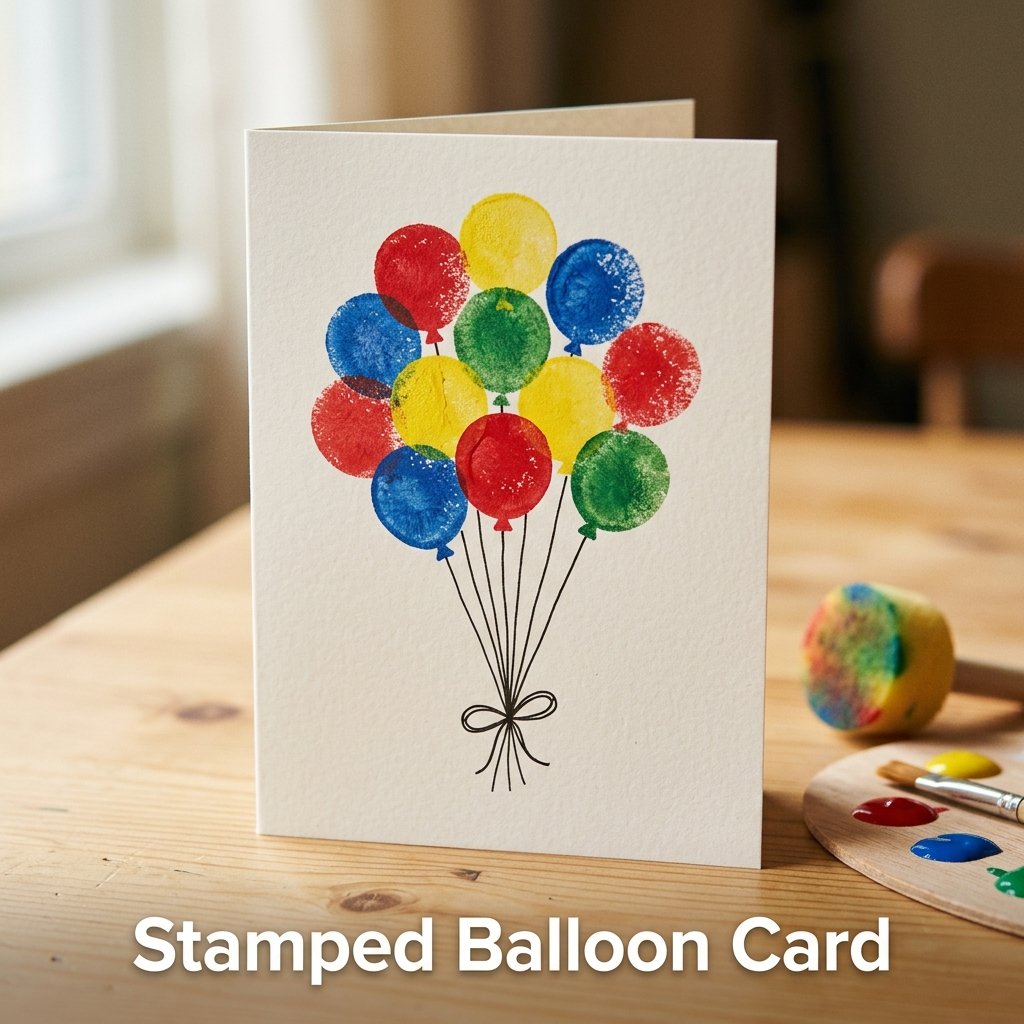
Making a DIY Stamp
Cut a circle roughly one inch in diameter from a dense kitchen sponge. Dip it lightly into a small amount of acrylic paint spread on a flat plate. Press it onto the card surface with even pressure and lift straight up. Repeat in a cluster pattern to create a bunch of balloons.
Adding String Details
Draw thin curved lines below each stamped circle using a black marker to create balloon strings. Gather the lines together at the bottom and add a small bow shape where they meet. I used three colors of paint for the balloons and the contrast between the circles and the fine black strings made the design look intentional.
6. Layered Paper Flower Card
A layered paper flower card uses multiple circles of colored paper stacked on top of each other to form a dimensional flower attached to the card front. This is a well-known unique birthday card idea because the texture of the layered paper gives it a handcrafted look that flat designs do not produce.
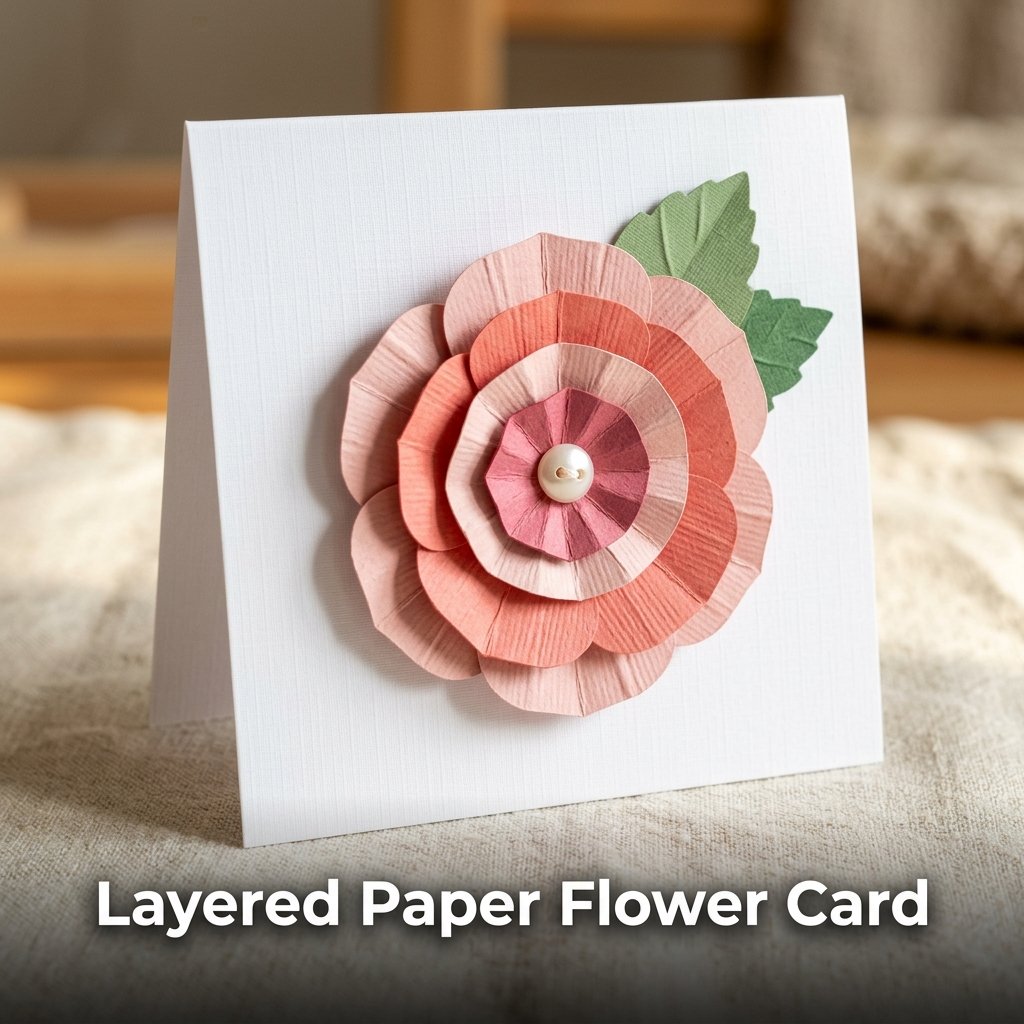
Cutting the Paper Layers
Cut five circles in decreasing sizes from colored cardstock. Start at three inches for the largest and go down to half an inch for the smallest. Use different shades of the same color for depth, or mix contrasting colors. Fold each circle in half, then in half again, and open it flat. The fold lines add texture.
Assembling the Flower
Stack the circles from largest to smallest and glue each layer to the center of the one below it. Add a small button or paper circle at the very top as the flower center. Glue the finished flower onto the card front slightly off-center. I added two small paper leaves under the flower to complete the design.
7. Envelope Surprise Card
An envelope surprise card places a small folded note or mini card inside a tiny handmade envelope glued to the inside of the main card. The recipient opens the card and finds a second message waiting inside the small envelope. I made one for my colleague’s birthday and she saved both the card and the inner note separately.
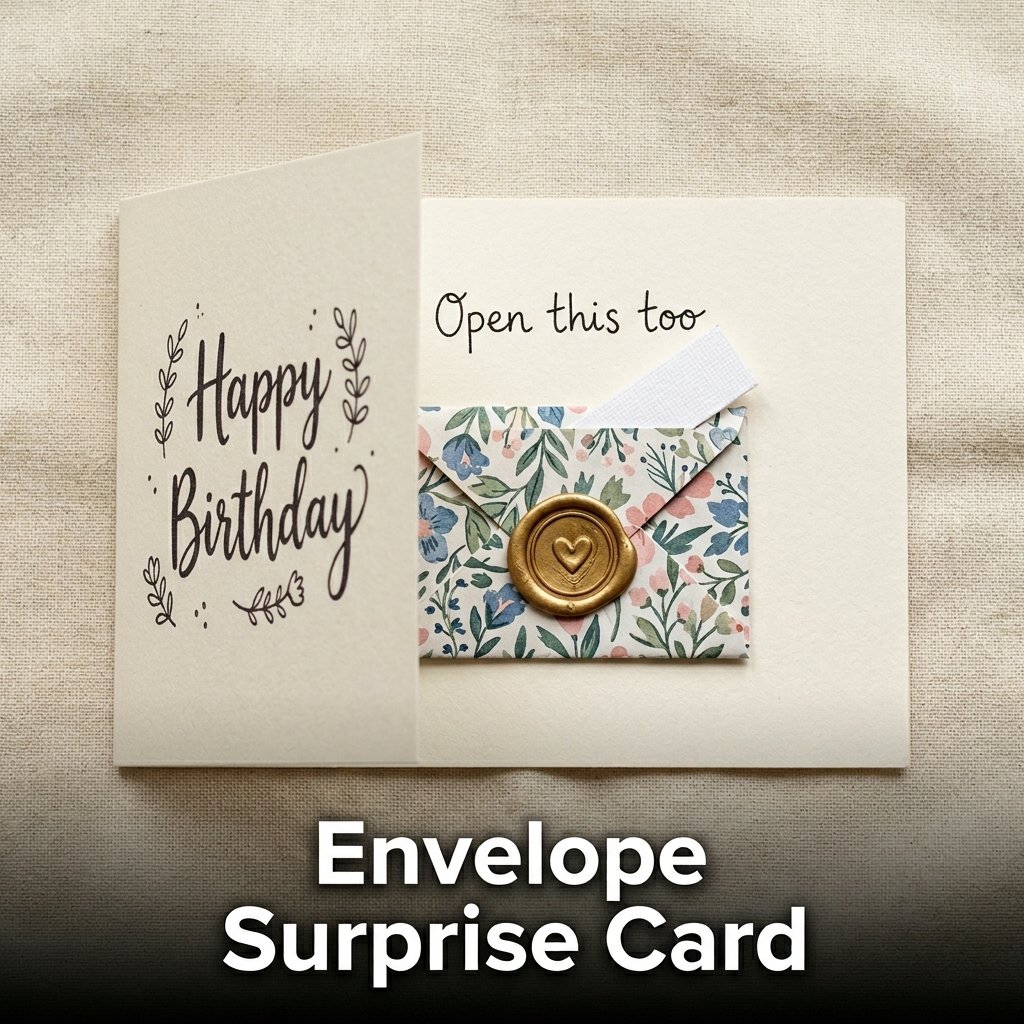
Making the Mini Envelope
Cut a small square of patterned paper, about four inches by four inches. Fold all four corners toward the center. Secure three of the folded flaps with glue and leave the top flap open as the envelope’s opening. Write a short personal message on a small strip of paper and tuck it inside.
Attaching to the Main Card
Glue the sealed mini envelope onto the bottom half of the card’s inside panel. Write a short prompt above it like “Open this too.” That instruction draws attention to the envelope immediately. I decorated the outer envelope flap with a small sticker seal to make it feel like a proper letter.
8. Glitter Number Card
A glitter number card features the recipient’s age written in large block letters filled with glitter on the card front. This is one of the most visually direct birthday card ideas for friends because the age itself becomes the main design element. I made a “30” glitter card for my friend and she framed it instead of throwing it away.
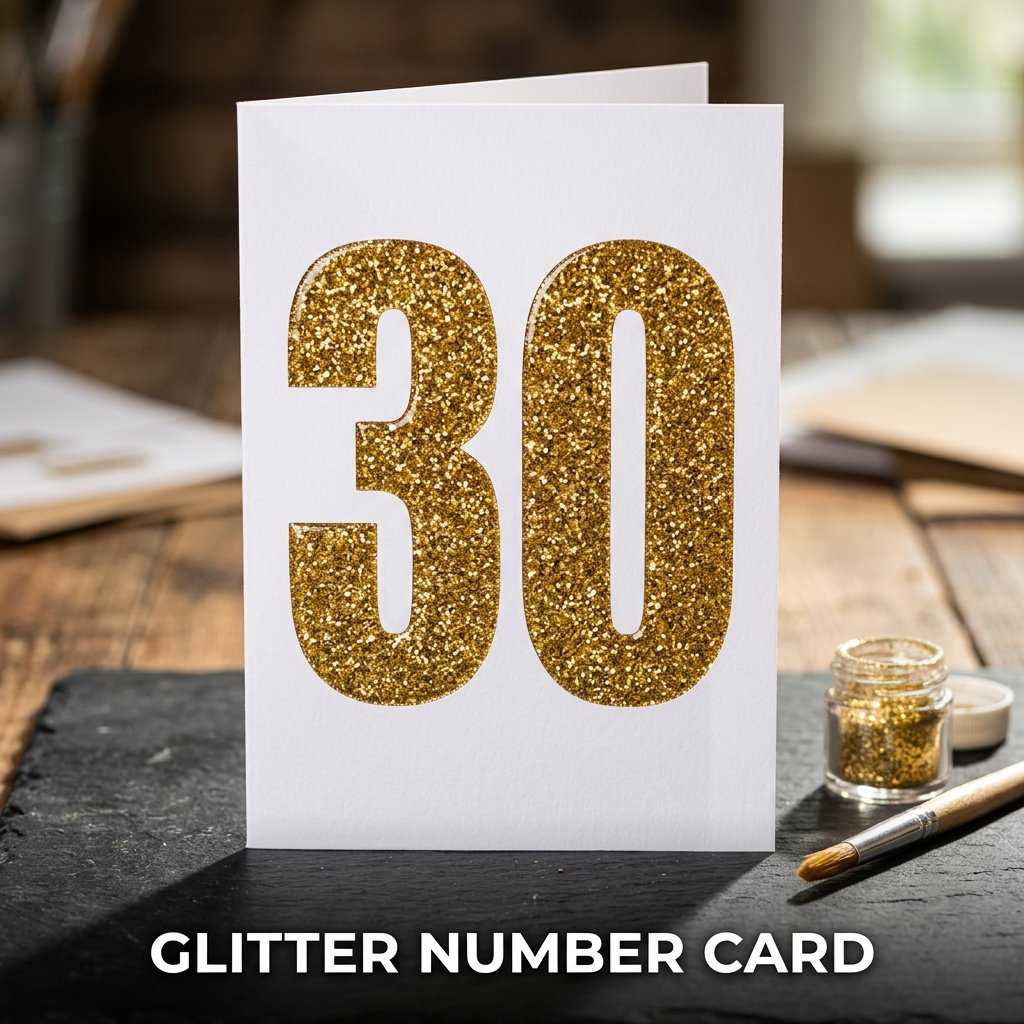
Drawing and Cutting the Numbers
Draw large block numbers on cardstock and cut them out carefully. Each number works as a separate piece. Alternatively, draw the numbers directly onto the card front using a pencil first, then trace over the pencil lines with glue and pour glitter over the wet glue immediately.
Sealing the Glitter
Once the glue dries fully, tap the card gently to remove excess glitter. Apply a thin layer of clear-drying craft glue over the entire glitter surface to seal it. This step stops the glitter from shedding when the card is handled. I skipped this step on my first attempt and regretted it immediately.
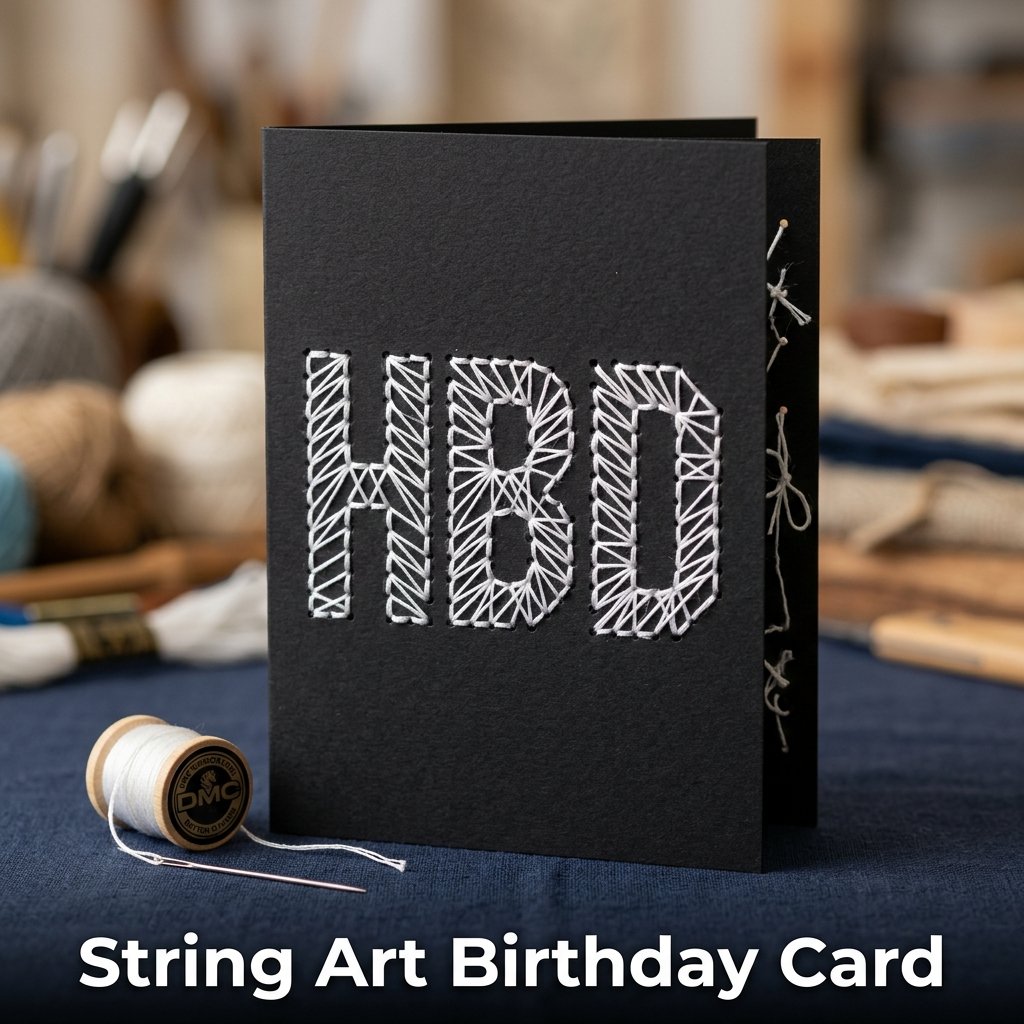
9. String Art Birthday Card
A string art birthday card uses thread or embroidery floss woven between small holes punched into cardstock to create a geometric or letter-based pattern. I used a needle, white thread, and black cardstock to spell “HBD” in a string pattern. The finished card looked detailed and required no drawing skill.
Preparing the Card
Draw your design lightly on the back of the cardstock so the pencil marks do not show on the front. Use a needle or pin to punch holes along the design outline, spacing them about 3 millimeters apart. Hold the card over a soft surface like a folded towel while punching to protect the table.
Weaving the Thread
Thread a needle with embroidery floss and knot one end. Push the needle through the first hole from back to front, then connect to the next hole in the pattern from front to back. Continue until the full design is complete. Secure the last knot on the back with a small piece of tape.
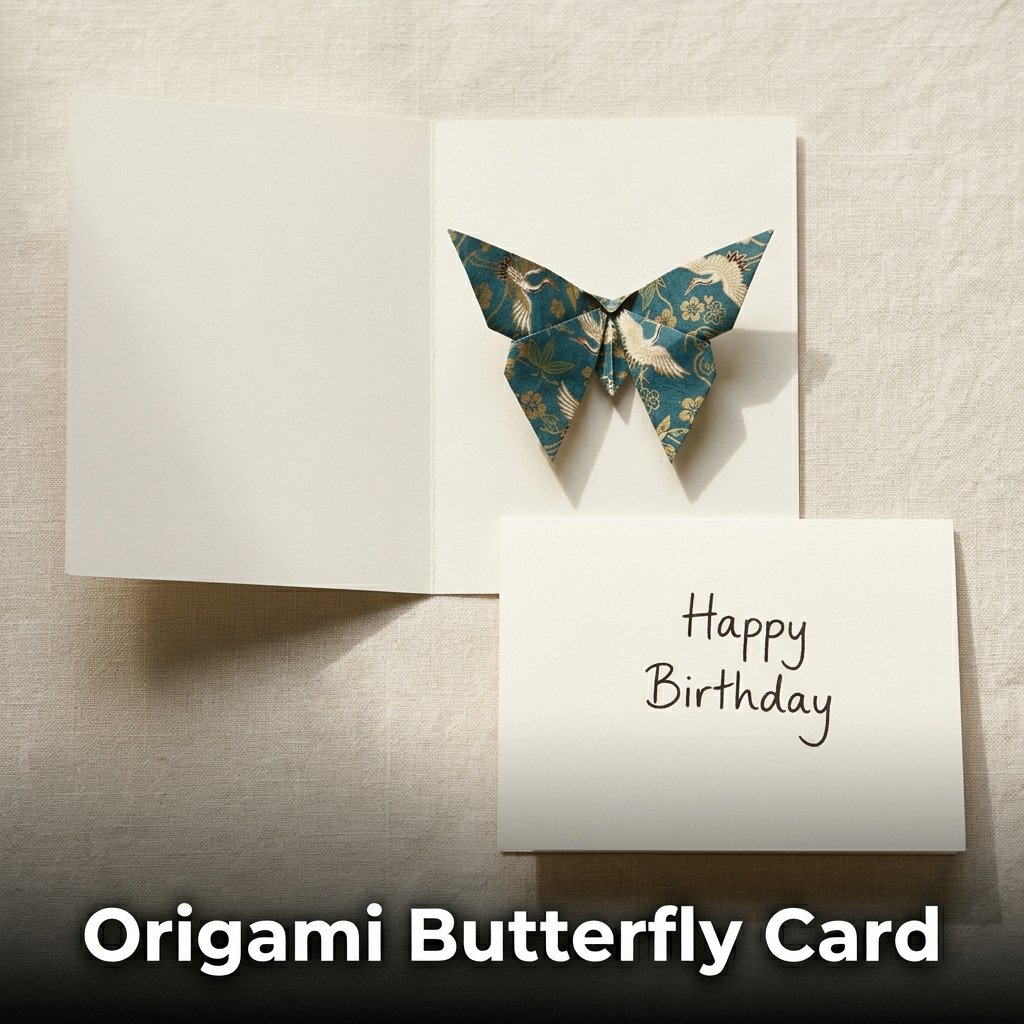
10. Origami Butterfly Card
An origami butterfly card attaches a folded paper butterfly to the front or inside of a greeting card as a three-dimensional decoration. I followed a basic origami butterfly fold using a five-inch square of patterned paper and attached it to a plain white card. The butterfly took about seven minutes to fold.
Folding the Butterfly
Start with a square piece of paper. Fold it diagonally both ways and horizontally both ways to create crease lines. Collapse the paper into a triangle using the existing creases. Fold the top layers up on both sides to form the wings. Pinch the center and secure with a small piece of tape or a brad fastener.
Attaching to the Card
Glue only the center body of the butterfly to the card, leaving the wings free so they lift slightly off the surface. This creates a three-dimensional effect. I placed mine on the inside of the card so it appeared when the recipient opened it. A single butterfly at the center looks cleaner than multiple butterflies clustered together.
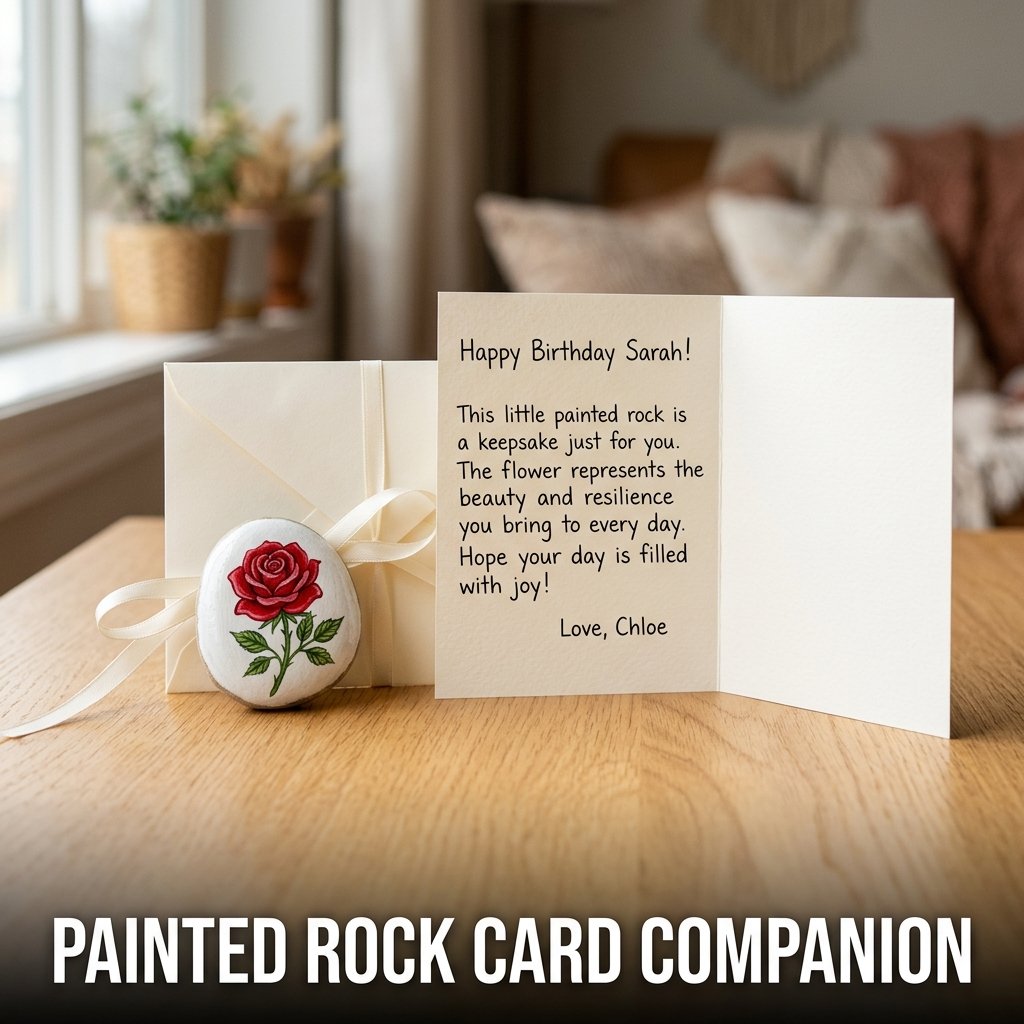
11. Painted Rock Card Companion
A painted rock card companion pairs a small hand-painted stone with a handmade birthday card, delivered together as one gift. The card explains what the rock represents, such as a lucky stone or a keepsake. I painted a smooth river rock with a small flower and tied it to a card with a ribbon. The recipient kept the rock on her desk.
Painting the Rock
Use a smooth, flat rock no larger than a golf ball. Apply a white base coat of acrylic paint and let it dry fully. Then paint a simple design on top: a flower, a star, initials, or a small pattern. Seal the finished rock with clear varnish so the paint does not chip.
Writing the Card Message
Explain the rock’s meaning inside the card. Write something like: “This is your birthday keepsake stone. Keep it somewhere you look every day.” That instruction gives the rock a purpose. I tied the rock to the outside of the card envelope using a thin ribbon so both pieces arrived together as one package.
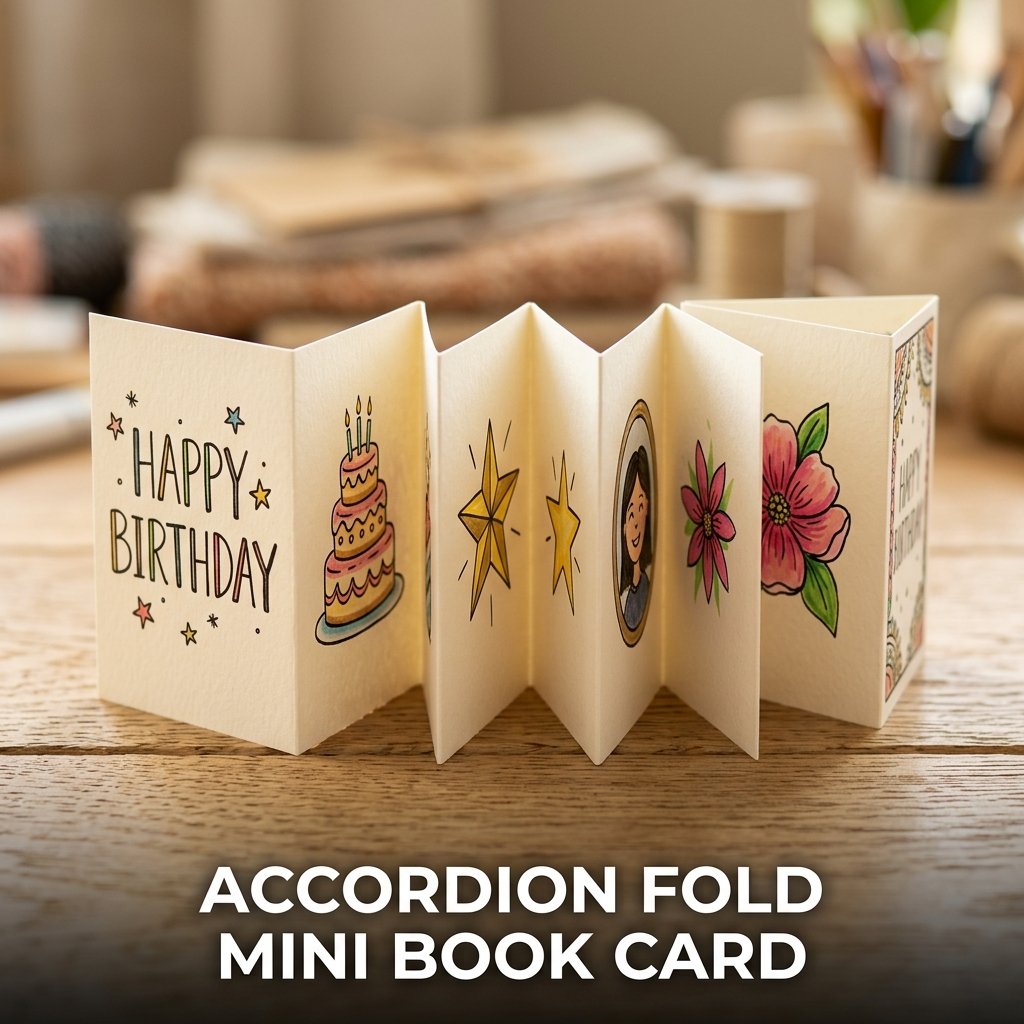
12. Accordion Fold Mini Book Card
An accordion fold mini book card is a strip of cardstock folded back and forth into a small booklet shape, with each panel holding a different message or drawing. I made one with six panels for my nephew’s birthday. Each panel had a different illustration and a single sentence. He read through it like a tiny picture book.
Cutting and Folding
Cut a strip of cardstock approximately four inches tall and 18 inches long. Score the strip at every three inches using a bone folder or the back of a butter knife. Fold along each score line alternating directions to create the accordion shape. The result is a six-panel booklet that collapses flat for mailing.
Filling the Panels
Use each panel for one element: a drawing, a memory, a wish, or a photo. Keep each panel focused on a single idea. I used the first panel as a cover with “Happy Birthday” written on it and the last panel as a closing message. The panels in between held small hand-drawn pictures.
13. Rubber Band Resist Card
A rubber band resist card wraps rubber bands tightly around a folded card, then paints over the entire surface. When the rubber bands are removed after the paint dries, the areas under the bands remain white, creating a striped pattern. I tried this with blue and gold paint and the result looked intentional and geometric.
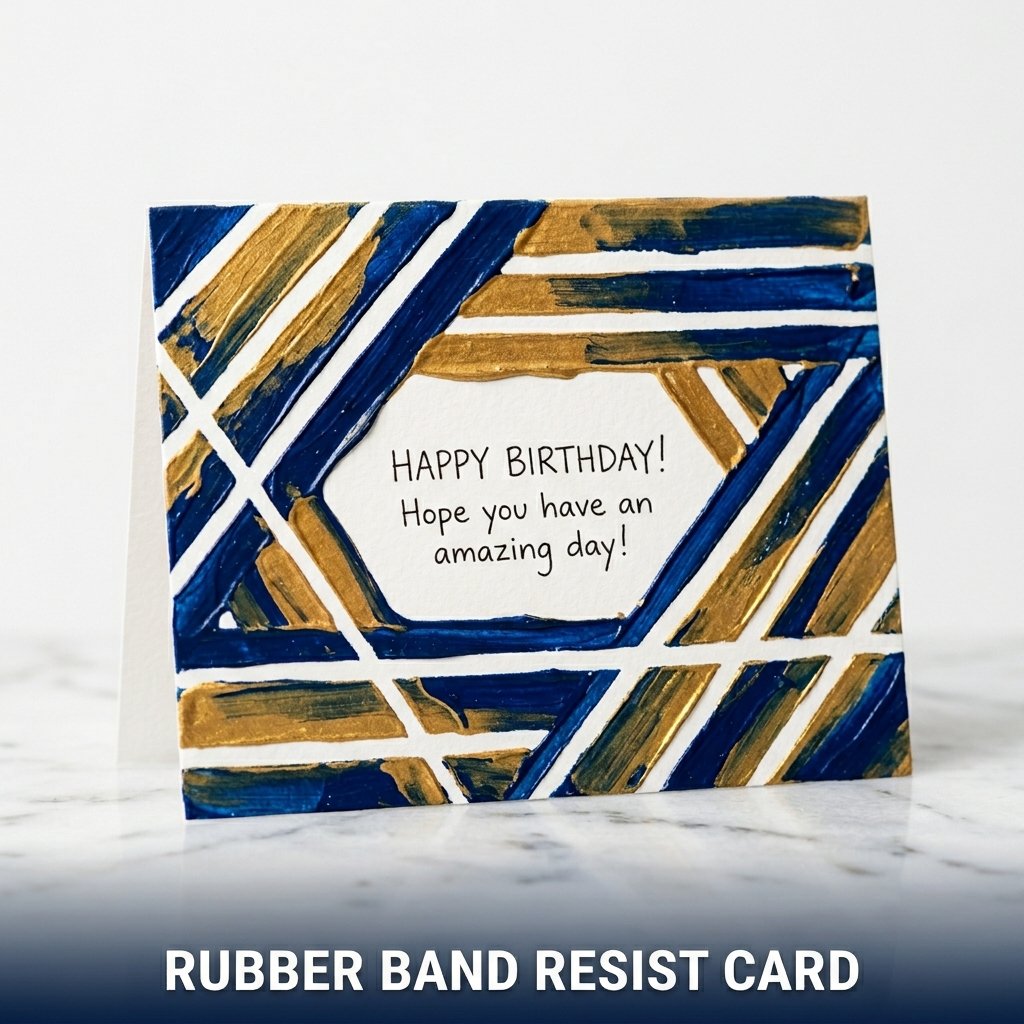
Setting Up the Resist
Fold the cardstock and wrap four to six rubber bands around it at different angles. Mix them diagonally and horizontally for variety. Apply acrylic paint over the entire front surface using a sponge or flat brush. Work quickly and cover all exposed areas evenly. One coat is enough if the paint is not too diluted.
Removing the Bands
Wait until the paint dries completely before removing the rubber bands. Peel each band off slowly to avoid tearing the paper surface. The white lines left behind form a clean geometric pattern. I wrote the birthday message in one of the larger white sections using a fine black marker.
14. Ticket Stub Style Card
A ticket stub style card is designed to look like an event ticket, with the recipient’s name listed as the guest, the date of their birthday as the event date, and a short message in the description field. I printed a ticket template on cardstock, filled in the details by hand, and added a perforated tear strip on one side using scissors.
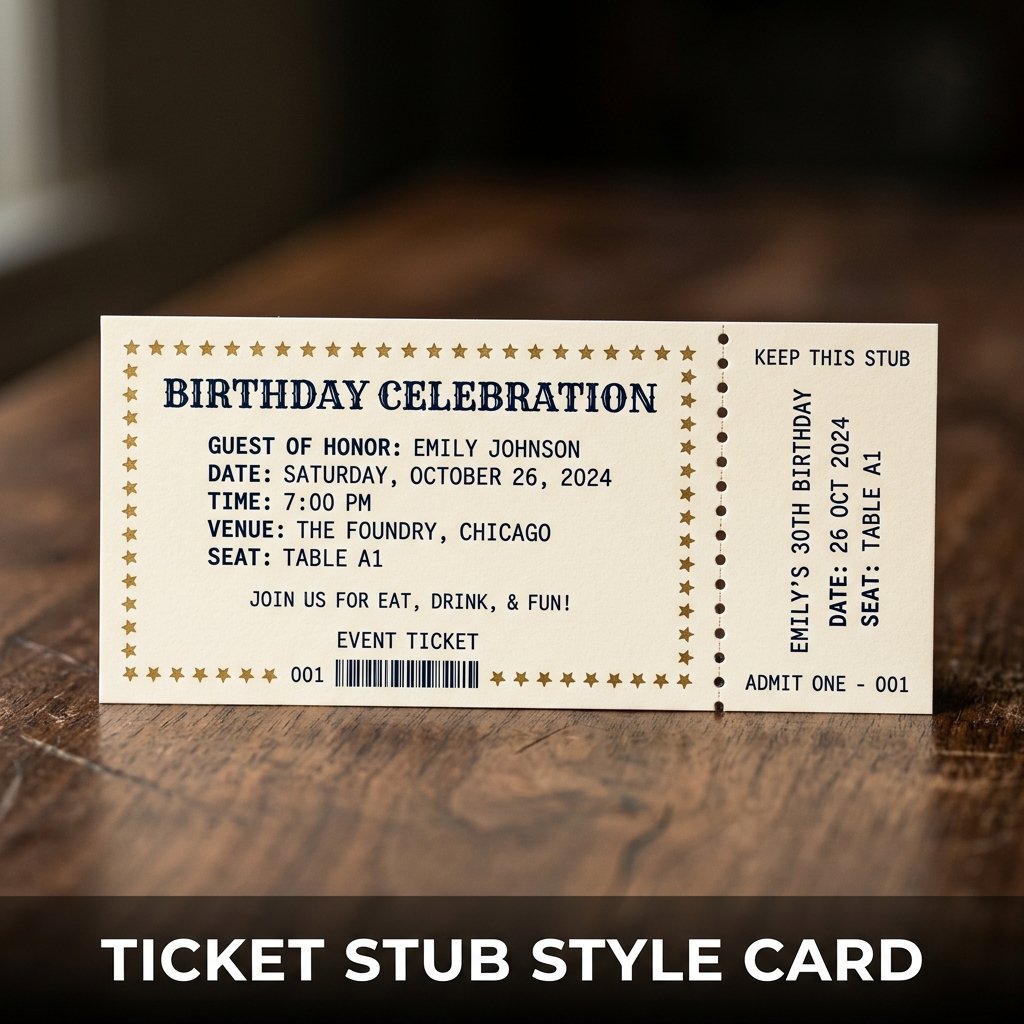
Designing the Layout
Draw or print a horizontal rectangle on cardstock. Divide it into a main section and a smaller stub section on the right side. Use a ruler and fine marker to draw the dividing line. Add fields for the event name, date, seat number, and a short birthday message. Keep all text small and ticket-like.
Adding Finishing Details
Use a hole punch to create a dotted perforation line along the dividing mark between the main card and the stub. Number the ticket at the bottom, like “Ticket No. 001,” to add to the printed look. I used a vintage font style for the text and added a small star border around the edge of the main section.
15. Fabric Scrap Collage Card
A fabric scrap collage card uses small pieces of fabric, lace, or ribbon glued onto cardstock to create a textured, mixed-media design. I used leftover fabric from a sewing project and cut small squares and strips to build a patchwork pattern on a white card. The texture made it stand out from every other card on the table.
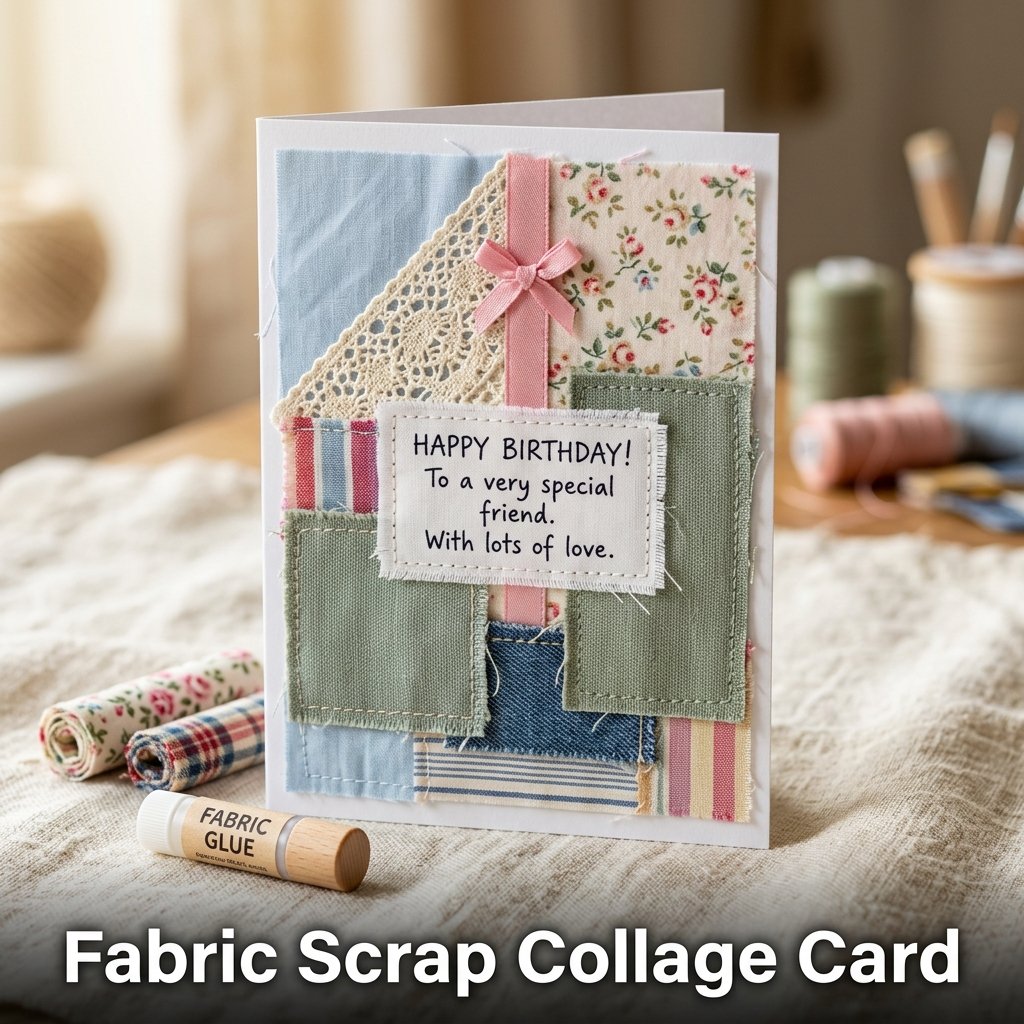
Choosing the Fabric Pieces
Select three to five fabric types with different textures and patterns. Cut each into small shapes: squares, triangles, or strips. Avoid very thick fabrics since they add too much bulk to the card. Thin cotton, lace, and lightweight ribbon all glue down flat without creating bumps.
Gluing the Layout
Apply a strong craft glue to the back of each fabric piece and press it onto the cardstock front. Arrange the pieces in a patchwork grid or a loose scattered pattern. Let the glue dry for 30 minutes before adding any text. I wrote the birthday message on a small white label and glued it over the fabric collage in the center.
16. Stenciled Initial Card
A stenciled initial card places the recipient’s first initial in large format at the center of the card front using a stencil and paint or ink. I cut my own stencil from a piece of acetate using a craft knife. The process took 10 minutes and the finished initial looked clean and professional.
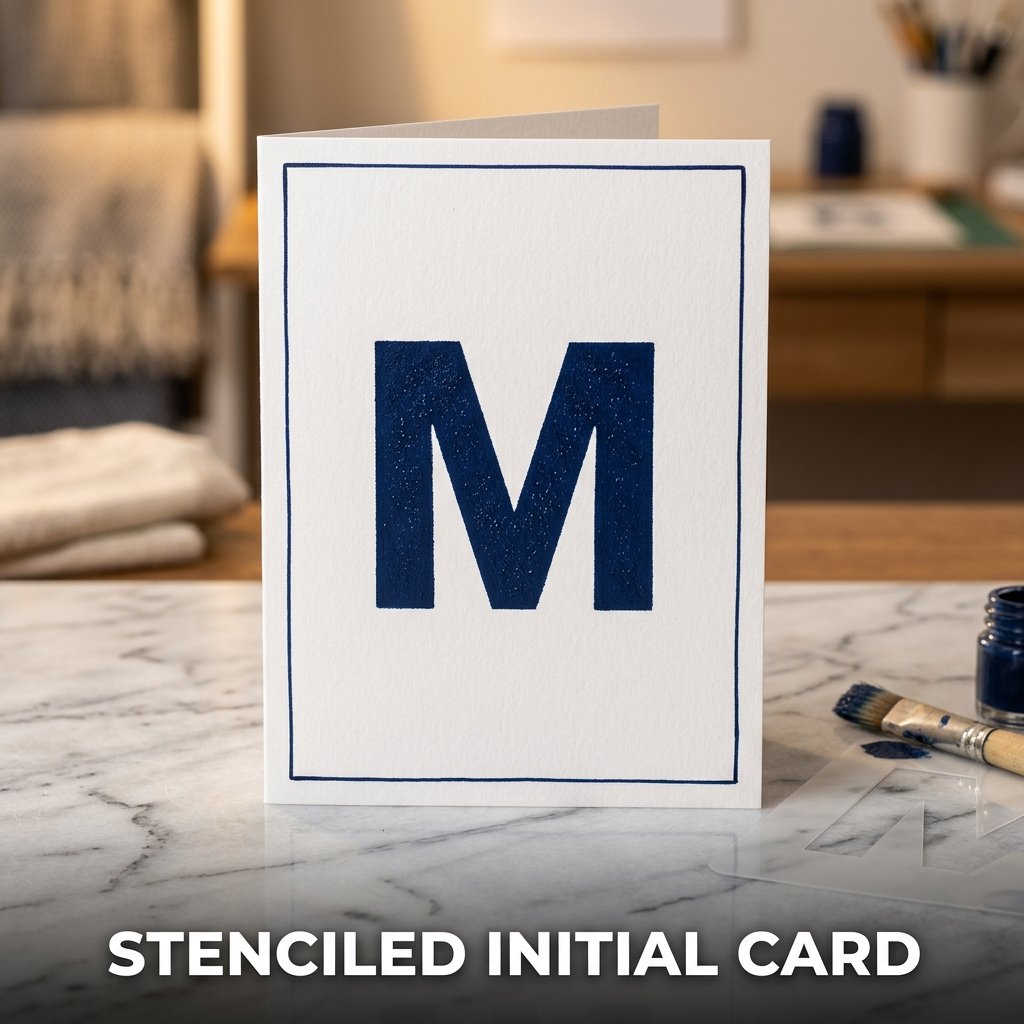
Cutting or Buying the Stencil
Print the desired letter in a large font, around three inches tall, on regular paper. Tape it to a sheet of acetate or thick plastic folder material. Cut along the letter outline using a sharp craft knife on a cutting mat. The stencil is reusable, so you can make multiple cards with the same initial.
Applying the Paint
Tape the stencil firmly to the card front so it does not shift. Dip a stiff stencil brush or a small sponge into acrylic paint. Remove most of the paint on a paper towel before applying. Use a light dabbing motion over the stencil opening. Lift the stencil straight up after painting to avoid smearing the edges.
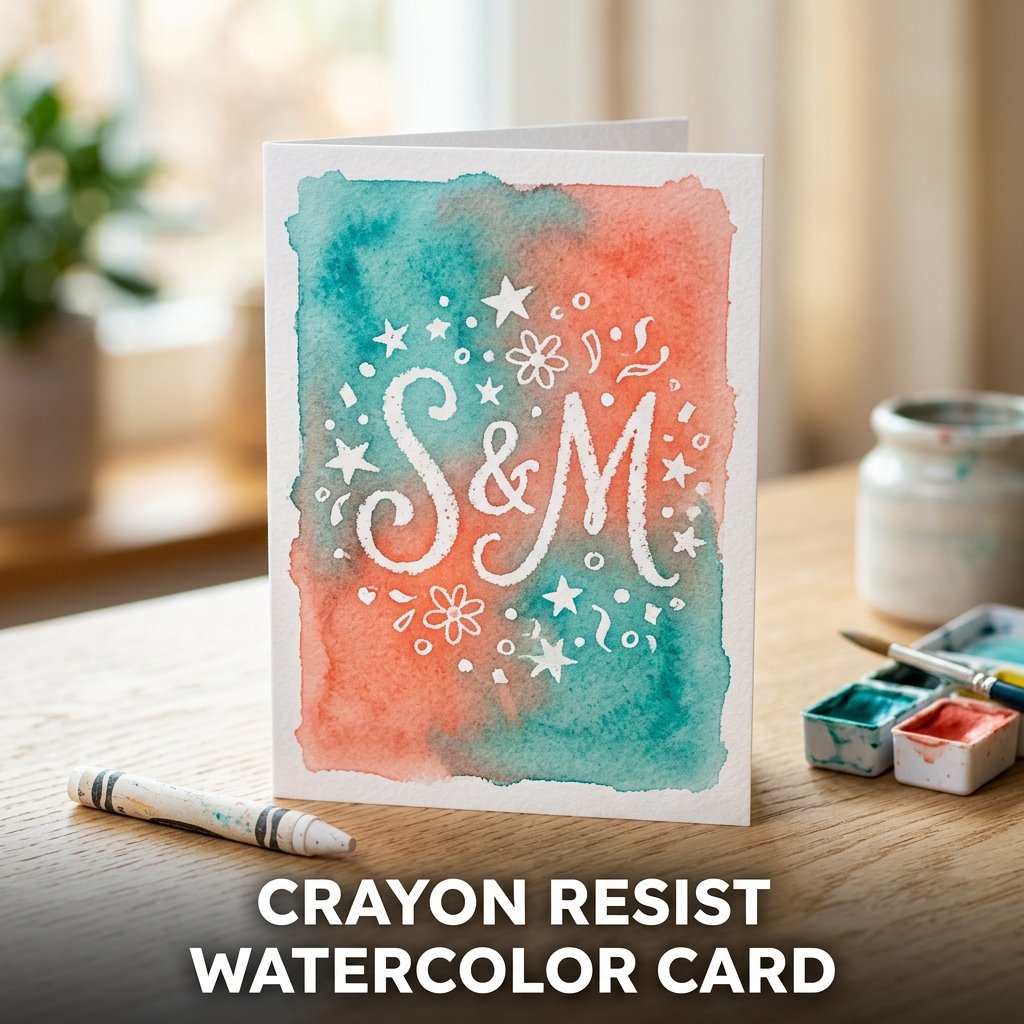
17. Crayon Resist Watercolor Card
A crayon resist watercolor card uses white crayon marks drawn onto cardstock before watercolor paint is applied over the top. The wax in the crayon repels the paint, making the drawn design appear as the paint spreads across the surface. I drew stars and small flowers in white crayon before painting and the revealed design surprised even me.
Drawing the Hidden Design
Use a white wax crayon or a white oil pastel to draw your design on white cardstock. Press firmly so enough wax transfers to the paper. The design stays invisible until the paint goes on. I drew the recipient’s initials in large letters so they appeared clearly once the watercolor was applied.
Applying the Watercolor
Brush a wash of watercolor paint over the entire card front using a wide brush. Use one color or let two colors blend together at the edges. The wax lines appear immediately as the paint hits them. Let the card dry flat for 20 minutes. The dried result shows a clear design against a soft painted background.
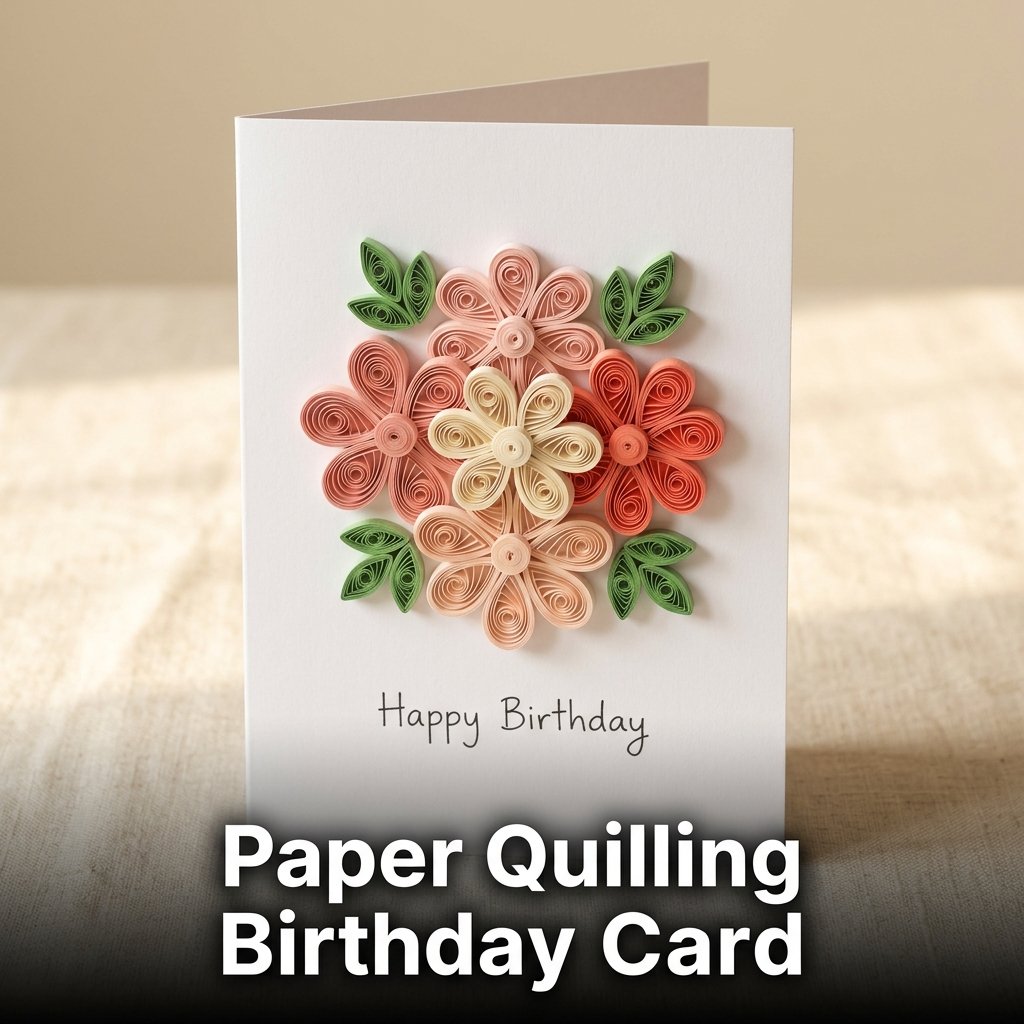
18. Paper Quilling Birthday Card
A paper quilling birthday card uses thin strips of paper rolled and shaped into coils, then arranged to form flowers, letters, or patterns on the card surface. I bought a beginner quilling kit for under five dollars and made my first quilled flower card in about 40 minutes. The finished piece looked like it took hours.
Rolling the Paper Strips
Insert one end of a paper strip into the slotted quilling tool and roll it tightly toward you. Slide the coil off the tool and allow it to loosen slightly before gluing the end down. A tight coil makes a solid circle. A looser coil with a pinched end makes a teardrop or leaf shape.
Arranging the Design
Glue the finished coil shapes onto a cardstock base to form flowers, leaves, or borders. Apply glue only to the bottom edge of each coil so it stands slightly upright. I built a small bouquet of quilled flowers in the center of a white card and added a handwritten birthday message below the arrangement.
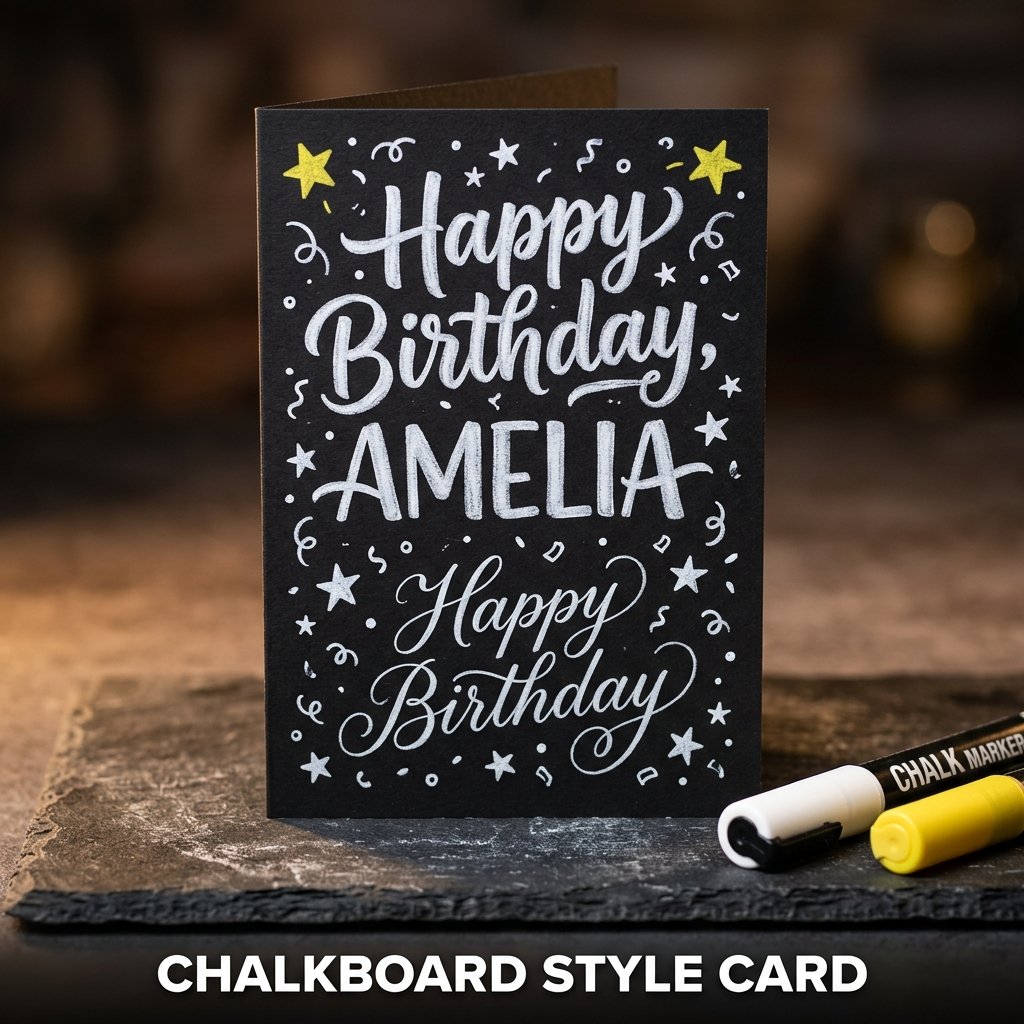
19. Chalkboard Style Card
A chalkboard style card uses black cardstock as the base, with all text and decoration written or drawn in white and colored chalk markers. I made one for a teacher friend’s birthday and used a chalk marker to write the message in a hand-lettered style. The dark background made every detail stand out clearly.
Choosing the Right Markers
Use chalk markers, not regular chalk, for this project. Chalk markers write smoothly on cardstock and do not smudge after drying. They come in white and multiple colors. I used white for the main text and a light yellow for decorative stars around the border. Both dried within two minutes of application.
Designing the Layout
Write the recipient’s name in large letters at the top. Add “Happy Birthday” below in a slightly smaller size. Fill the remaining space with small drawings: stars, dots, confetti shapes, or simple florals. Keep the design centered so there is a small dark border visible around all four edges of the card
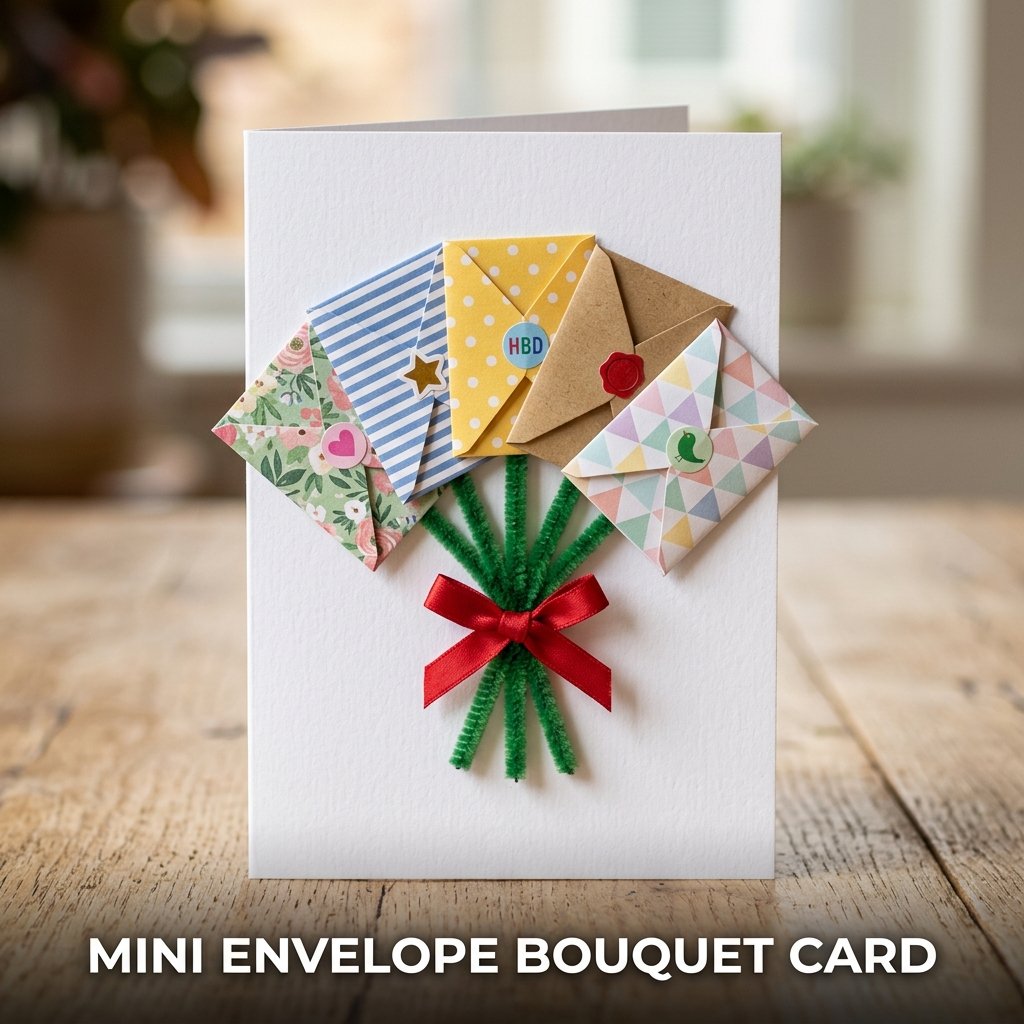
20. Mini Envelope Bouquet Card
A mini envelope bouquet card places several tiny envelopes, each holding a small message or coupon, arranged together on a card base to look like a bouquet of flowers. I made one with five envelopes, each holding a birthday wish. My sister said it was the most creative handmade birthday card she had ever received.
Making the Mini Envelopes
Fold small squares of patterned paper into mini envelope shapes following the same method as idea number seven. Make five to seven envelopes in different paper patterns. Write one birthday message, memory, or wish on a small strip of paper and tuck one into each envelope. Seal the flaps with a small dot of glue or a sticker.
Assembling the Bouquet
Attach a short length of green pipe cleaner or a folded green paper strip to the back of each envelope as a stem. Arrange the envelopes in a fan shape on the card base and glue the stems together at the bottom. Wrap the gathered stems with a small ribbon bow. The finished card stands upright when placed on a flat surface.
Frequently Asked Questions
What materials do I need to make a handmade birthday card at home?
The basic materials for a handmade birthday card are white or colored cardstock, scissors, a glue stick, markers, and decorative items like stickers or washi tape. Most of these ideas work with supplies that cost under five dollars total. Cardstock is the most important material because it holds its shape when folded and does not bend easily. You do not need a full craft supply store. A single trip to a dollar store gives you enough to complete at least five of the ideas listed in this guide.
How long does it take to make a handmade birthday card?
Most handmade birthday card ideas take between 10 and 45 minutes to complete. Simple designs like the washi tape card or the watercolor wash card take under 15 minutes. More detailed projects like paper quilling or string art take 30 to 45 minutes. I completed 14 of the 20 cards in this list in under 20 minutes each. The time depends on the design you choose and how familiar you already are with the materials involved.
Which handmade birthday card idea works best for a best friend?
The photo collage card, the glitter number card, and the mini envelope bouquet card work best for a best friend because all three reference personal details and shared history directly. The photo collage uses real memories. The glitter number marks a specific age. The mini envelope bouquet delivers multiple individual messages in one card. I made the accordion fold mini book card for my closest friend and included one memory per panel. She kept it for over two years after her birthday.
Can kids make these handmade birthday cards on their own?
Kids aged seven and above can complete the washi tape card, the stamped balloon card, and the watercolor wash card without adult help. These three designs require no cutting with sharp tools and no complex folding. The pop-up flower card and the origami butterfly card need adult supervision for younger children because they involve more precise folding steps. I made the stamped balloon card with a six-year-old during a family gathering and she finished it in under 10 minutes with no assistance.
How do I make a handmade birthday card look neat and professional?
A handmade birthday card looks neat when you score fold lines before folding, measure and center all elements before gluing, and allow glue and paint to dry fully between steps. Use a ruler for straight lines and a pencil for planning layouts before committing with marker or paint. I always test my design on a scrap piece of paper before working on the actual card. That single step removes most mistakes before they happen on the final piece.