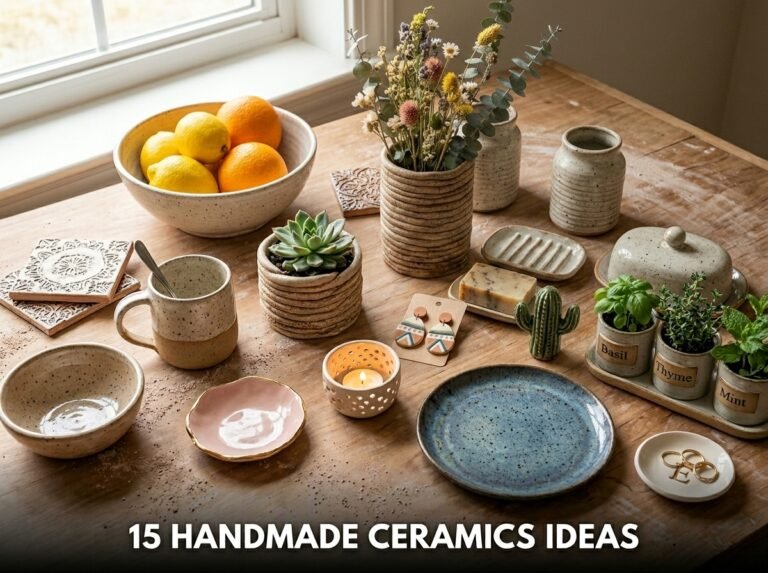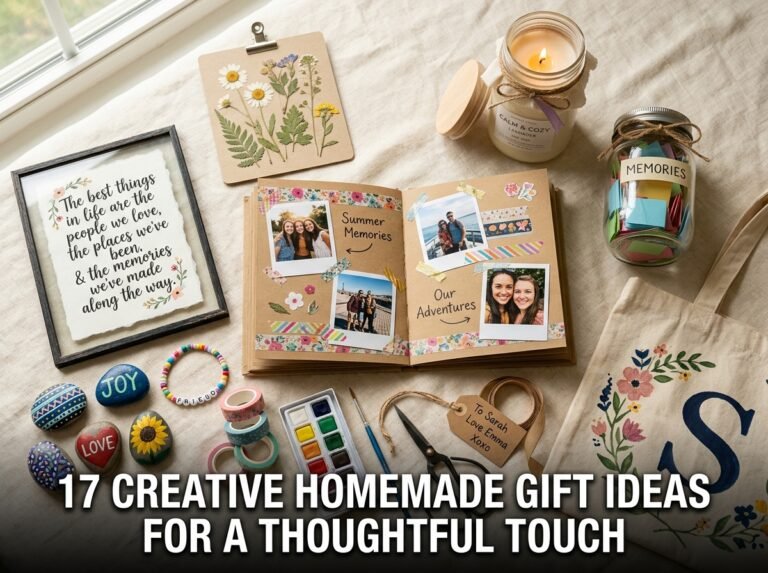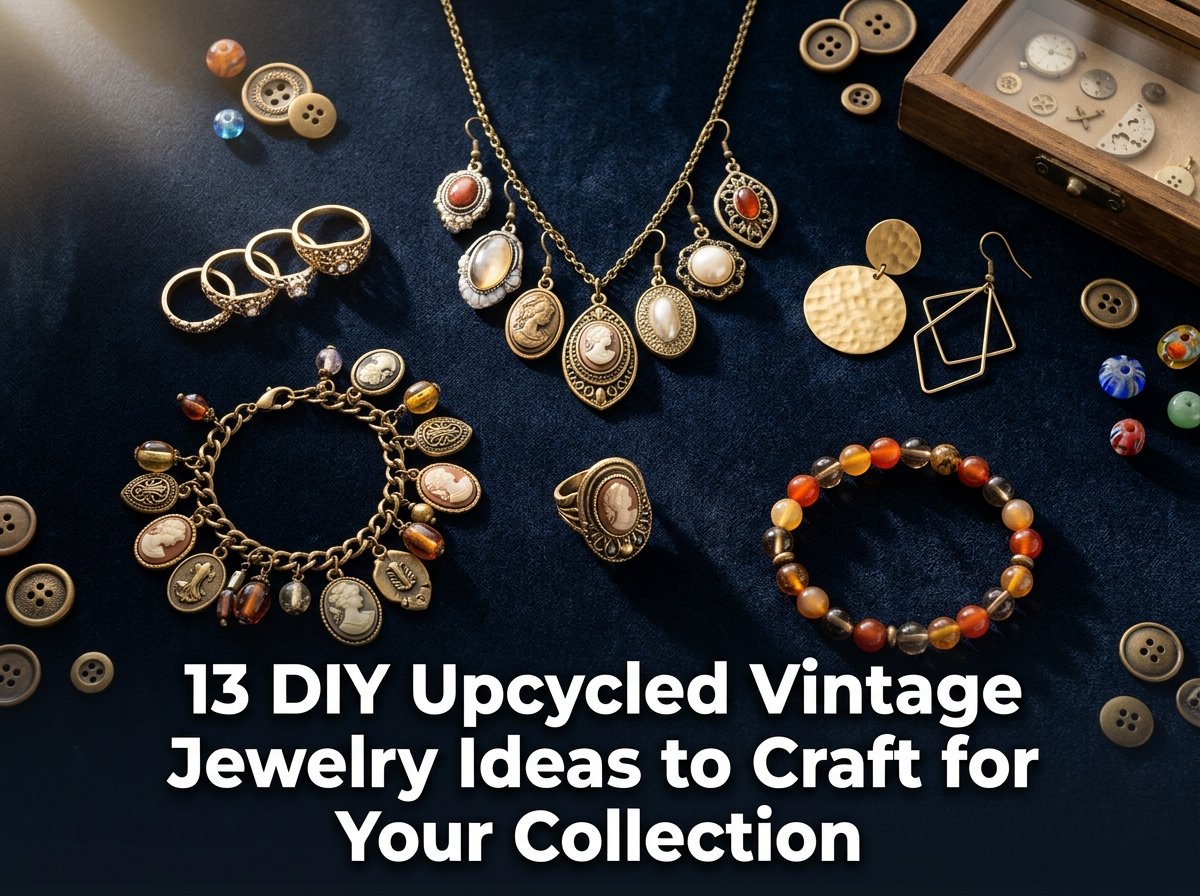
13 DIY Upcycled Vintage Jewelry Ideas to Craft for Your Collection
I used to keep a small box of broken necklaces, mismatched earrings, and old brooches under my bed. I never threw them away, but I also never knew what to do with them. Then one afternoon, I decided to actually sit down and turn that box into something worth wearing. That decision changed how I look at old jewelry completely.
DIY upcycled vintage jewelry ideas give you a way to remake old, broken, or outdated pieces into something fresh and wearable. You do not need professional training or expensive tools. A pair of pliers, some jump rings, and a little patience go a long way. I started with a broken earring and turned it into a pendant. That small win made me want to keep going.
What I love most about this process is that every piece tells a story. Old jewelry carries history, and when you reshape it, that history stays with it. You are not throwing anything away. You are giving it a second life. Whether you want to make gifts, build a personal collection, or even sell on Etsy, these projects work for all of that. I will walk you through 13 ideas I have personally tried or researched in depth.
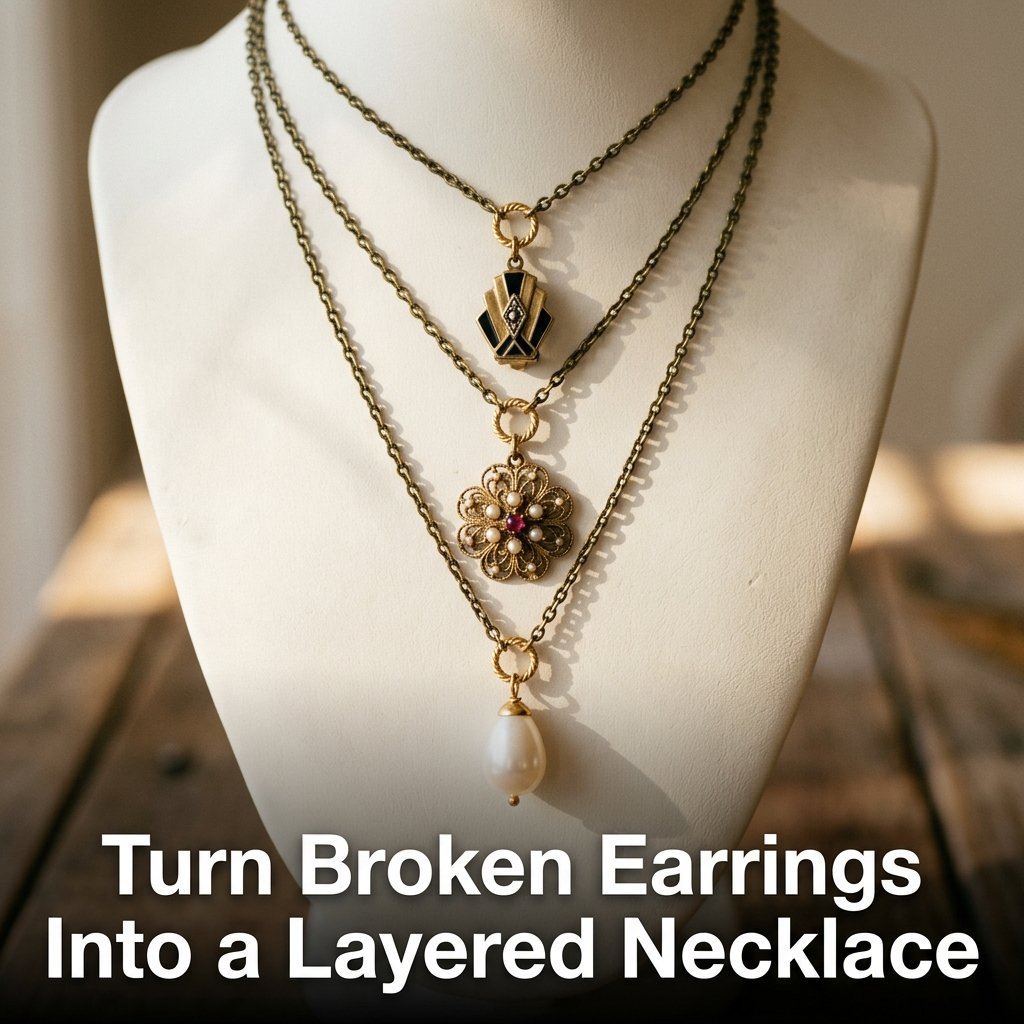
1. Turn Broken Earrings Into a Layered Necklace
Broken earrings are the most common thing sitting in every jewelry box. Instead of tossing them, I connected three mismatched vintage earrings onto a single antique chain using jump rings. The result looked intentional, layered, and completely one-of-a-kind. This is one of the easiest DIY upcycled vintage jewelry ideas for beginners because it requires almost no special skill.
What You Need to Get Started
You need jewelry pliers, jump rings, an antique chain, and 2 to 4 old earrings. Remove any broken hooks from the earrings first. Then attach each earring to the chain at different lengths using jump rings. Keep the spacing uneven for a more natural, boho look. The whole process takes about 20 minutes.
How to Style the Final Piece
Layer this necklace over a plain white top or a linen dress. The mismatched vintage elements create a retro look that feels current. I wore mine to a family gathering and got three compliments in one evening. That told me the design worked.
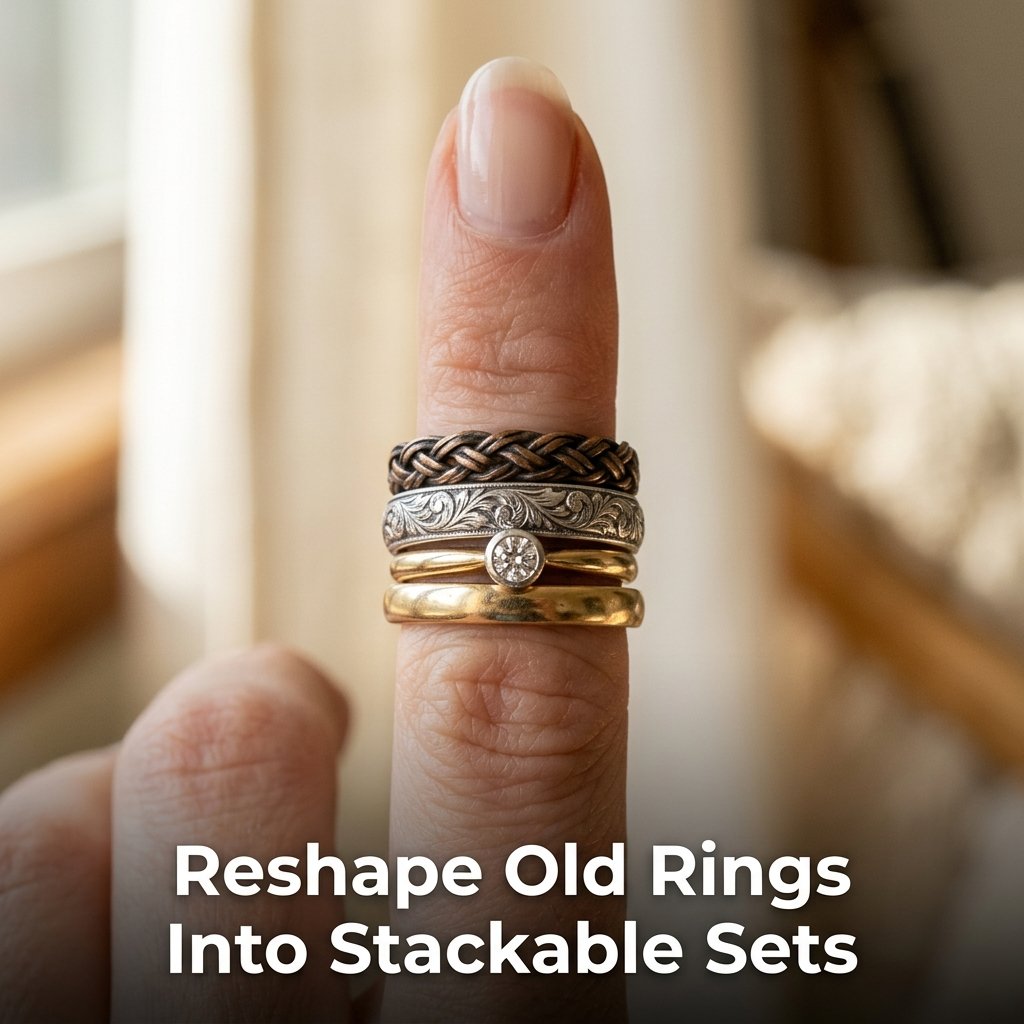
2. Reshape Old Rings Into Stackable Sets
I had four old rings that did not fit anymore. Instead of keeping them in a drawer, I resized two of them using a ring mandrel and combined all four into a stackable set. Vintage jewelry repurposed this way costs almost nothing and produces pieces that look like they came from a boutique.
Resizing Rings at Home
Place the ring on a ring mandrel and use a rubber mallet to gently tap it to your size. This works best on thin metal bands. Thicker rings need professional resizing. Once resized, polish each ring with a soft cloth to restore its shine. Always work slowly to avoid cracking the metal.
Combining Rings Into a Set
Stack rings of different textures together: one smooth band, one with an engraving, one with a small stone. Mixing finishes like gold and silver actually works well for a vintage look. I stacked three rings on one finger and wore them as a single statement piece. The combination looked intentional and elegant.
3. Make Framed Jewelry Art for Your Wall
One of my favorite DIY projects was learning how to make framed jewelry art. I arranged old brooches, cameos, and beaded necklaces inside a shadow box frame and hung it in my bedroom. It became a wall display and a storage solution at the same time.
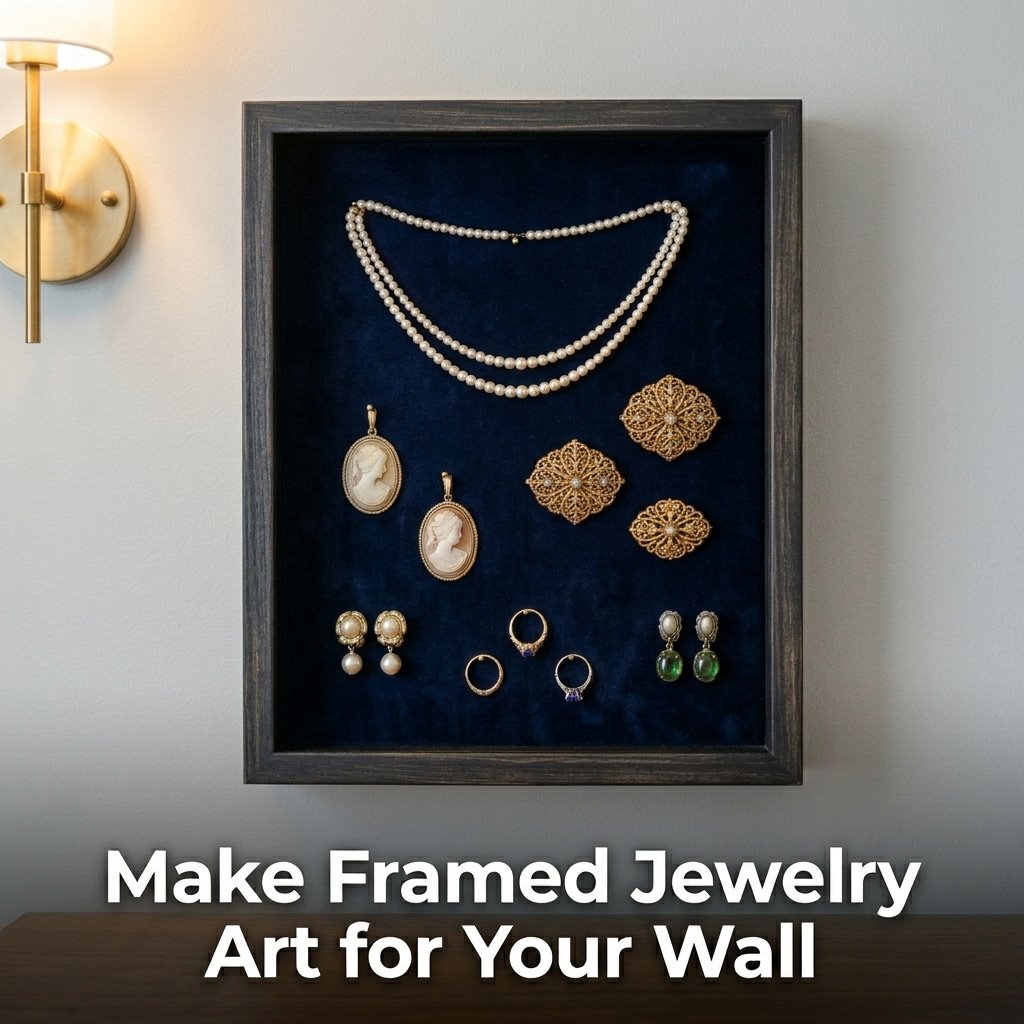
Choosing the Right Frame
Use a deep shadow box frame, at least 1.5 inches deep. Line the inside with velvet fabric using a hot glue gun. Dark navy or black velvet makes vintage jewelry pop visually. I used a 12×16 inch frame and fit 11 pieces inside it comfortably.
Arranging the Pieces
Place larger brooches first, then fill gaps with smaller items like rings or earrings. Use straight pins to secure lightweight pieces and small adhesive hooks for heavier ones. Step back every few minutes to check the overall balance. A slightly asymmetric arrangement looks more natural than a perfectly even grid.
4. Convert Vintage Brooches Into Hair Accessories
I clipped a vintage brooch onto a plain metal hair clip and wore it the same day. It took four minutes. This is one of those DIY upcycled vintage jewelry ideas that requires almost no effort but produces a really polished result.
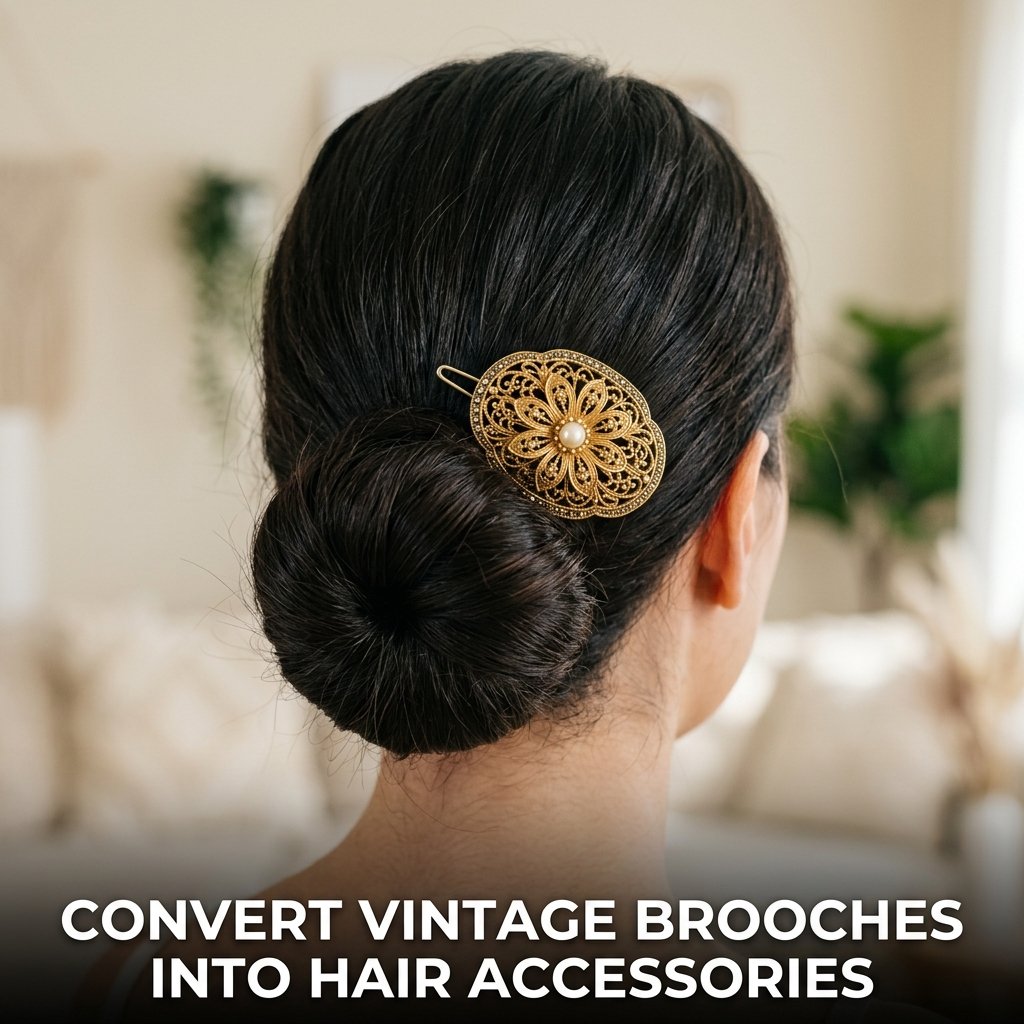
Attaching a Brooch to a Hair Clip
Use a strong jewelry adhesive or small wire to secure the brooch onto a barrette or alligator clip. Let the adhesive cure for 24 hours before wearing. Choose brooches that are not too heavy so they do not pull the hair or slip out.
Best Brooch Styles for Hair
Floral brooches, cameos, and geometric art deco pieces all work well as hair accessories. I found that oval and round shapes stay in place better than long, narrow ones. A single brooch clipped near a bun or braid adds a vintage touch to an otherwise simple hairstyle.
5. Create Charm Bracelets From Mismatched Pieces
I collected every small charm, broken pendant, and odd earring I could find and turned them into charm bracelets. Each bracelet became a small collection of memories. This is one of the best DIY recycled jewelry projects because it has no rules and every result is different.
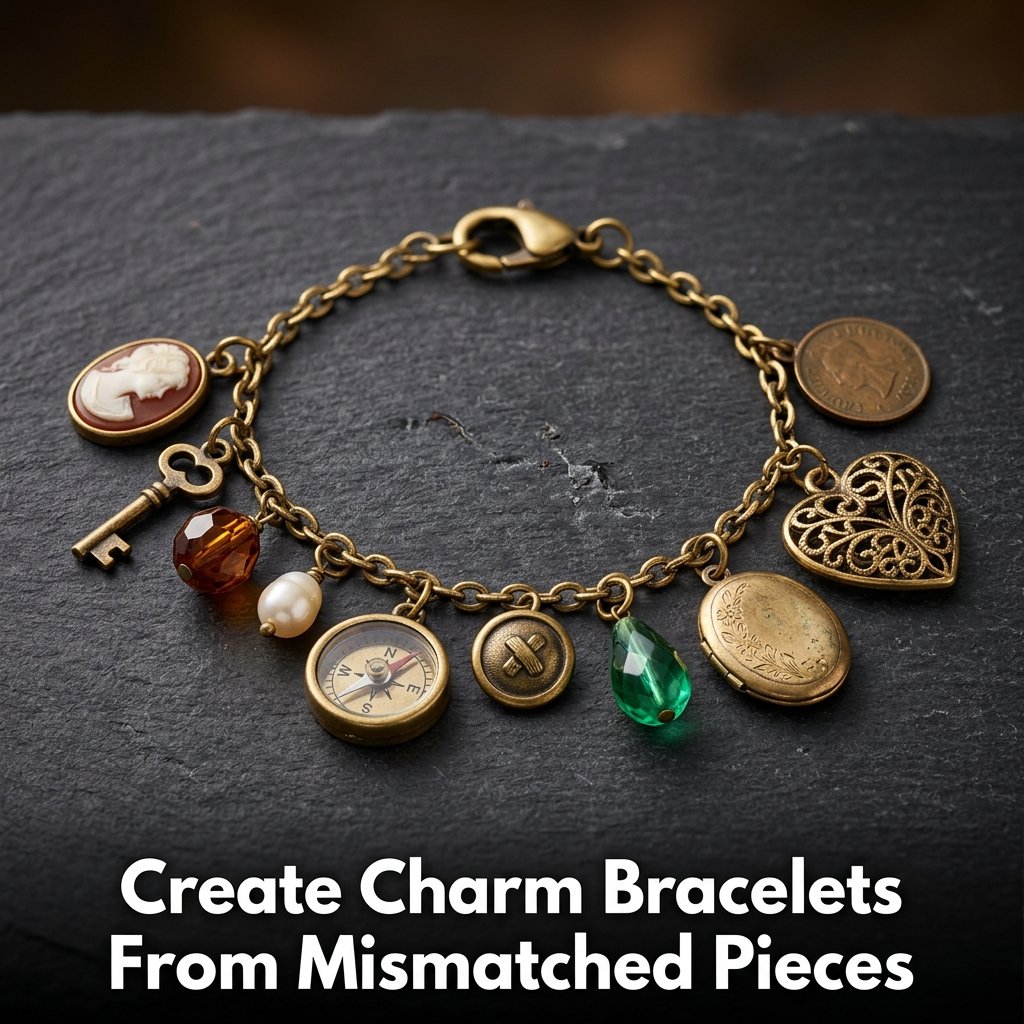
Selecting Your Charms
Look for pieces with loops or holes already built in, since those are the easiest to attach. For pieces without loops, add a jump ring using pliers. Mix metals, colors, and sizes freely. Vintage beads, small cameos, and antique buttons all work as charms.
Assembling the Bracelet
Start with a base chain that has a strong clasp. Attach charms at irregular intervals rather than evenly spaced. I used about 8 to 12 charms per bracelet. The finished piece looks full without being overcrowded. Add or remove charms anytime to refresh the look.
6. Repurpose Old Earrings Into Pendants
This was the first DIY project I ever completed, and it still holds a place in my collection. I took a large clip-on earring, removed the clip, added a bail, and strung it on a beading wire. It became a pendant in under 10 minutes.

Removing the Earring Finding
Use flat-nose pliers to carefully bend and remove the clip or post from the back of the earring. Work slowly to avoid scratching the front face of the piece. If the earring has a flat back, a glue-on bail works perfectly for attaching it to a chain.
Choosing the Right Chain
Match the chain style to the earring design. A delicate vintage earring looks better on a thin chain. A bold art deco piece can handle a chunkier antique chain. I tried both and found that contrast between the pendant and chain often creates the most interesting result.
7. Build a Beaded Bracelet With Vintage Beads
Old necklaces are full of beads that deserve a new purpose. I disassembled a 1960s beaded necklace and restrung the beads into three separate bracelets. Each one looked different because I rearranged the bead order intentionally.
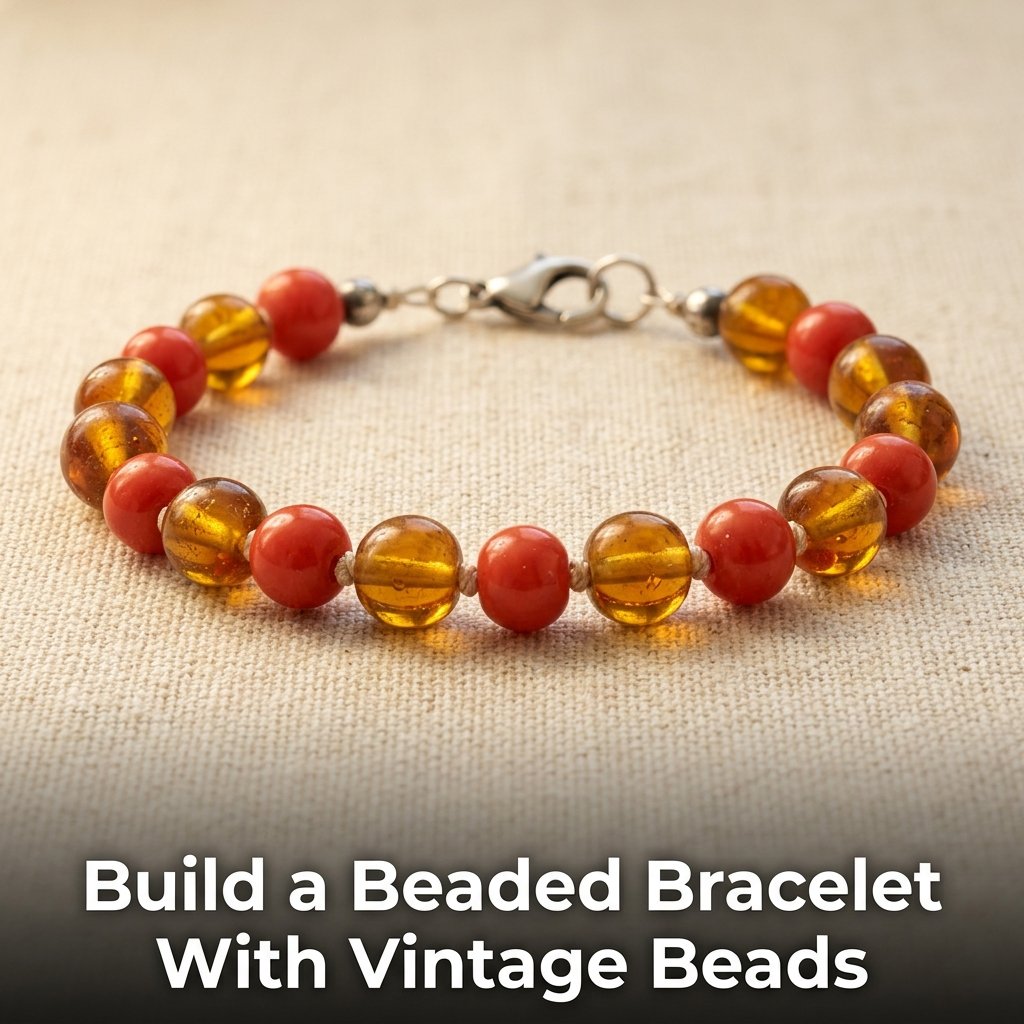
Disassembling the Old Necklace
Cut the old stringing thread carefully and collect every bead in a small bowl so nothing rolls away. Sort the beads by size and color before you start restringing. I sorted mine into three groups and built each bracelet around one dominant color.
Stringing and Knotting
Use strong beading wire and add a crimp bead at each end to secure the clasp. If you want a knotted look, use silk thread and tie a small knot between each bead. Knotting takes longer but gives the bracelet a more finished, professional appearance.
8. Make Christmas Crafts With Old Jewelry
Christmas crafts with old jewelry are something I started doing three years ago. I glue vintage brooches and earrings onto plain ornament balls and hang them on the tree. Each ornament looks completely different and costs almost nothing to make.
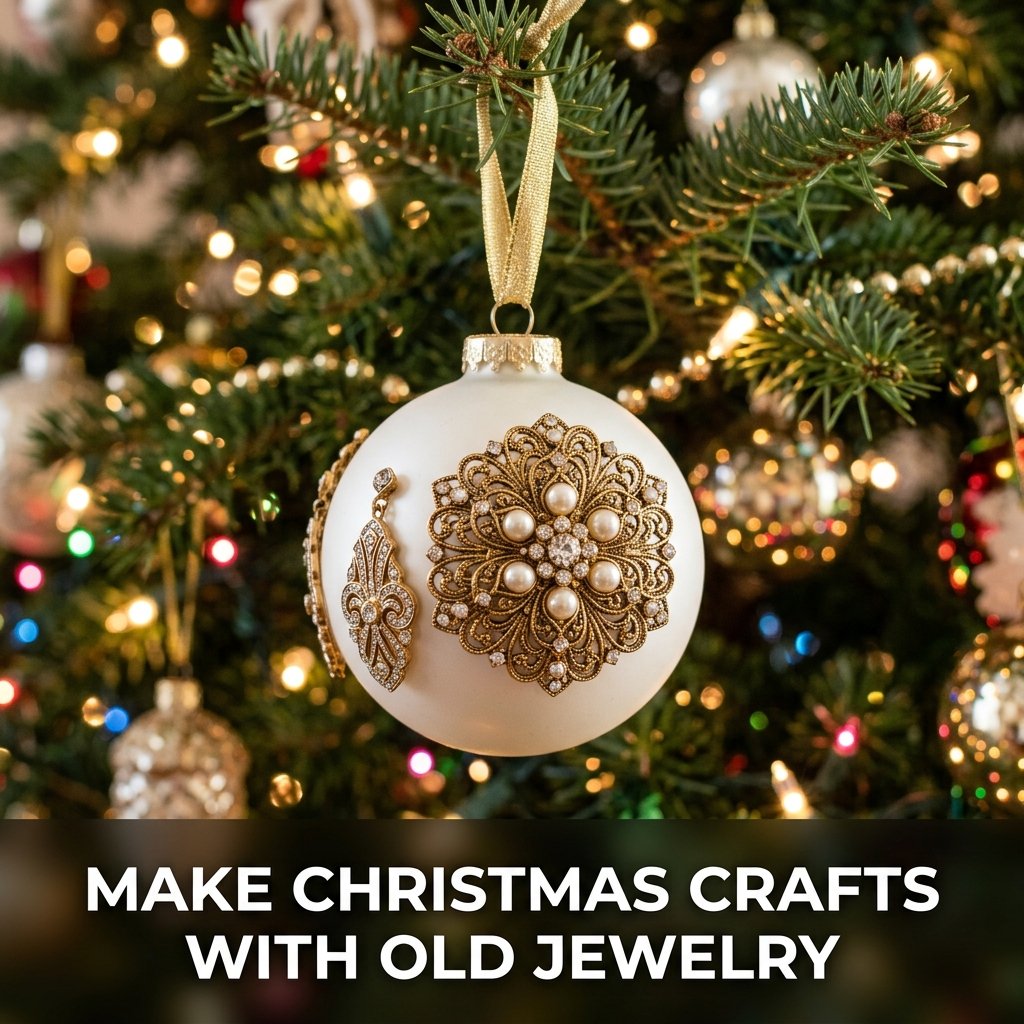
Decorating Ornament Balls
Use clear or matte-finish ornament balls in white, gold, or red. Apply jewelry adhesive to the flat back of each brooch or earring and press it firmly onto the ornament surface. Hold it in place for 60 seconds. Let it cure overnight before hanging.
Other Christmas Uses
Vintage earrings make excellent gift toppers when tied onto a ribbon. Old chains can be woven into a wreath for a metallic, retro effect. I made a small wreath from antique chains and pearl strands last December and it became the most talked-about decoration in my home.
9. Design a Layered Lariat Necklace From Old Chains
I had three antique chains in different lengths and finishes. Instead of wearing them separately, I connected them at one end with a large jump ring and let them drape freely. That created a lariat necklace with no clasp needed.
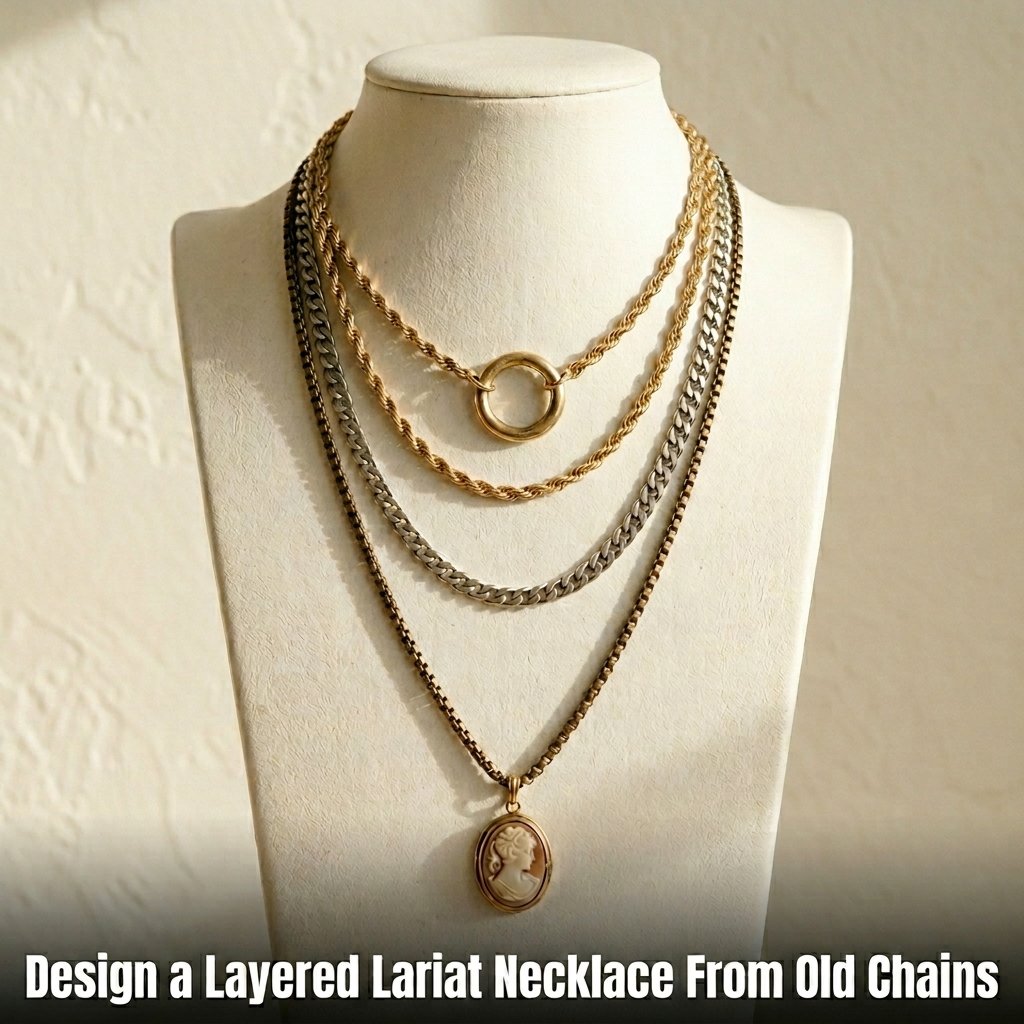
Selecting Chains for a Lariat
Choose chains that differ in texture, not just length. A rope chain, a box chain, and a flat link chain together create visual depth. I used chains in gold, silver, and bronze tones. The mixed metals gave it a collected, vintage jewelry art project feel.
Finishing the Lariat
Attach a small decorative element, like an old pendant or a vintage button, at the longest end as a focal point. The pendant weighs the necklace down and keeps it draped properly. I used a small cameo and it settled perfectly at the center front.
10. Repurpose Metal Scraps Into Minimalist Earrings
Small metal scraps from broken jewelry are easy to reshape into minimalist earrings. I bent a few flat metal pieces into simple geometric shapes and attached ear wires to them. The process took about 30 minutes and the results were clean and modern.
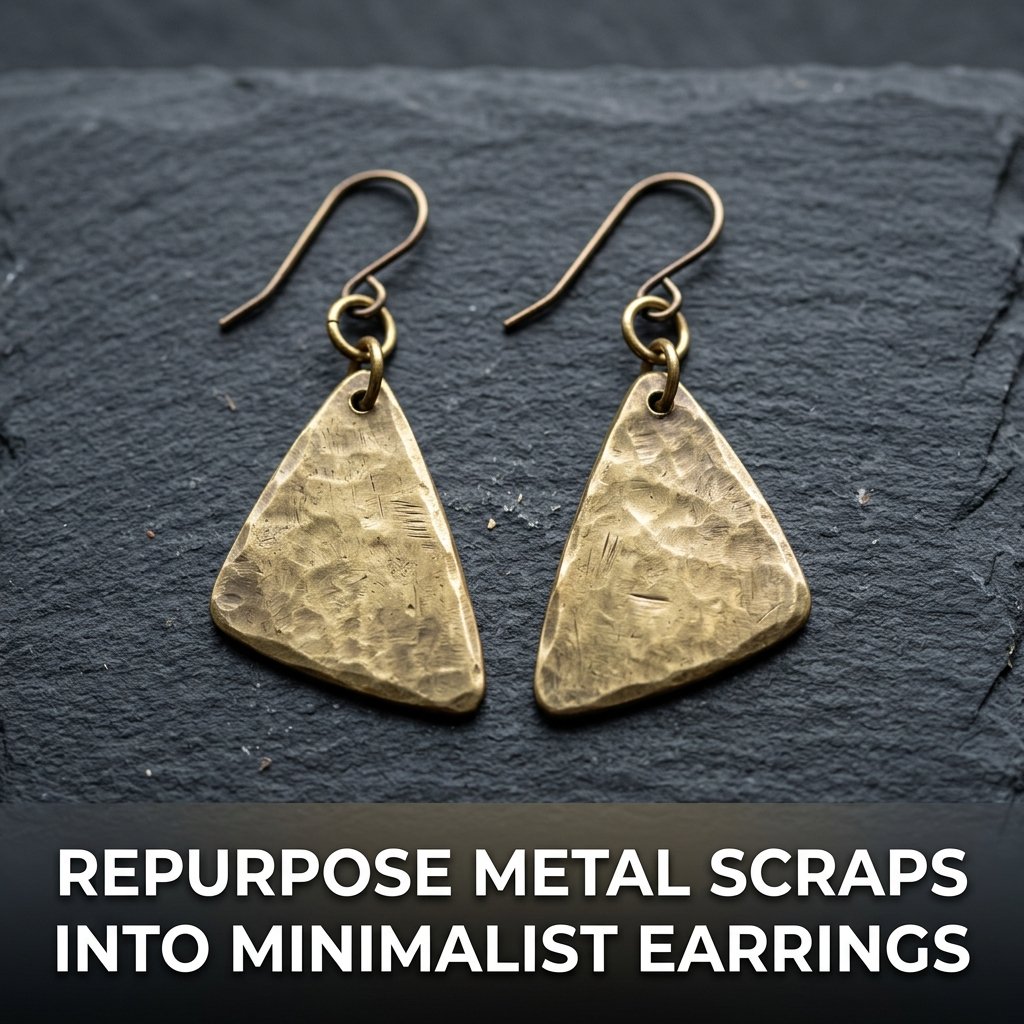
Shaping the Metal
Use flat-nose and round-nose pliers to bend metal scraps into triangles, squares, or irregular abstract shapes. File down any sharp edges with a small metal file before attaching anything to them. Smooth edges are important for anything that will sit near skin.
Adding Ear Wires
Attach a jump ring to the top of each shaped piece, then connect a French ear wire through the jump ring. Make sure both earrings are the same weight so they hang evenly. I made four pairs in one sitting, each with a slightly different shape.
11. Sew Vintage Beads and Buttons Onto Fabric Cuffs
I sewed a mix of vintage beads, small buttons, and lace pieces onto a plain fabric cuff bracelet. The result looked like something from a vintage market stall in Paris. This is one of the handmade vintage jewelry designs that blends textile craft with jewelry making.
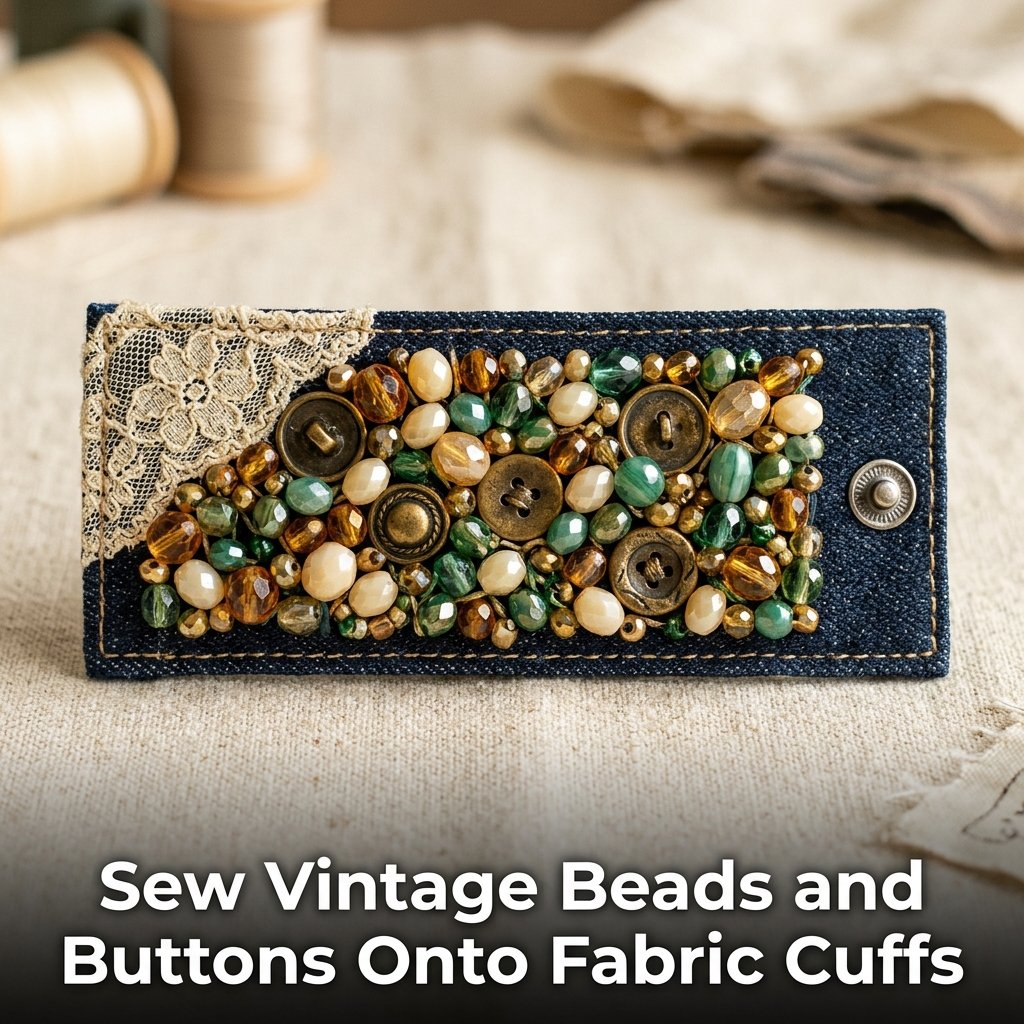
Choosing the Fabric Base
Use a sturdy fabric like denim, canvas, or thick cotton. Cut it into a strip about 2.5 inches wide and long enough to wrap your wrist with a small overlap for the closure. Iron interfacing onto the back to keep it stiff and structured.
Sewing the Embellishments
Thread a beading needle with strong thread and sew each bead and button down individually. Cluster some together and space others out for variety. I added a snap closure at the ends. The finished cuff was thick, textured, and completely one-of-a-kind.
12. Reassemble Vintage Jewelry Into a Statement Ring
I took an oversized vintage earring, removed the finding, and glued it onto a plain adjustable ring base. It became a bold statement ring that I now wear more than anything else I own. This idea works especially well with large clip-on earrings from the 1960s and 1970s.
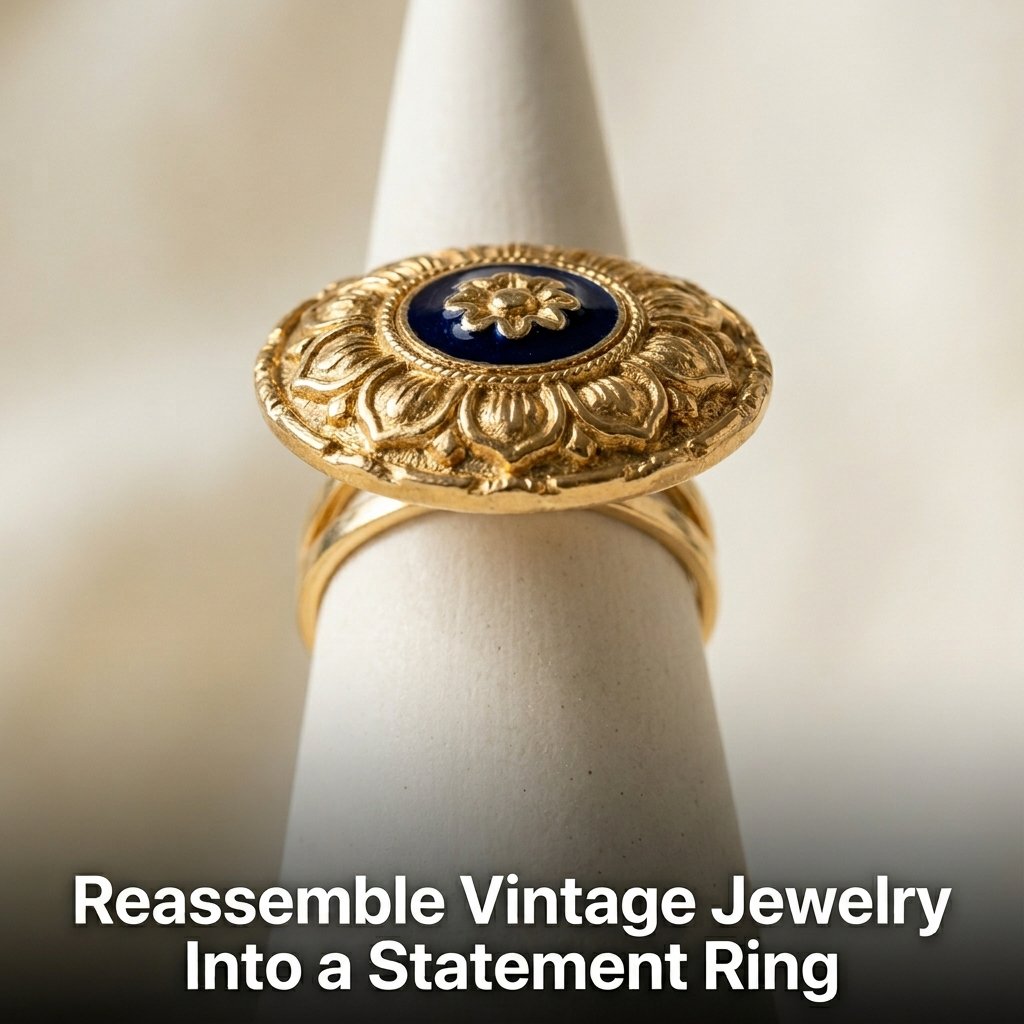
Preparing the Earring
Remove the clip or post using pliers. Clean the back surface with a cotton swab dipped in rubbing alcohol. Let it dry completely before applying adhesive. A clean, dry surface gives the adhesive the strongest possible bond.
Attaching to the Ring Base
Apply a small amount of two-part epoxy adhesive to the flat pad of an adjustable ring base. Press the earring face down onto the pad and hold it firmly for 90 seconds. Let it cure for at least 12 hours before wearing. I tested mine after 24 hours and it held perfectly.
13. Create Pendant Designs From Antique Buttons
Antique buttons are one of the most overlooked materials in DIY antique jewelry ideas. I drilled a small hole at the top of several buttons, added jump rings, and strung them on short chains as pendants. Some buttons had such detailed engravings that they looked like miniature works of art.
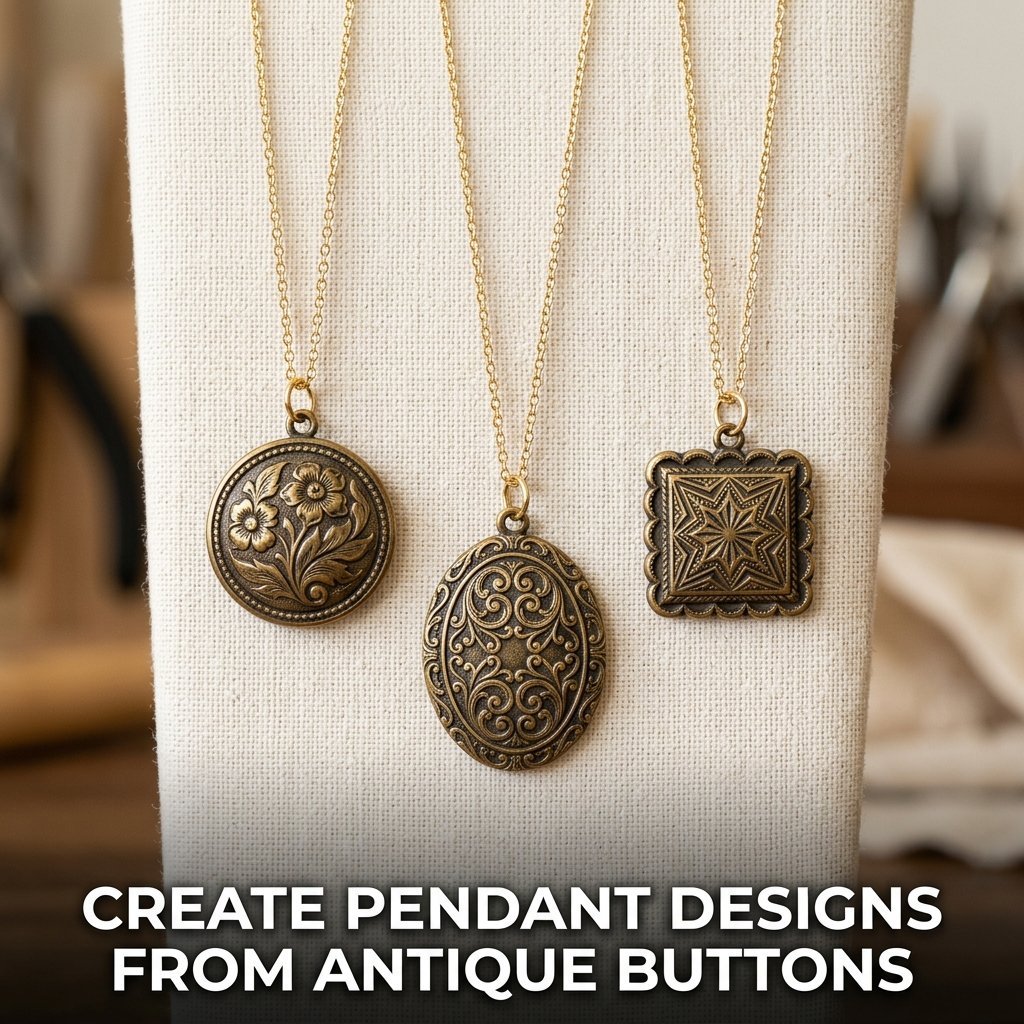
Finding the Right Buttons
Look for metal, glass, or Bakelite buttons at estate sales, thrift stores, and antique markets. Avoid plastic buttons since they do not hold drilled holes well. I found a set of 12 ornate brass buttons for under 3 dollars at a local estate sale.
Drilling and Assembling
Use a small hand drill with a fine bit to create the hole near the top edge of each button. Work slowly and apply light pressure to avoid cracking. After adding a jump ring, string the button on a thin gold or silver chain for a clean, minimalist pendant design.
Frequently Asked Questions
What tools do I need to start DIY upcycled vintage jewelry ideas at home?
You need a basic set of jewelry pliers, which includes flat-nose, round-nose, and wire cutters. You also need jump rings in two or three sizes, beading wire, clasps, and a strong jewelry adhesive like two-part epoxy. A ring mandrel is helpful if you plan to resize rings. Most of these tools cost under 15 dollars total when purchased as a beginner kit. You do not need a full workshop. A small table with good lighting is enough space to complete most projects listed in this guide.
Can a complete beginner try these vintage jewelry repurposed projects?
Yes, a complete beginner can start with several of these projects right away. Converting an earring into a pendant, decorating ornament balls, and assembling charm bracelets require no prior jewelry-making experience. All you need is basic plier control and patience. I completed my first project with zero experience and it came out wearable. Start with the easiest ideas first, like the brooch hair clip or the framed jewelry art, and build your skill level from there before moving on to drilling or resizing.
Where can I find old jewelry to upcycle for these DIY projects?
Estate sales, thrift stores, flea markets, and antique shops are the best places to find affordable vintage jewelry for upcycling. Many thrift stores sell broken or incomplete jewelry sets at very low prices, sometimes under 1 dollar per piece. You can also check online platforms like eBay or local Facebook Marketplace listings for lot sales of vintage jewelry. Family members often have old jewelry sitting unused in drawers. I built most of my supply by asking relatives if they had anything they no longer wore.
How do I make vintage jewelry art projects look professional?
Clean every piece before you start working with it. Use a soft cloth and mild soap to remove dirt and tarnish. Work with consistent materials, meaning match your jump rings and clasps in the same metal finish. Use proper adhesive and allow full curing time before handling the finished piece. Presentation also matters. Store finished pieces in small jewelry boxes or display them on a velvet pad. When I started photographing my pieces against a plain background, they immediately looked more polished and intentional.
Can I sell upcycled vintage jewelry on Etsy or at craft markets?
Yes, upcycled vintage jewelry sells well on Etsy and at local craft markets. Buyers respond well to pieces with a story, so describe the original source of the materials in your product listings. Photograph your pieces in natural light against a neutral background. Price your work by adding together material costs, tool wear, and your time at a fair hourly rate. I researched similar Etsy listings before pricing my first pieces. Most handmade vintage jewelry redesign pieces on Etsy sell between 18 and 65 dollars depending on complexity and material quality.