18 Winter Crafts for Kids to Make this Season
I spread newspaper across the kitchen table one January afternoon, handed my niece a pair of safety scissors and a sheet of white paper, and told her to cut snowflakes. She cut her first one, held it up to the window, and watched the light come through every gap she had made. She asked to make twelve more before dinner.
If you want winter crafts for kids, all 18 projects here use materials already found in most homes: colored paper, cardstock, cotton balls, glue, scissors, and paint. Every project suits children aged 3 and above, and most finish in under 45 minutes.
These crafts cover snow-themed projects, animal characters, holiday cards, and seasonal decorations. I selected each one because the steps are short enough for a child to follow, the materials cost under 5 dollars per project, and the finished item looks like something a child chose to make rather than something an adult assembled for them.
Several projects here work for preschoolers aged 2 to 4 with light adult guidance on cutting steps. Others suit kindergarten through elementary age children working independently. Each section states the appropriate age range and adult supervision level clearly.
Every project here uses safe, non-toxic materials.
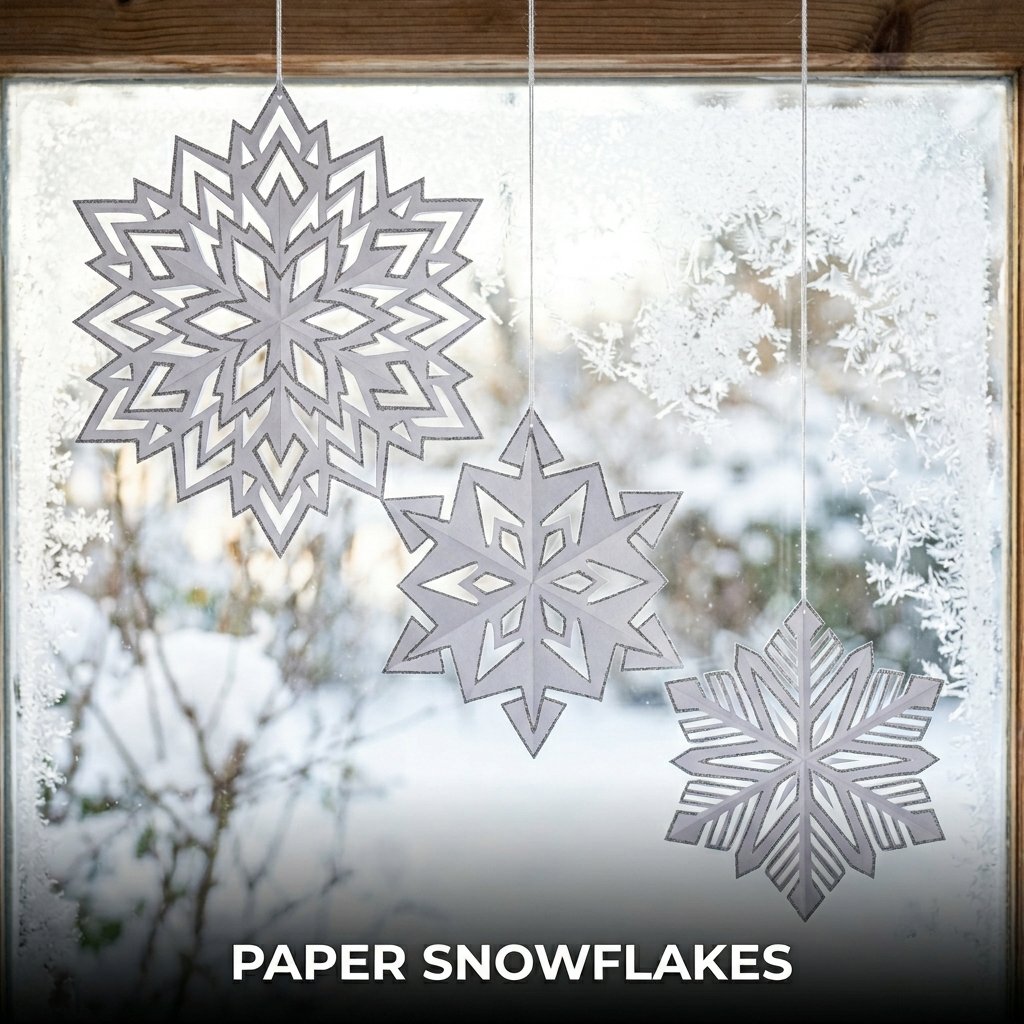
1. Paper Snowflakes
A paper snowflake is the most widely made winter craft for kids because it requires only white paper, scissors, and 5 minutes to produce a unique symmetrical design every time. I made paper snowflakes with a group of 6 children aged 4 to 8 at a winter holiday party and every child finished at least 3 snowflakes in 20 minutes. The finished snowflakes hung in the window for the rest of the season.
Paper snowflakes suit children aged 5 and above for independent cutting. Children aged 3 to 4 complete this craft with adult help on the folding steps.
How to Fold Paper for a Snowflake
Cut a square from white paper at 20 x 20 cm. Fold in half diagonally to form a triangle. Fold in half again to form a smaller triangle. Fold one-third of the triangle over to the right and the remaining third over to the left, producing a narrow wedge shape. Cut small shapes along both folded edges and across the pointed tip. Unfold carefully to reveal the snowflake. Each cut produces 6 symmetrical openings across the finished snowflake surface.
Decorating Paper Snowflakes After Cutting
Apply silver or white glitter glue along the cut edges of the unfolded snowflake for a sparkling effect. Press the decorated snowflake flat between two heavy books for 10 minutes to flatten any fold marks before displaying. Hang finished snowflakes using a single piece of clear thread tied through one outer point. A group of 8 to 12 snowflakes hung at different heights in a window creates a full winter display from a single 30-minute craft session.
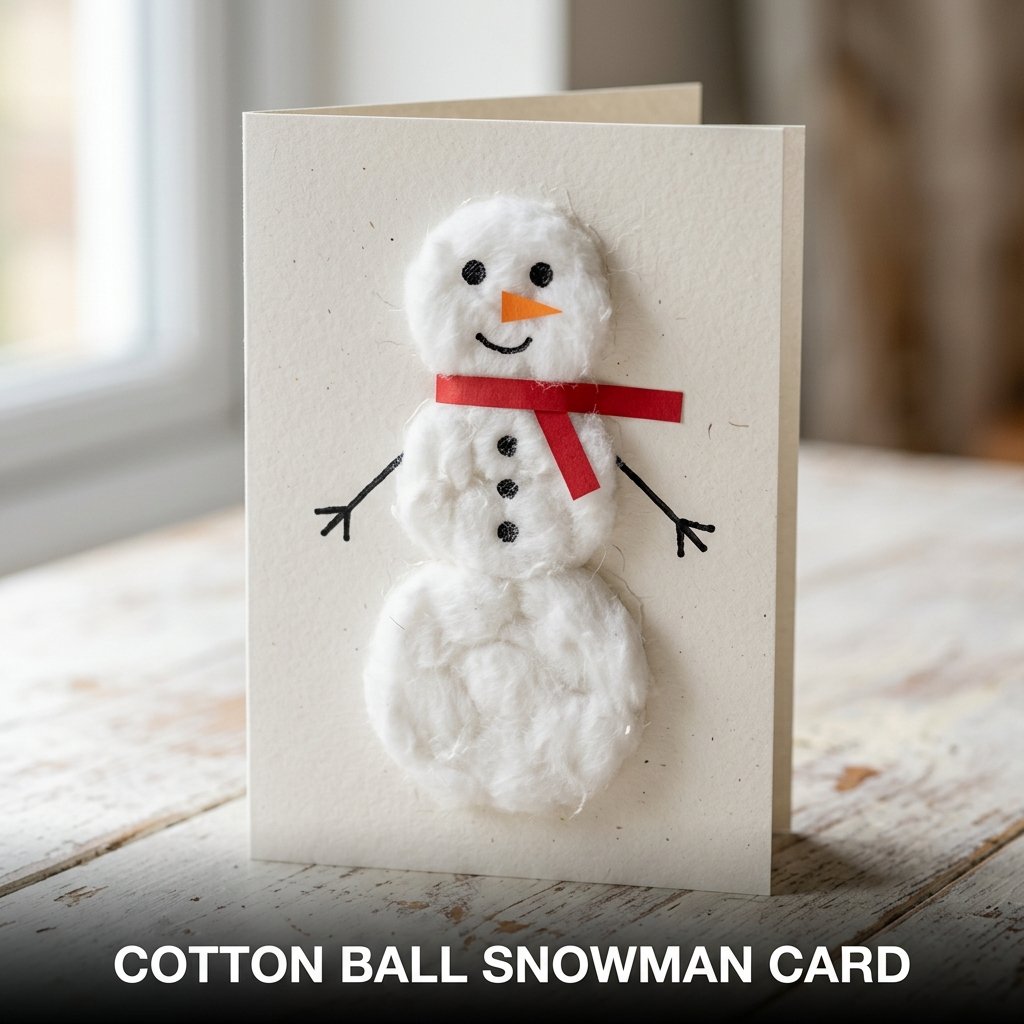
2. Cotton Ball Snowman Card
A cotton ball snowman card uses cardstock, cotton balls, and basic craft supplies to produce a handmade winter greeting card that children give as a gift. I made these with a kindergarten class of 22 children during a winter craft afternoon. Every child finished their card in under 30 minutes and decorated it differently despite using the same base materials. The cards went home as gifts for parents the same day.
Cotton ball snowman cards suit children aged 3 and above. Children aged 3 to 4 need adult help applying glue. Children aged 5 and above complete the full project independently.
Assembling a Cotton Ball Snowman on a Card
Fold a piece of cardstock at 20 x 28 cm in half to produce a card at 20 x 14 cm. Draw 3 pencil circles on the front panel in decreasing sizes: 5 cm, 4 cm, and 3 cm diameter from base to top, stacked vertically with 3 mm gaps between them. Apply white craft glue inside each circle. Press cotton balls into the glued circles, filling each shape completely. Allow 10 minutes of drying time before adding facial features and accessories with markers.
Adding Details to a Snowman Card
Draw a carrot nose using an orange marker inside a small triangle shape on the top ball. Add 3 black dot eyes and a curved smile using a black marker. Draw stick arms extending from the middle ball. Cut a small rectangle of orange or red paper and fold it into a scarf shape, gluing it between the middle and top balls. These 4 details complete the recognizable snowman figure and take under 5 minutes for a child aged 5 or above to add independently.
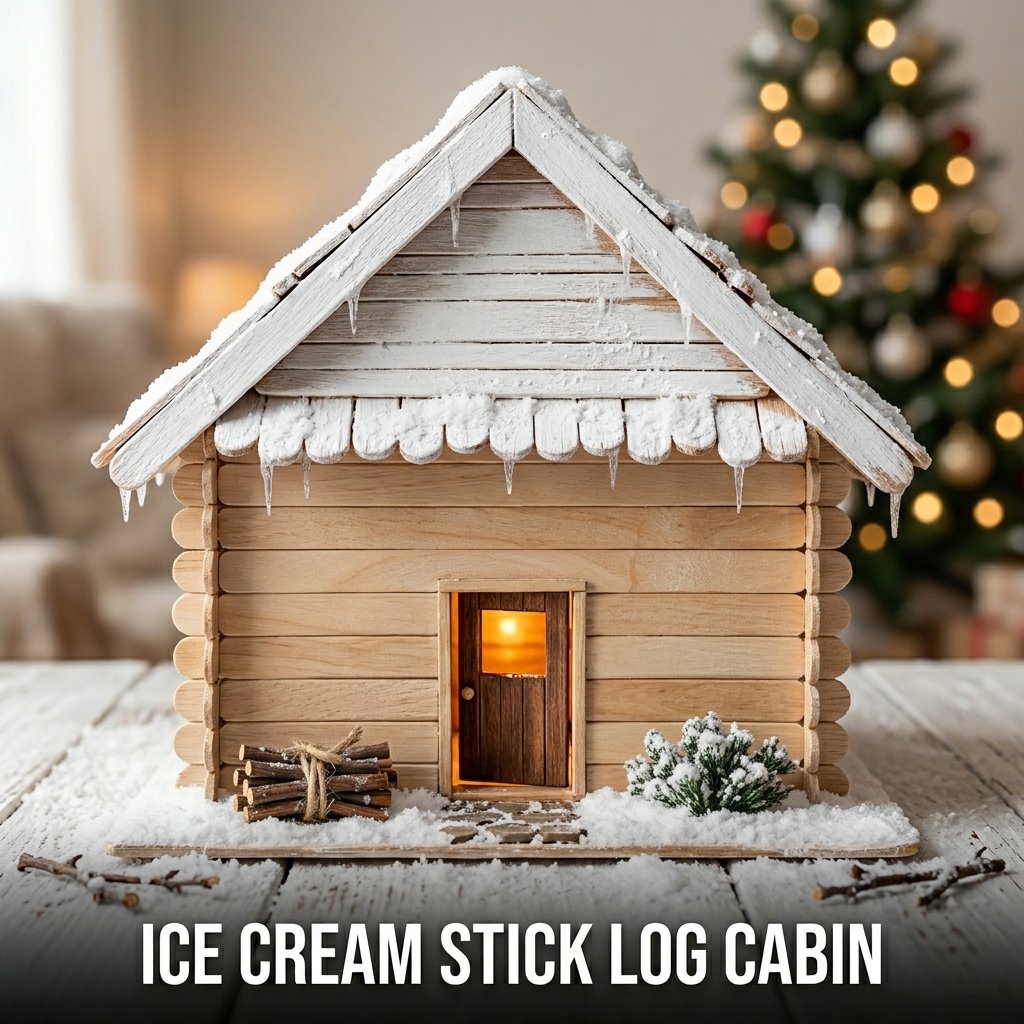
3. Ice Cream Stick Log Cabin
An ice cream stick log cabin uses wooden craft sticks glued into a small cabin structure as an indoor winter craft for kids that produces a 3-dimensional display model. I built one with my nephew aged 7 over 2 short sessions using 80 craft sticks and a glue gun operated by me while he arranged the sticks. The finished cabin sat on his bedroom shelf for the entire winter.
This craft suits children aged 6 and above. Adult supervision is required for any hot glue gun use. Children aged 8 and above use a standard PVA craft glue safely without adult assistance, though the drying time extends to 30 minutes between layers.
Building the Walls of an Ice Cream Stick Cabin
Lay 2 craft sticks parallel, 8 cm apart. Glue 8 sticks across them horizontally, side by side, to produce a solid rectangular wall panel. Repeat 3 times for a total of 4 wall panels. Allow all panels to dry flat. Glue the 4 panels upright at right angles to form a rectangular cabin structure, with the horizontal sticks facing outward as the log texture. Hold each corner join for 30 seconds until the glue sets before releasing.
Building the Roof for a Stick Cabin
Cut 10 craft sticks in half using craft scissors or a small saw for older children. Glue 2 full-length sticks diagonally from the top of each long wall panel to meet at a center ridge point above the cabin. Fill between the diagonal supports with half-sticks glued side by side. Repeat on the opposite side to produce a gabled roof. Apply white paint to the roof after drying to represent a snow-covered cabin roof for a winter seasonal display.
4. Penguin Handprint Craft
A penguin handprint craft uses black and white paint applied to a child’s hand to produce a printed penguin shape on cardstock. I made these with a group of toddlers aged 2 to 3 at a playgroup winter session. Each child produced 2 prints in 5 minutes. After the paint dried, I added the beak, eyes, and feet details for the younger children and let the 3-year-olds add their own with guidance.
Handprint crafts suit children aged 2 and above. Children aged 2 to 3 need full adult assistance. Children aged 4 and above complete the painting step independently with light supervision.

How to Make a Penguin Handprint
Paint the entire palm and fingers of a child’s hand with black washable paint. Press the painted hand firmly onto white cardstock with fingers together and thumb extended sideways. Lift the hand straight up without smearing. Allow 5 minutes of drying time. Paint the thumb print area white for the penguin’s belly using a small brush. Add an orange triangle beak, two white circle eyes with black dot pupils, and two orange rectangle feet using a marker or paint. These details complete the penguin figure within the dried handprint shape.
Displaying a Handprint Penguin Craft
Cut around the dried handprint penguin shape leaving a 1 cm white border. Glue the cut penguin to a piece of light blue cardstock at 15 x 20 cm. Add cotton ball snow at the base of the penguin using 3 to 4 small cotton balls pressed into craft glue. Write the child’s name and date on the back of the cardstock before displaying. Parents consistently keep handprint crafts as keepsakes, and the date added on the back increases the long-term sentimental value of the finished piece.
5. Paper Plate Polar Bear
A paper plate polar bear uses a standard white paper plate as the polar bear’s face and adds paper ears, a black nose, and drawn features to produce a simple winter animal craft. I made these with a preschool class aged 3 to 4 during an indoor winter crafts session. The preparation time for all materials was 10 minutes and every child finished their bear in under 20 minutes. The bears got displayed on the classroom wall as a winter scene.
Paper plate crafts suit children aged 3 and above. All cutting is done by adults in advance for children aged 3 to 4.

Cutting and Assembling the Polar Bear Face
Cut 2 circles at 6 cm diameter from white cardstock for the ears. Cut 1 smaller circle at 3 cm diameter from white cardstock for the nose muzzle area. Glue both ear circles to the back top edge of the paper plate so they extend above the plate rim. Glue the nose circle to the center lower area of the plate front. Draw 2 black oval eyes above the nose circle and a black oval nose on the muzzle circle using a black marker. Draw a curved smile below the nose for the bear’s expression.
Adding Texture to a Paper Plate Polar Bear
Spread a thin layer of white craft glue across the surface of the paper plate front and press small pieces of white tissue paper or white cotton fiber over the glued surface to create a fluffy fur texture. Allow 15 minutes of drying time. The textured surface distinguishes the finished polar bear from a plain paper plate and adds a tactile element that younger children particularly enjoy touching and examining after the craft is complete.
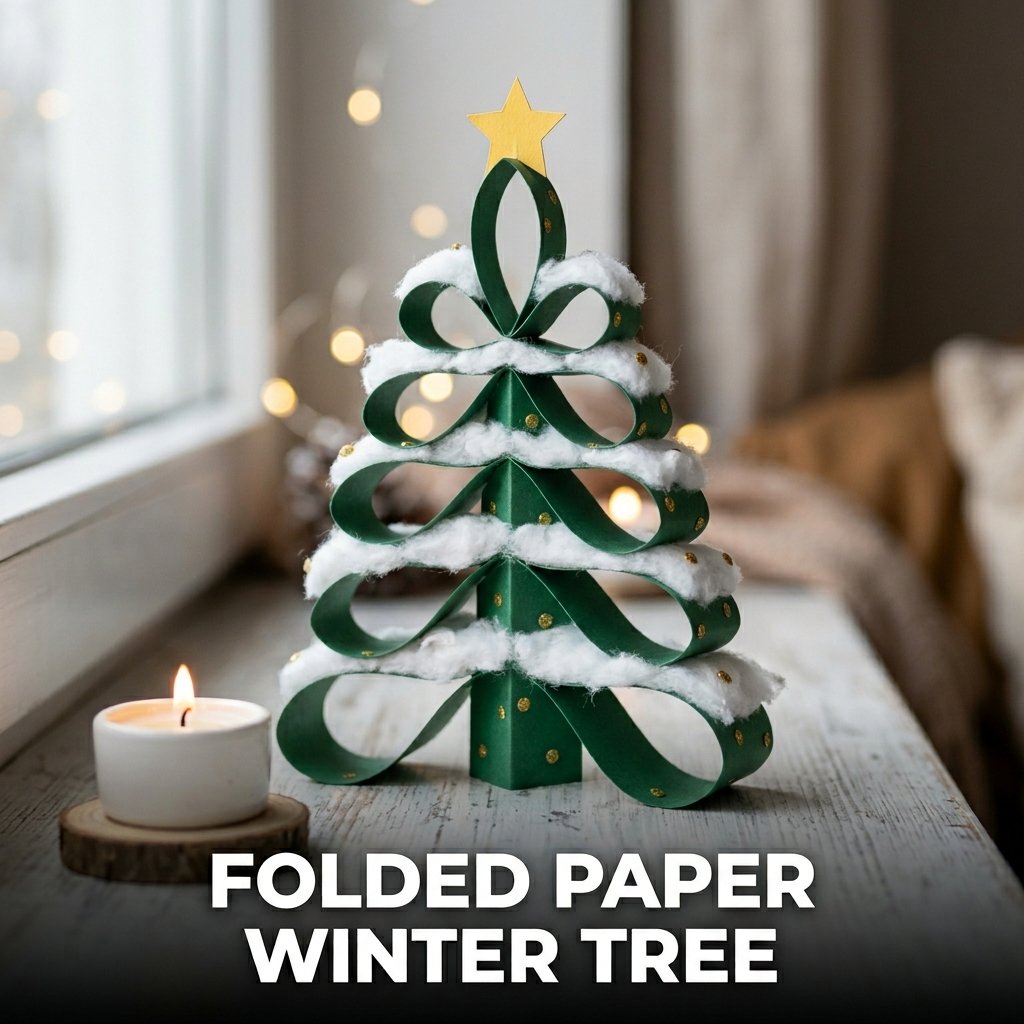
6. Folded Paper Winter Tree
A folded paper winter tree uses strips of green paper folded and stacked in decreasing sizes to produce a dimensional paper tree decorated with cotton ball snow. I made a set of 6 of these trees with children aged 6 to 10 for a winter classroom display. Each tree took 25 minutes to assemble and stands independently on a table surface without any additional support structure.
This craft suits children aged 5 and above. Children aged 5 to 6 need help with the folding sequence. Children aged 7 and above complete the full project independently.
Cutting and Folding the Tree Layers
Cut 5 strips of green cardstock in decreasing widths: 20 cm, 17 cm, 14 cm, 11 cm, and 8 cm, all at the same height of 6 cm. Fold each strip into a loop by overlapping the ends by 1 cm and gluing them together. Allow drying for 5 minutes. Stack the loops from largest at the base to smallest at the top, gluing each layer to the one below it at the center point. The overlapping folded loops create a dimensional layered tree shape that stands upright on the base loop.
Decorating a Paper Winter Tree With Snow
Apply white craft glue to the top edges of each paper loop layer. Press small pieces of cotton ball onto the glued edges to represent snow resting on the tree branches. Add small dot stickers or glitter glue dots across the tree layers to represent decorative lights or ornaments. Cut a small yellow star from cardstock and glue it to the top of the smallest loop to complete the winter tree decoration. The finished tree measures approximately 12 cm tall and displays well on a shelf or windowsill.
7. Sock Snowman
A sock snowman uses a clean white sock filled with rice or polyfill stuffing, tied into sections, and decorated with fabric scraps and buttons to produce a soft 3-dimensional snowman figure. I made one with a 6-year-old using a single white ankle sock, a cup of rice, elastic bands, and craft supplies from a box. The finished snowman stood 15 cm tall and sat on the child’s bookshelf for the entire winter season.
Sock snowmen suit children aged 5 and above. Adult assistance is needed for tying the elastic bands tightly enough to create visible sections.
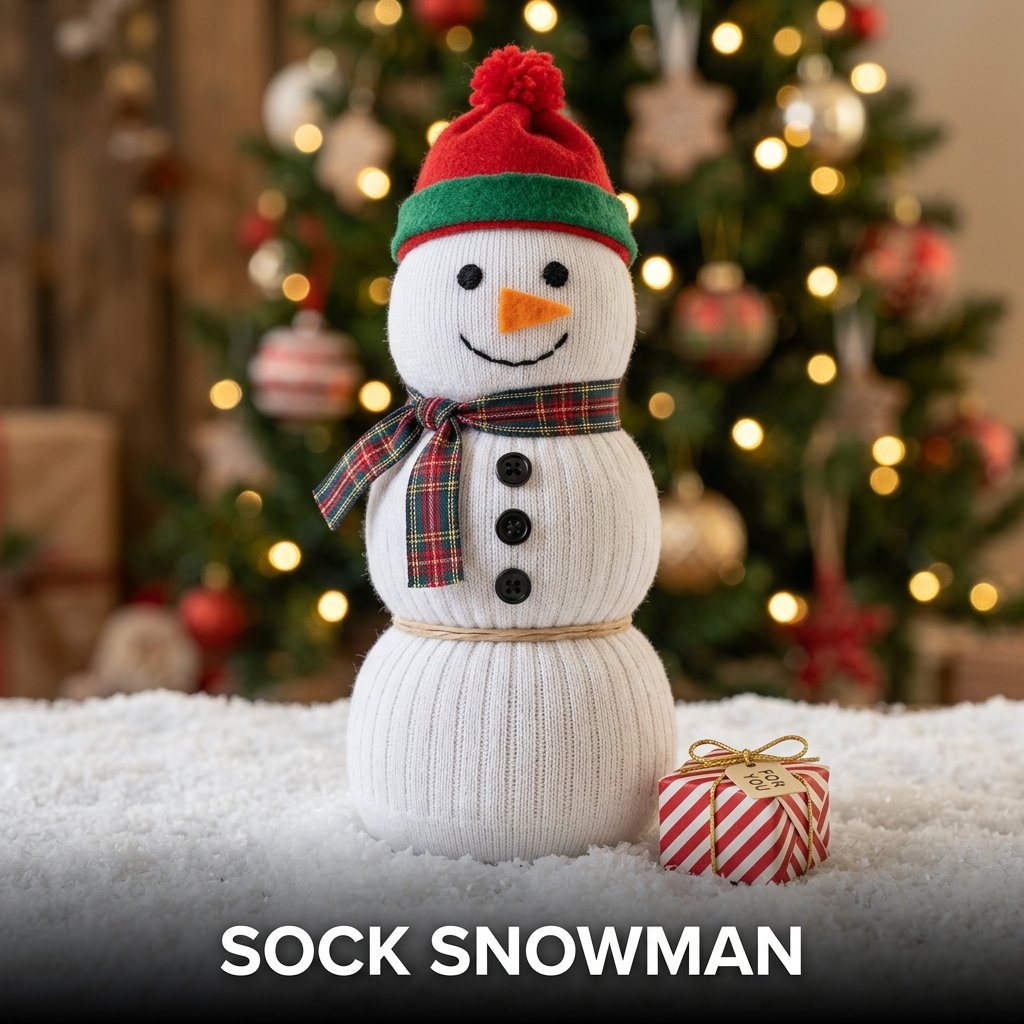
Filling and Shaping a Sock Snowman
Fill a white ankle sock with white rice to 8 cm depth for the base body section. Twist an elastic band tightly around the sock 8 cm from the filled base to create the first body section. Fill the sock above the elastic band with 5 cm more of rice for the middle section. Add a second elastic band at 5 cm above the first. Fill a further 4 cm for the head section and tie the top of the sock closed with a third elastic band. Trim any excess sock above the top elastic band.
Decorating a Sock Snowman
Glue 3 small black buttons down the front of the middle body section. Glue 2 small black button eyes and an orange felt triangle nose to the head section. Cut a 30 cm strip of colored fabric at 3 cm wide and tie it around the neck between the head and middle body sections as a scarf. Glue a small circle of felt to the top of the head as a hat base. Add a strip of felt around the hat base for the hat brim. These details complete the snowman figure using no sewing.
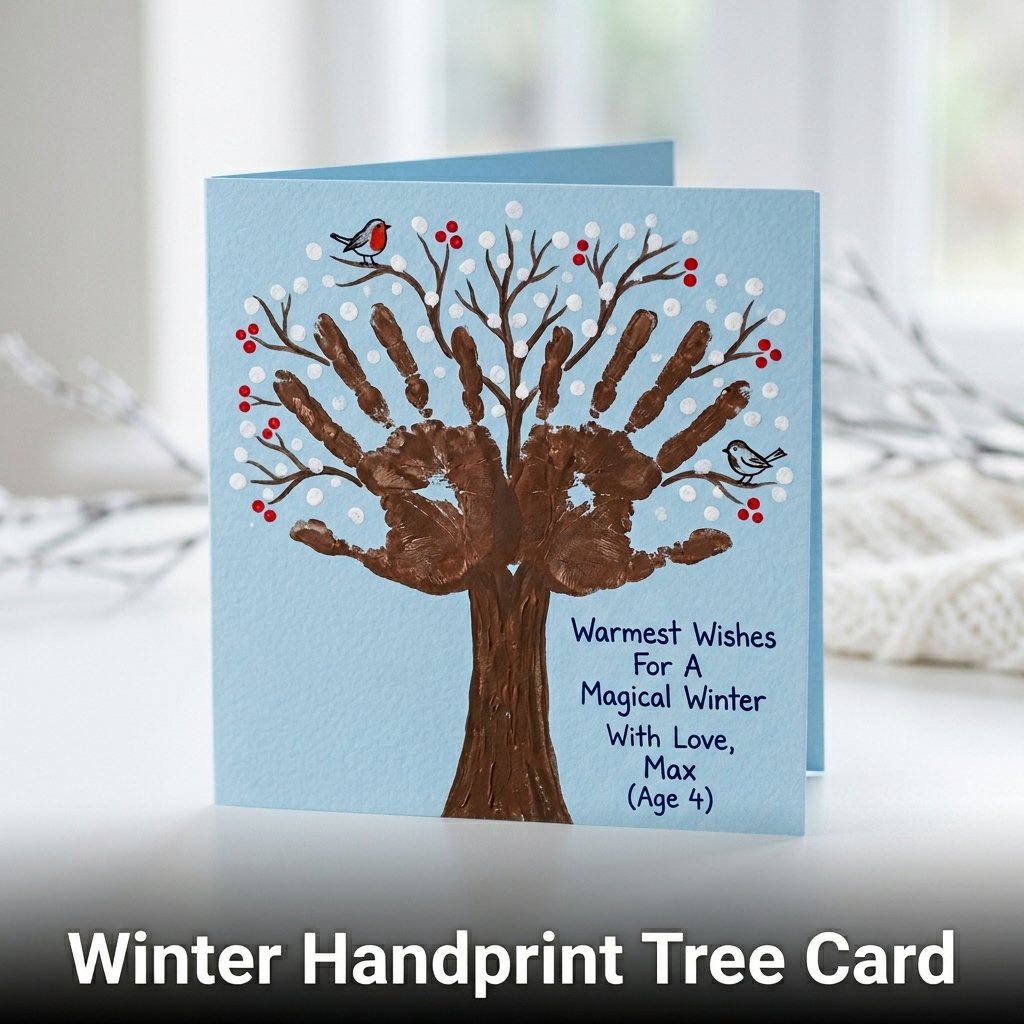
8. Winter Handprint Tree Card
A winter handprint tree card uses two handprints in brown paint pressed trunk-side down on cardstock to produce a bare winter tree silhouette that children decorate with snow and bird details. I made these with a school group aged 6 to 9. Each child produced a different tree shape because hand sizes and finger positions varied between children, which made every finished card unique despite using the same process.
Making the Handprint Tree Trunk and Branches
Paint the palm and fingers of both hands with brown washable paint. Press both hands onto white or light blue cardstock with thumbs touching at the center to form the trunk and the fingers spreading outward as branches. Lift both hands straight up without smearing. Allow 5 minutes of drying time before adding any additional details. The two handprints together produce a symmetrical bare tree silhouette approximately 20 cm wide and 15 cm tall on a standard A4 cardstock sheet.
Adding Snow and Detail to a Handprint Tree Card
Dip a finger into white paint and press fingerprint dots along the top edges of the handprint branches to represent snow. Add small red fingerprint dots scattered across the branches to represent berries. Draw small black bird silhouettes sitting on the branches using a fine marker. Write a winter greeting inside the folded card. These 3 detail additions require 10 minutes and produce a finished greeting card that works as both a winter craft and a personalized gift for a family member.
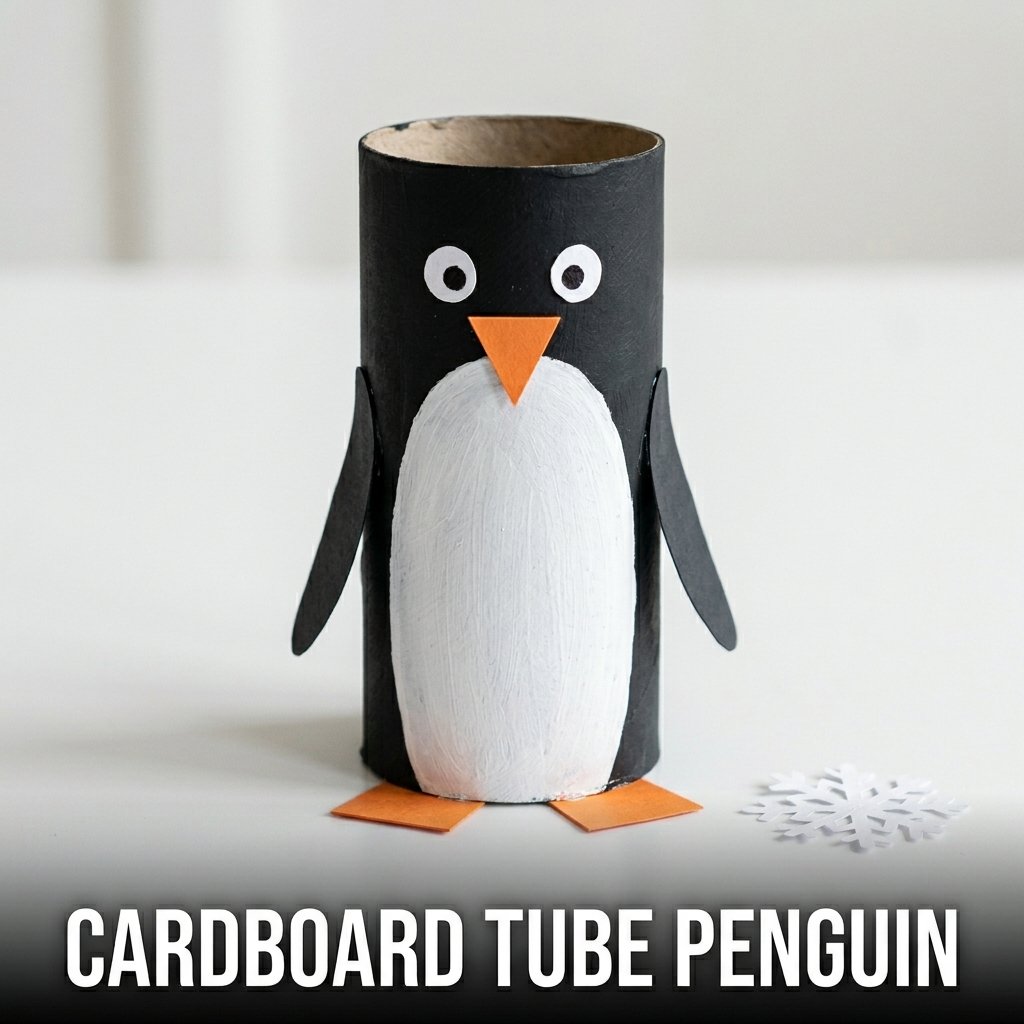
9. Cardboard Tube Penguin
A cardboard tube penguin converts a toilet paper roll into a standing penguin figure using paint and paper cutouts. I made a set of 8 with children aged 4 to 7 for a winter display shelf. Each child painted their own tube and attached the paper parts with assistance on the cutting steps. The finished penguins stood in a row on the classroom windowsill and created a simple winter scene display that remained in place for 3 weeks.
Cardboard tube crafts suit children aged 4 and above. Adult pre-cutting of paper parts is required for children aged 4 to 5.
Painting a Cardboard Tube for a Penguin Body
Paint the entire outer surface of a toilet paper roll with black acrylic or washable craft paint. Allow 10 minutes of drying time. Paint an oval shape on the front of the tube in white paint, covering approximately half the front surface from the base to 2 cm below the top edge. This white oval represents the penguin’s belly. Allow a further 10 minutes of drying time before attaching any paper details to the painted surface.
Attaching Face and Wing Details to a Tube Penguin
Cut 2 wing shapes from black cardstock at 4 x 2 cm each, rounded at one end. Glue one wing to each side of the tube at the middle height. Cut an orange triangle beak at 2 cm base and 1.5 cm height. Fold a 5 mm tab at the base of the triangle and glue the tab to the front of the tube at the top of the white oval. Glue 2 small white circle eyes with black dot pupils above the beak. Cut 2 small orange feet rectangles and glue them folded under the base of the tube so they extend forward.
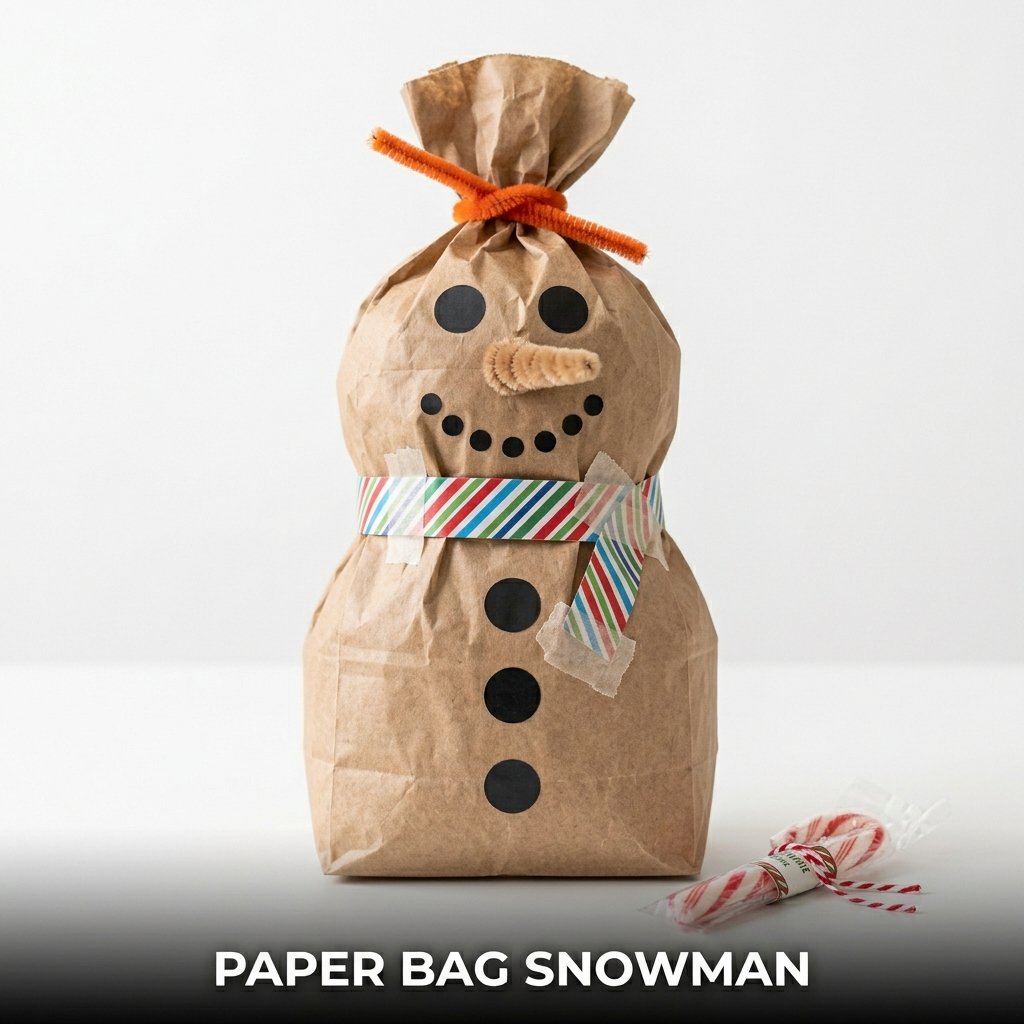
10. Paper Bag Snowman
A paper bag snowman uses a white paper lunch bag stuffed with crumpled newspaper and sealed at the top to produce a standing snowman body that children decorate with craft supplies. I made these with toddlers aged 2 to 3 at a winter playgroup session. The stuffing step required adult assistance but the decoration step was fully child-led using pre-cut paper shapes and dot stickers. Every child finished a recognizable snowman in under 20 minutes.
Paper bag snowmen suit children aged 2 and above with adult support on the filling and sealing steps.
Stuffing and Shaping a Paper Bag Snowman
Open a white paper lunch bag. Stuff it loosely with crumpled newspaper to fill approximately 80% of the bag volume. Gather the top of the bag together and twist it closed. Wrap an orange pipe cleaner twice around the twisted top to secure it and shape the twisted section into a carrot nose by bending the pipe cleaner forward. The twisted top of the bag above the pipe cleaner forms the nose shape automatically when the paper is gathered tightly.
Decorating a Paper Bag Snowman Body
Press 3 large black dot stickers down the front center of the bag for buttons. Press 2 medium black dot stickers near the top of the bag for eyes and 1 curved line of small black dot stickers for a smile. Cut a strip of colored paper at 20 x 3 cm and wrap it around the bag below the face area as a scarf, securing with a small piece of tape. These decoration steps use no scissors and suit children aged 2 to 3 who are not yet ready for cutting activities.
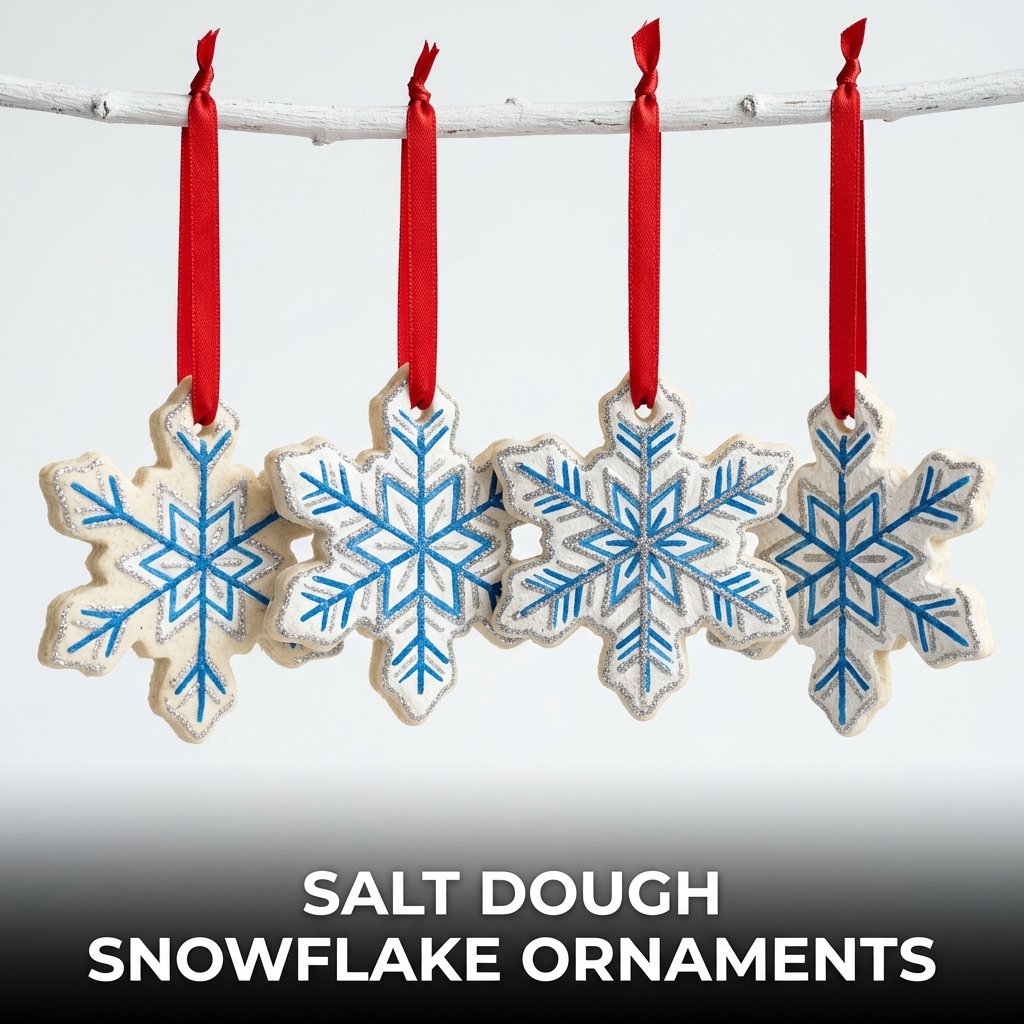
11. Salt Dough Snowflake Ornaments
Salt dough snowflake ornaments use a flour, salt, and water dough shaped into snowflake forms, baked until hard, and painted for hanging as winter decorations. I made these with a group of children aged 5 to 9 during a winter holiday craft session. Each child shaped their own snowflake using cookie cutters or freehand, baked them while doing another activity, and painted them after the baking was complete. The finished ornaments hung on a classroom display for the full winter season.
Making and Baking Salt Dough
Mix 2 cups of plain flour with 1 cup of table salt and 1 cup of water. Stir until a firm dough forms. Knead on a floured surface for 3 minutes. Roll to 6 mm thickness. Cut snowflake shapes using cookie cutters or cut freehand with a blunt knife. Pierce a 5 mm hole at the top of each shape using a toothpick. Place on a baking tray lined with parchment paper. Bake at 120 degrees Celsius for 2 hours until fully hard and dry throughout.
Painting and Finishing Salt Dough Ornaments
Paint the cooled salt dough snowflakes with white acrylic paint as a base coat. Allow 20 minutes of drying time. Apply blue, silver, or pastel paint in geometric patterns over the white base. Add glitter glue to the raised edges after the paint dries. Thread a 20 cm length of ribbon through the hole at the top of each ornament and tie a loop for hanging. Apply 2 coats of clear PVA glue over the fully decorated surface to seal the paint and protect the ornament from humidity.
12. Tin Foil Snowman
A tin foil snowman uses aluminum foil shaped by hand into a 3-dimensional snowman figure that holds its form without any adhesive or internal support. I showed this craft to a group of children aged 6 to 10 and watched them spend 40 minutes perfecting their foil snowmen without any instruction beyond the initial demonstration. The finished figures held their shape for display throughout the winter season.
Tin foil sculpting suits children aged 5 and above. No scissors, glue, or paint are required, making this one of the safest and most supply-free winter crafts for kids.

Shaping Foil Into a Snowman Body
Tear 3 sheets of aluminum foil at 30 cm, 25 cm, and 20 cm respectively. Crumple each sheet tightly into a ball, compressing it firmly until it holds a round shape. The largest ball forms the base body, the medium ball forms the middle body, and the smallest ball forms the head. Press the 3 balls together firmly so the foil surfaces interlock and hold the stacked snowman shape without any adhesive. Reshape any section by pressing and smoothing the foil surface with fingers.
Adding Details to a Tin Foil Snowman
Press small pieces of black foil torn from a sheet into 2 eye positions and 3 button positions on the snowman body. Twist a small piece of orange foil into a carrot nose shape and press it firmly into the face area. Tear a thin strip of colored foil and wrap it around the neck join as a scarf. These details press directly into the existing foil surface without glue. The finished foil snowman measures approximately 12 cm tall and stands independently on its flat base.
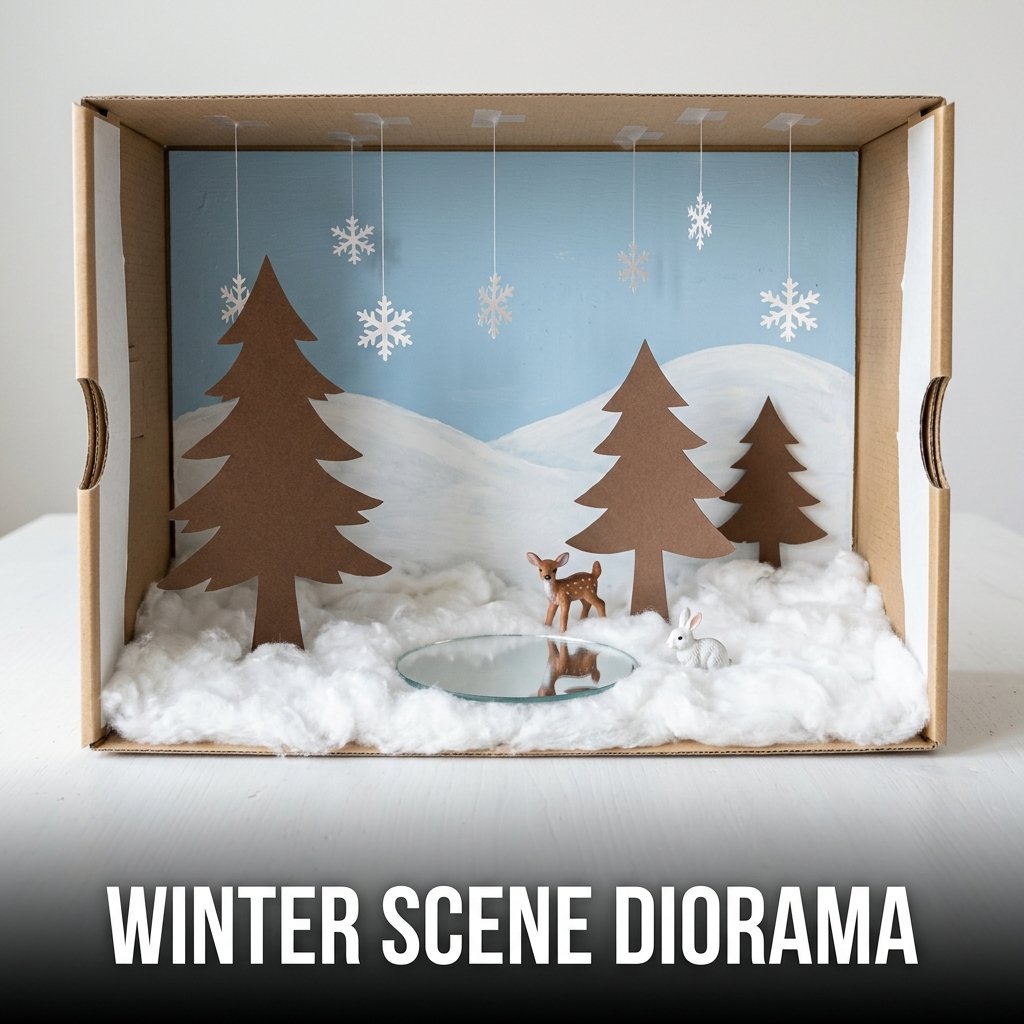
13. Winter Scene Diorama
A winter scene diorama uses a shoebox, cotton wool, paper cutouts, and craft supplies to build a 3-dimensional winter landscape inside a box that children view from the open front. I built one with a 9-year-old over one afternoon using a shoebox, white cotton wool, paper trees, a mirror piece for a frozen pond, and small plastic figures. The finished diorama sat on his desk for the full winter and he added new elements to it over several weeks.
Winter dioramas suit children aged 7 and above. Younger children complete a simplified version with pre-cut paper trees and adult help arranging the scene elements.
Setting Up the Diorama Box Base
Paint the interior back wall of a shoebox with light blue paint for a winter sky. Allow 20 minutes of drying time. Paint white irregular shapes across the lower portion of the back wall for snow-covered hills in the distance. Cover the base of the box with white craft glue and press white cotton wool evenly across the full base area to represent snow on the ground. Allow 30 minutes of drying time before adding any standing elements to the cotton wool base.
Adding Trees and Figures to a Winter Diorama
Cut winter tree silhouettes from brown cardstock at 10 to 15 cm tall. Fold a 2 cm tab at the base of each tree and glue the tabs to the diorama base at staggered positions to create depth. Cut small animal figures from cardstock or use small plastic toy figures from an existing toy collection. Place a small mirror flat on the cotton wool base for a frozen pond. Add small paper snowflakes hung from thread taped to the inside top of the box for a snow-falling effect.
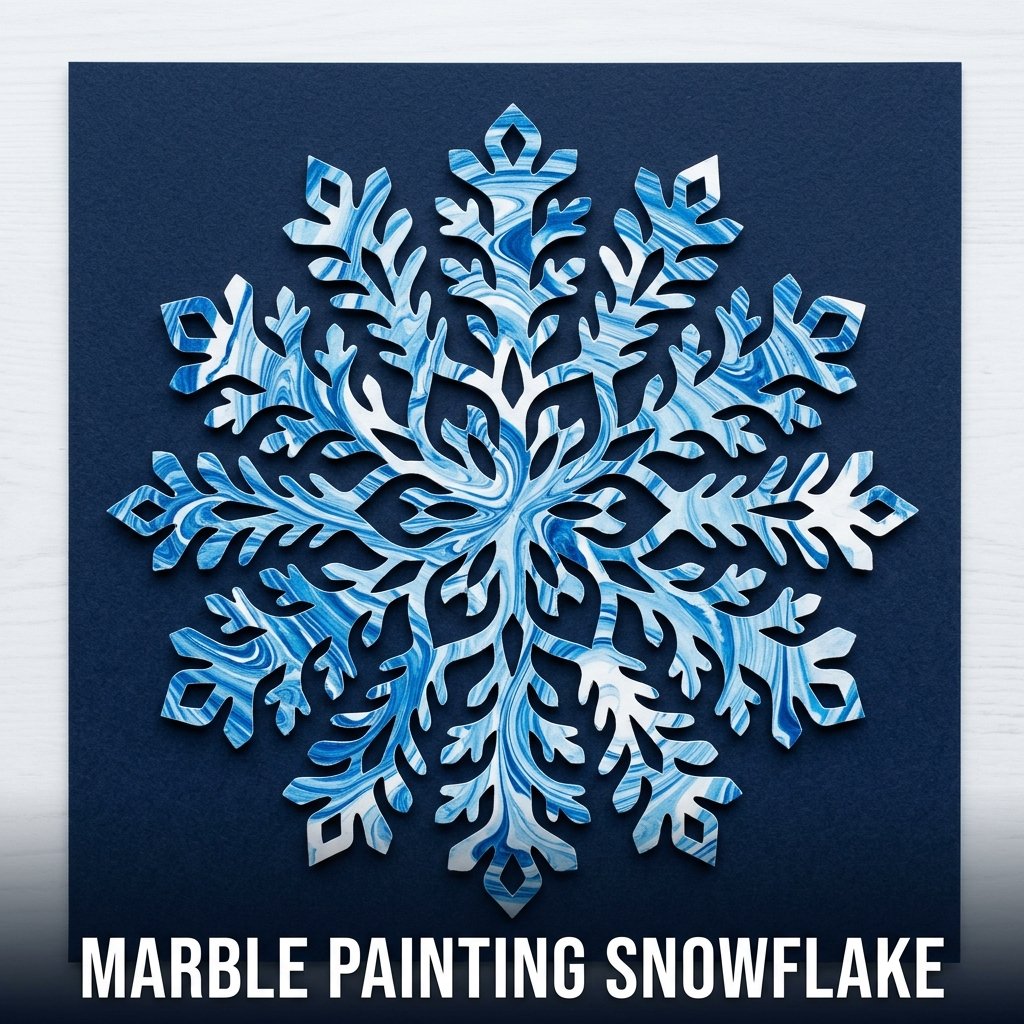
14. Marble Painting Snowflake
A marble painting snowflake uses blue and white paint rolled around a marble inside a box lid to produce a printed winter pattern on circular white paper that forms a snowflake design when folded. I made these with a school group aged 5 to 8 and the rolling step kept every child engaged for the full 10 minutes it took to build up the paint pattern. No two finished snowflakes looked the same because the marble path changed with every child’s movements.
Setting Up the Marble Painting Station
Cut a circle at 20 cm diameter from white cardstock. Place it inside a box lid with raised sides at least 3 cm tall. Drop 2 marbles into the lid. Place 3 small dots of blue paint and 3 small dots of white paint directly onto the cardstock circle. Tilt and roll the box lid in different directions to move the marbles through the paint. Continue rolling for 2 to 3 minutes until the paint covers most of the cardstock surface in a swirled pattern. Remove the cardstock and allow 10 minutes of drying time.
Folding the Painted Circle Into a Snowflake Shape
Fold the dried painted circle in half. Fold in half again to produce a quarter circle. Cut small curved and triangular shapes from the folded edges as in a standard paper snowflake. Unfold to reveal a symmetrical painted snowflake pattern. The marble-painted background produces a different color distribution in every cut section, which makes the unfolded snowflake more visually interesting than a snowflake cut from plain white paper. Mount the finished snowflake on dark blue cardstock for display.
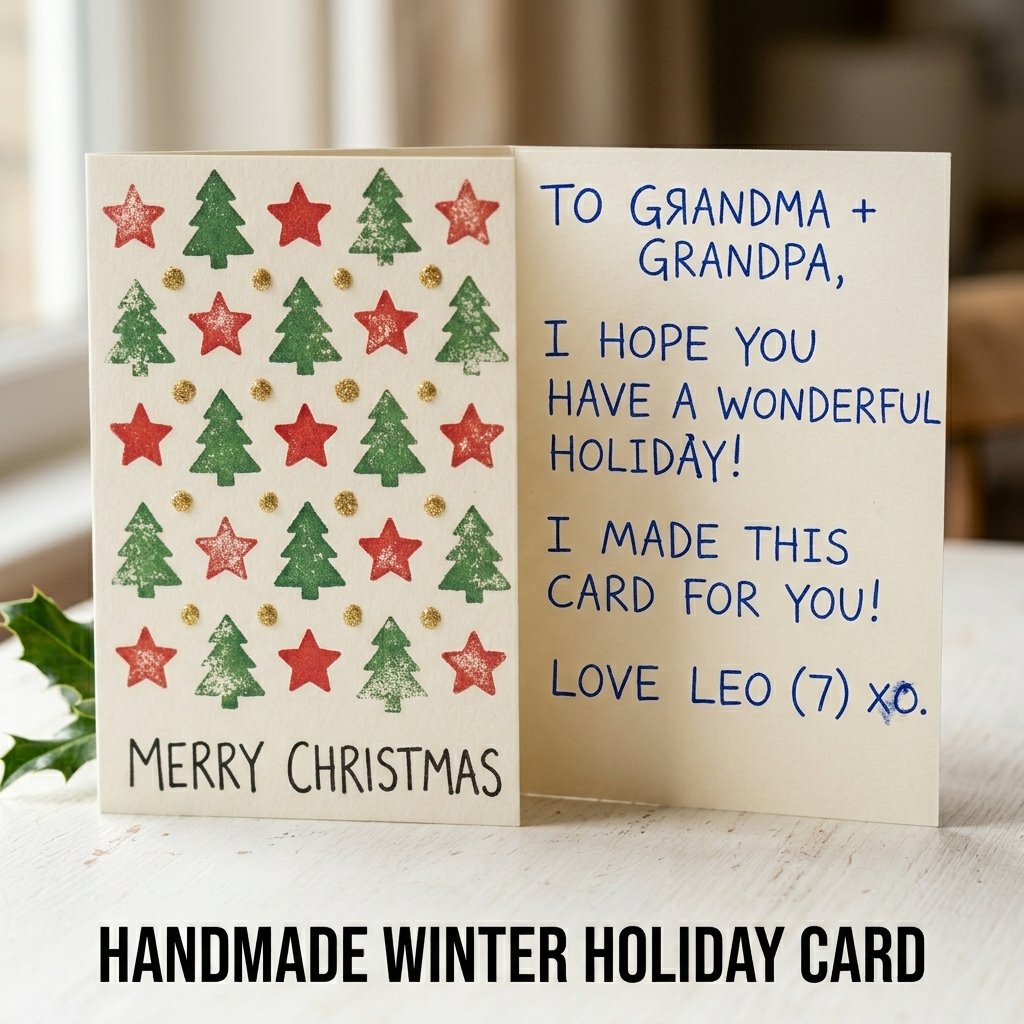
15. Handmade Winter Holiday Card
A handmade winter holiday card uses cardstock, paint, and simple stamping techniques to produce a personalized greeting card that children give to family members during the winter season. I organized a winter card-making session for children aged 6 to 12 and every child produced 3 finished cards in 45 minutes. The cards used potato stamp printing, cotton ball dabbing, and marker drawing as 3 different decoration techniques that suited different ages and skill levels simultaneously.
Potato Stamp Printing on a Holiday Card
Cut a potato in half. Press a star or tree shape onto the cut surface using a cookie cutter as a guide, then cut away the surrounding potato flesh with a knife to leave the shape raised by 5 mm. Press the potato stamp into green or red paint on a flat plate. Press the loaded stamp onto the front of a folded cardstock card. Lift straight up. Repeat to fill the card front with a repeating stamped pattern. Allow 10 minutes of drying time before adding any additional details with marker or glitter glue.
Writing a Message Inside a Winter Card
Guide children to write a simple greeting inside the finished card: a name, a short sentence, and a signature. Children aged 5 to 6 trace pre-written letters with a pencil before writing independently. Children aged 7 and above write the full message without tracing. A handwritten message inside a stamped card increases the personal value of the finished craft for the recipient. The combination of a handmade exterior and a handwritten interior produces a card that most family recipients keep rather than discard after the winter season.
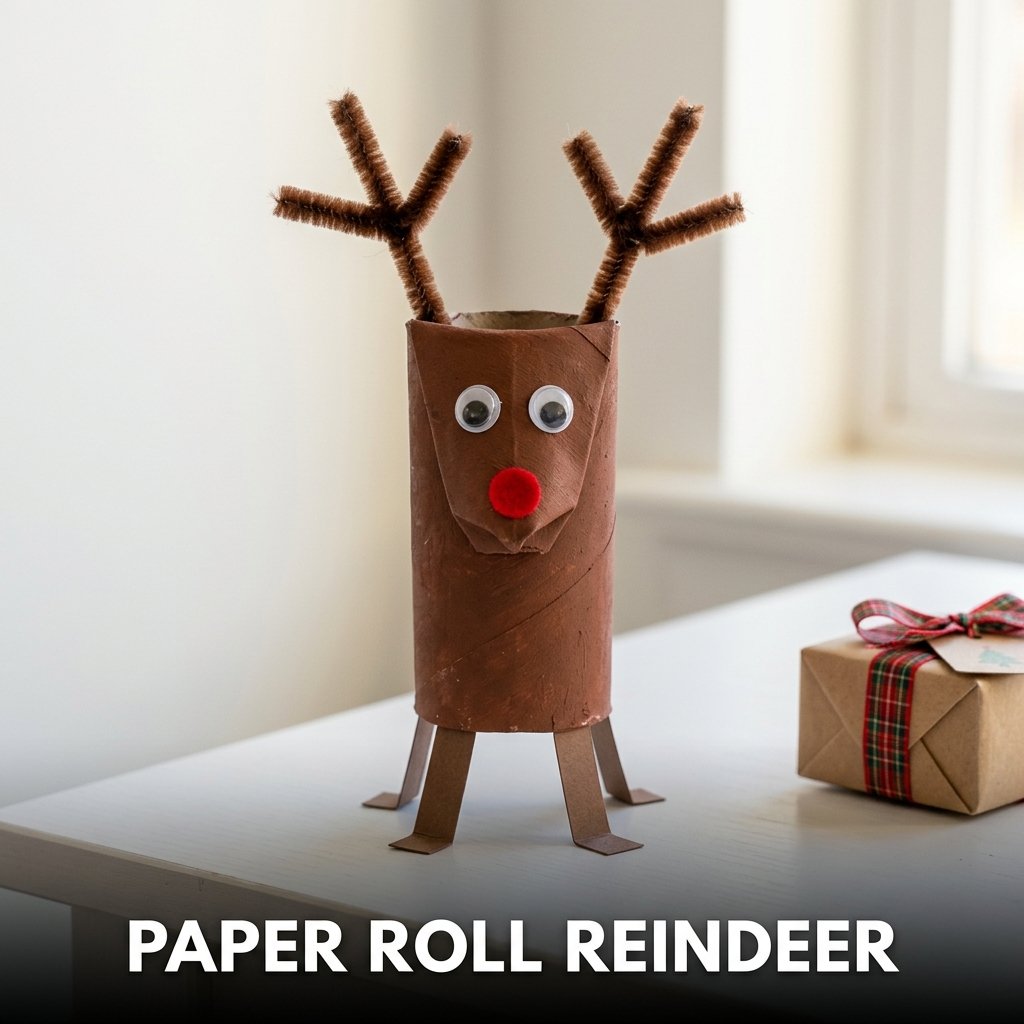
16. Paper Roll Reindeer
A paper roll reindeer uses a cardboard toilet paper roll as the reindeer body, with brown paint, pipe cleaner antlers, and paper details to produce a standing winter animal figure. I made a set of 12 of these with a school holiday group aged 4 to 8. The painting session took 15 minutes and the assembly took 20 minutes. The finished reindeer decorated a classroom windowsill in a row for the December display.
Paper roll reindeer suit children aged 4 and above. Pre-cut all paper parts for children aged 4 to 5.
Painting and Forming the Reindeer Body
Paint the entire outer surface of a toilet paper roll with brown washable paint. Allow 10 minutes of drying time. Pinch and fold one end of the tube at a slight angle, pressing it flat to form the reindeer’s nose end. Glue the folded nose end closed with a small amount of PVA glue. The angled nose gives the roll a recognizable animal head shape that distinguishes the reindeer from a plain cylinder. Glue 2 small googly eyes onto the nose end and a small red circle for the nose.
Adding Antlers and Legs to a Reindeer
Cut 2 brown pipe cleaners at 15 cm each. Bend each one into a Y shape with 2 upward branches representing antler tines. Push the straight base of each pipe cleaner antler into the top pinched end of the tube, one on each side. Secure with a small amount of hot glue or PVA. Cut 4 thin brown cardstock strips at 6 x 1 cm for the legs. Fold a 1 cm tab at one end of each strip and glue the tabs to the base of the tube interior so the legs extend downward and support the standing reindeer figure.
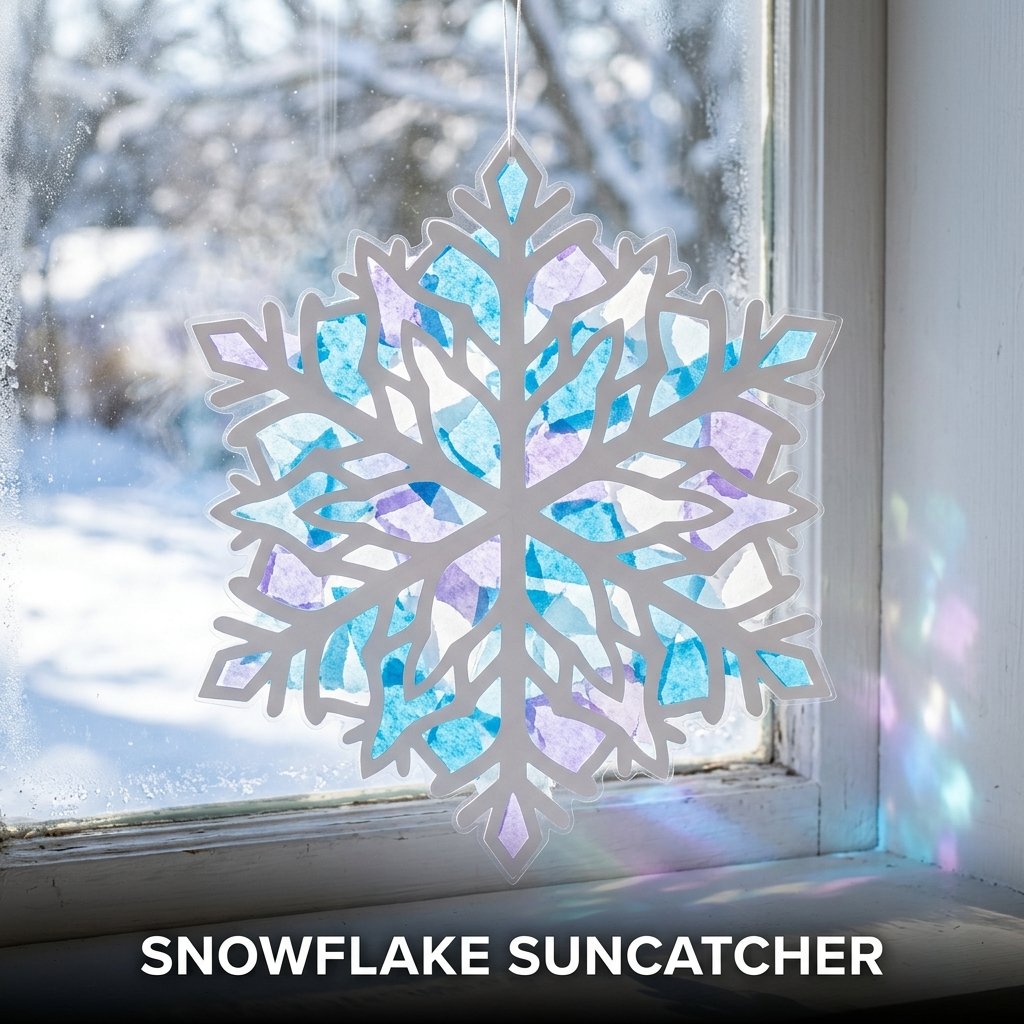
17. Snowflake Suncatcher
A snowflake suncatcher uses contact paper, tissue paper pieces, and a snowflake outline to produce a translucent window decoration that displays colored light when hung in front of a light source. I made these with a group of children aged 4 to 8 during a winter indoor craft session. Every child completed their suncatcher in under 20 minutes and the finished pieces hung in the classroom windows for the full winter season, producing colored light patterns on the walls during sunny days.
Preparing the Contact Paper Snowflake Frame
Draw a snowflake outline at 20 cm diameter on white cardstock and cut it out to produce a snowflake frame with a 4 cm wide border. Cut a piece of clear contact paper at 25 x 25 cm. Peel the backing from the contact paper and lay it sticky-side up on the table. Position the cardstock snowflake frame on top of the sticky contact paper, pressing it flat. The center open areas of the snowflake frame now expose the sticky contact paper surface for tissue paper application.
Filling the Suncatcher With Tissue Paper
Tear blue, white, and light purple tissue paper into small irregular pieces at 2 to 4 cm each. Press the tissue paper pieces onto the exposed sticky contact paper areas inside the snowflake frame openings. Overlap pieces slightly to build up layers of color. Cover all exposed sticky areas completely. Cut a second piece of contact paper at 25 x 25 cm and press it sticky-side down over the entire front surface to seal the tissue paper between the 2 contact paper layers. Trim the excess contact paper to the snowflake shape. Pierce a small hole at the top for a hanging thread.
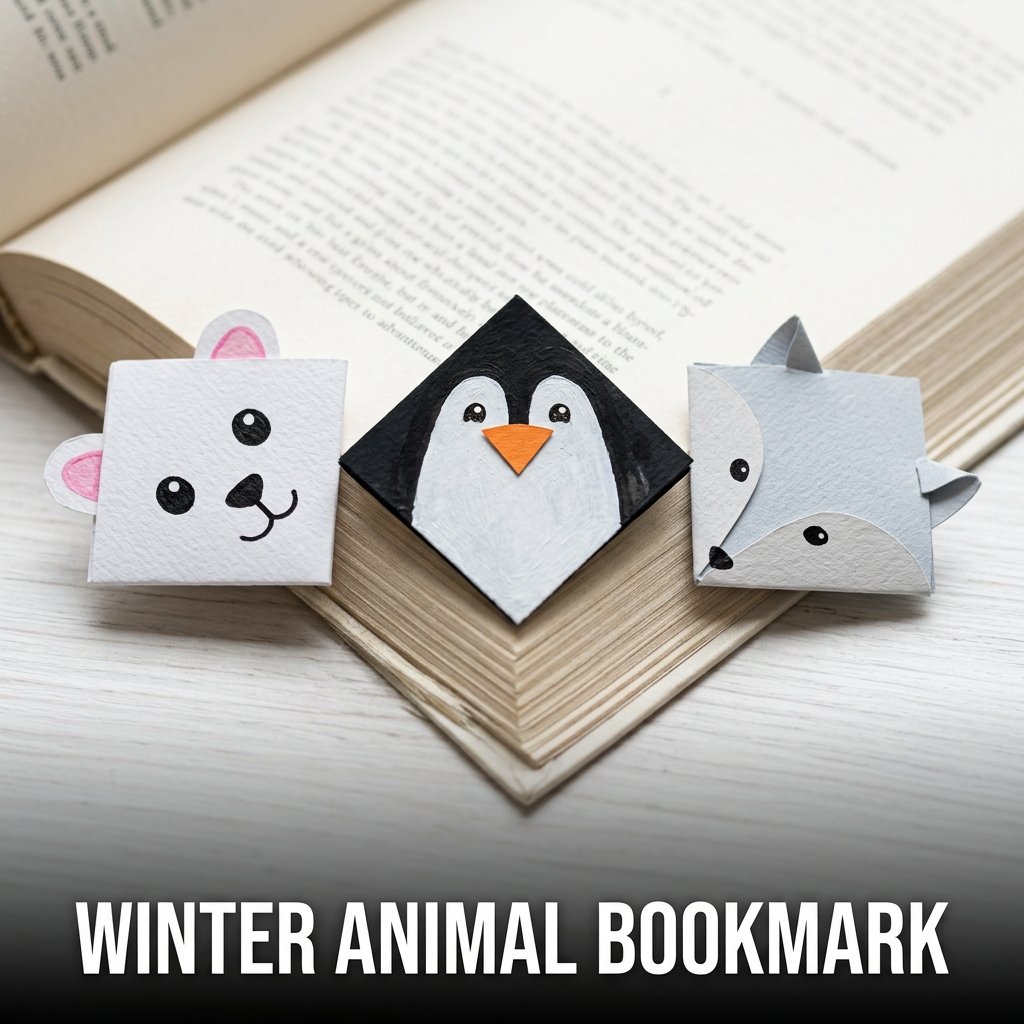
18. Winter Animal Bookmark
A winter animal bookmark uses cardstock cut into a corner pocket shape that slides over the page corner of a book, decorated as a winter animal including a polar bear, penguin, or arctic fox. I made these with children aged 6 to 10 as the final project of a winter craft afternoon. Each child completed a bookmark in 15 minutes and immediately used it in a book they were reading. The corner pocket shape holds securely on the page without any adhesive contact with the book itself.
Corner pocket bookmarks suit children aged 6 and above. Adult pre-cutting of the corner shape is required for children aged 6 to 7.
Cutting and Folding a Corner Pocket Bookmark
Cut a square from cardstock at 8 x 8 cm. Fold the square in half diagonally to produce a triangle. Fold the top layer of the triangle’s two bottom corners up to meet the top point of the triangle. Crease firmly. Fold these two corners back down halfway to create two small triangular ear shapes at the top of the bookmark. The folded pocket at the base of the triangle slides over a book page corner and holds in place through the tension of the folded layers against the page surface.
Decorating a Corner Bookmark as a Winter Animal
Draw a polar bear face on the upper triangle section using a black marker: 2 round eyes, a small oval nose, and a curved smile on a small circle muzzle. Color the 2 ear triangles with a light pink marker for the inner ear detail. Alternatively, draw a penguin face using the same triangle shape: paint the triangle black first, add a white oval belly on the lower section, and add orange triangle beak and eye details. Both designs use only the folded cardstock shape as the base without any additional paper or cotton parts.
FAQ
What are the easiest winter crafts for kids to make at home?
The easiest winter crafts for kids to make at home are paper snowflakes, cotton ball snowman cards, and tin foil snowmen. Paper snowflakes require only white paper and scissors. Cotton ball snowman cards use cardstock, cotton balls, and a glue stick. Tin foil snowmen require only aluminum foil with no glue, scissors, or paint. All 3 projects complete in under 20 minutes and suit children aged 3 and above with light adult guidance on folding and cutting steps. Every material for all 3 projects costs under 3 dollars in total and is available at any stationery or supermarket store.
What winter crafts for kids work for toddlers aged 2 to 3?
Winter crafts that work for toddlers aged 2 to 3 are paper bag snowmen, penguin handprint crafts, and cotton ball snowman cards. All 3 projects use washable materials, require no scissors for the child, and complete in under 20 minutes. Paper bag snowmen use only dot stickers and a paper strip scarf that toddlers apply independently. Handprint crafts require only pressing the hand onto paper with adult paint application. Cotton ball snowman cards use pre-cut paper shapes and glue sticks. Adults pre-cut all paper parts and apply glue to surfaces for children in this age group.
What materials do I need for winter crafts for kids at home?
The materials needed for winter crafts for kids at home are: white cardstock, colored paper, white copy paper, cotton balls, cotton wool, PVA craft glue, a glue stick, washable paint in white, black, brown, and blue, safety scissors, black markers, dot stickers, aluminum foil, cardboard tubes from toilet paper rolls, and craft sticks. These 15 materials cover every project on this list. Total cost for all materials is between 15 and 25 dollars for a full supply set that produces multiple projects from each material. Most items are available at supermarkets, stationery stores, and discount variety stores.
What winter crafts for kids work for a classroom or group setting?
Five winter crafts work best for classroom or group settings because they scale to large numbers without requiring individual adult supervision per child: paper snowflakes, cotton ball snowman cards, penguin handprint crafts, cardboard tube penguins, and marble painting snowflakes. All 5 projects complete in under 30 minutes. Pre-cutting all paper parts before the session reduces active supervision requirements during the craft activity. Setting up individual craft stations with pre-portioned materials for each child reduces material competition and keeps 20 to 30 children working simultaneously without waiting for shared supplies.
How do I make winter crafts for kids printable and easy to follow?
To make winter crafts for kids printable and easy to follow, create a one-page instruction sheet for each project showing 4 to 6 numbered steps with a simple line drawing beside each step. Print the instruction sheet at A4 size and laminate it for reuse across multiple sessions. Include a materials list at the top of each sheet with quantities per child. Pinterest and craft blog websites including firstpalette.com and happyhooligans.ca publish free printable winter craft instruction sheets for the most popular kids craft projects including snowflakes, snowmen, and winter animal characters.