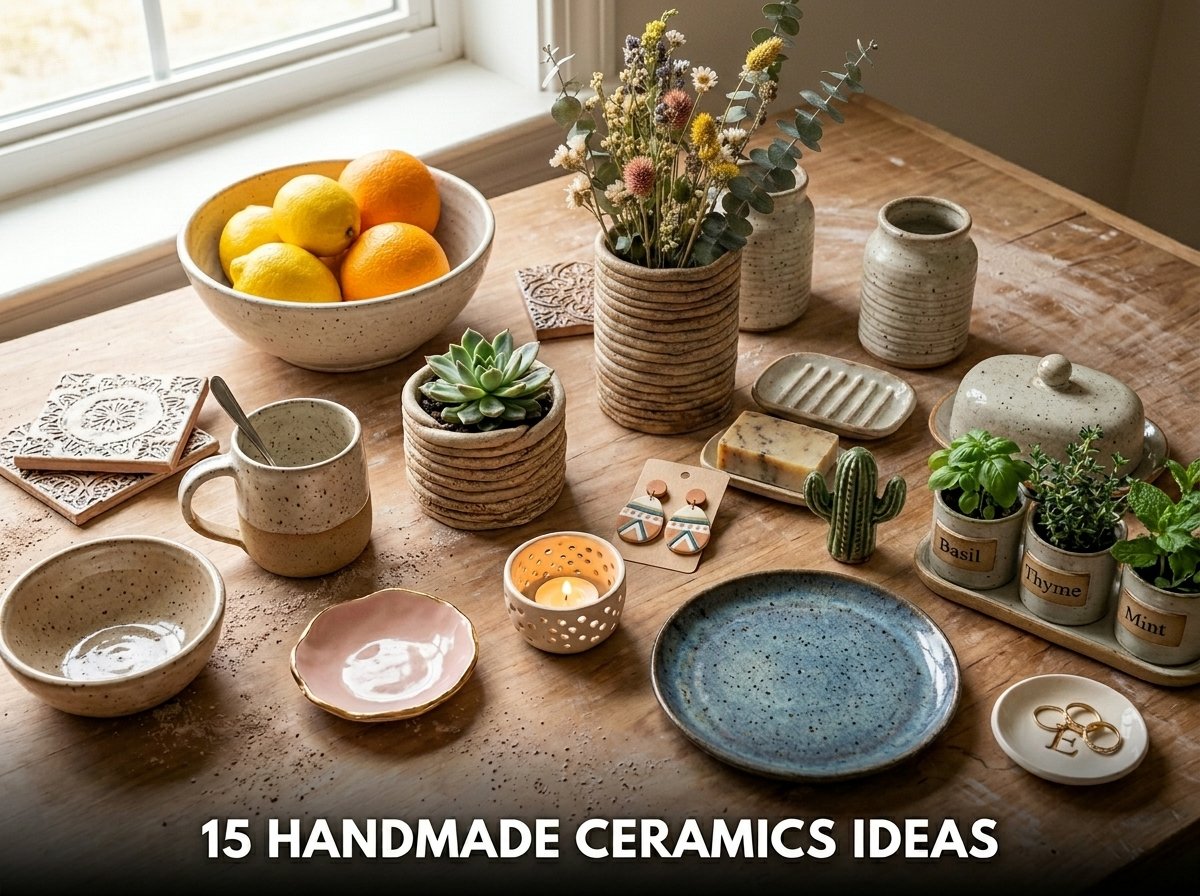
15 Handmade Ceramics Ideas to Spark Your Creativity
I pressed my hands into clay for the first time at a community pottery studio three years ago. The instructor handed me a block of earthenware, told me to wedge it for 5 minutes, and walked away. I had no idea what I was doing. Twenty minutes later I had a lopsided pinch pot that I was unreasonably proud of. That small bowl sat on my kitchen counter for two years holding paper clips.
If you want handmade ceramics ideas, all 15 options here work for beginners and experienced makers alike. Every project on this list uses hand building techniques, wheel throwing, or air dry clay so home crafters and studio potters both find something applicable.
These ideas cover functional ceramics including mugs, bowls, and planters, and decorative pieces including tiles, sculptures, and jewelry dishes. I selected each one because the construction method is clear, the clay type is specified, and the finishing options are practical at home or in a shared studio.
Most projects here fire in a standard electric kiln at temperatures between 1000 and 1280 degrees Celsius. Two projects use air dry clay and require no kiln at all, which suits makers working entirely at home without studio access.
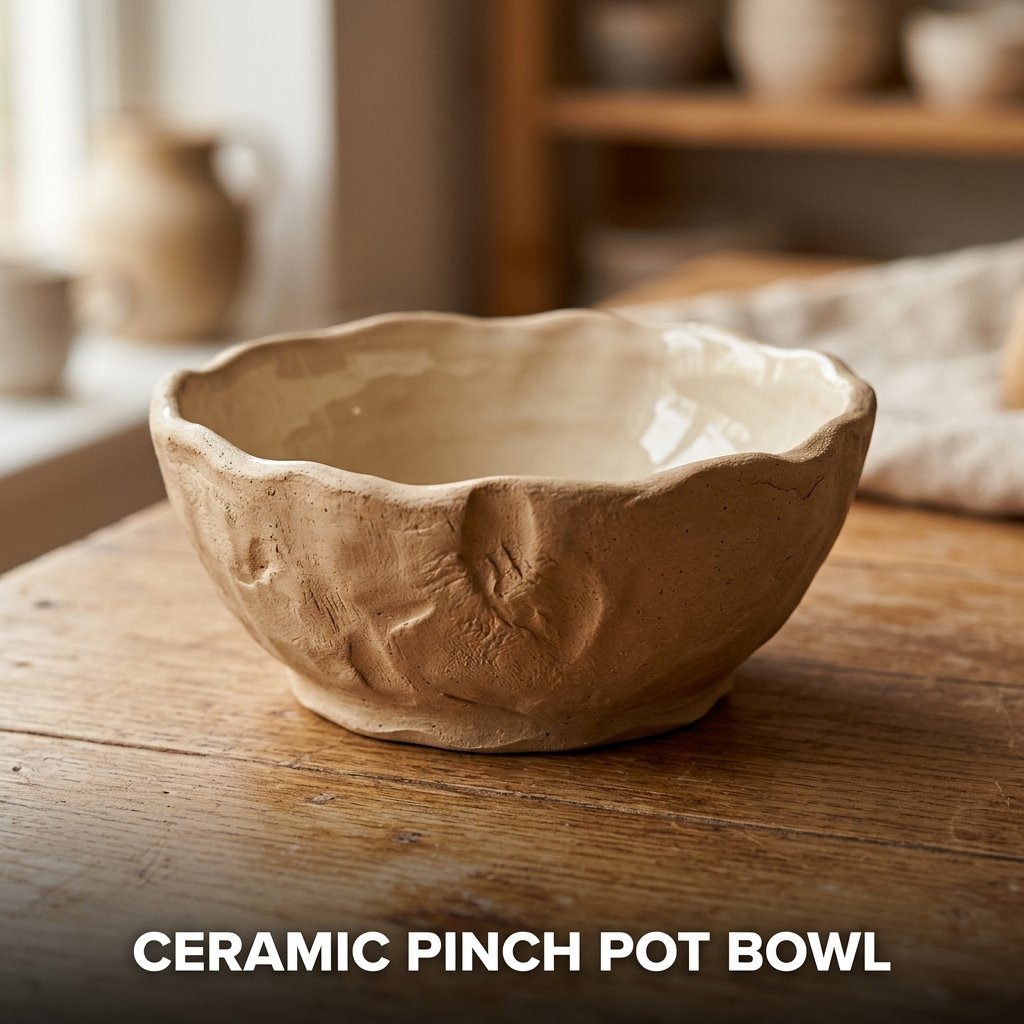
1. Ceramic Pinch Pot Bowl
A ceramic pinch pot bowl is the most accessible handmade ceramics idea for beginners because it uses only the hands, a ball of clay, and a smooth work surface to produce a functional bowl without any tools or wheel. I made my first set of 3 pinch pot bowls in 40 minutes at a studio open day using earthenware clay. After bisque firing and a clear gloss glaze coat, they looked like items from a craft store shelf.
Pinch pots suit beginners specifically because the technique requires no equipment beyond the clay itself and produces a tangible, usable result in a single session.
How to Form a Pinch Pot Bowl
Roll a ball of clay approximately 8 cm in diameter. Press your thumb into the center of the ball to a depth of 2 cm, stopping 1 cm from the base. Pinch the clay between your thumb on the inside and fingers on the outside, rotating the ball slowly as you work. Maintain an even wall thickness of 6 to 8 mm throughout. Work from the base upward to the rim. Smooth the rim by pressing it between wet fingers and rotating the pot against a flat surface.
Finishing and Glazing a Pinch Pot
Allow the pot to dry slowly to leather-hard stage, approximately 24 hours at room temperature, before smoothing any rough areas with a damp sponge. Bisque fire at 1000 degrees Celsius. Apply 2 coats of food-safe glaze to the interior and exterior after bisque firing, allowing each coat to dry before applying the next. Glaze fire at the temperature specified by the glaze manufacturer, typically 1060 to 1220 degrees Celsius depending on clay and glaze compatibility.
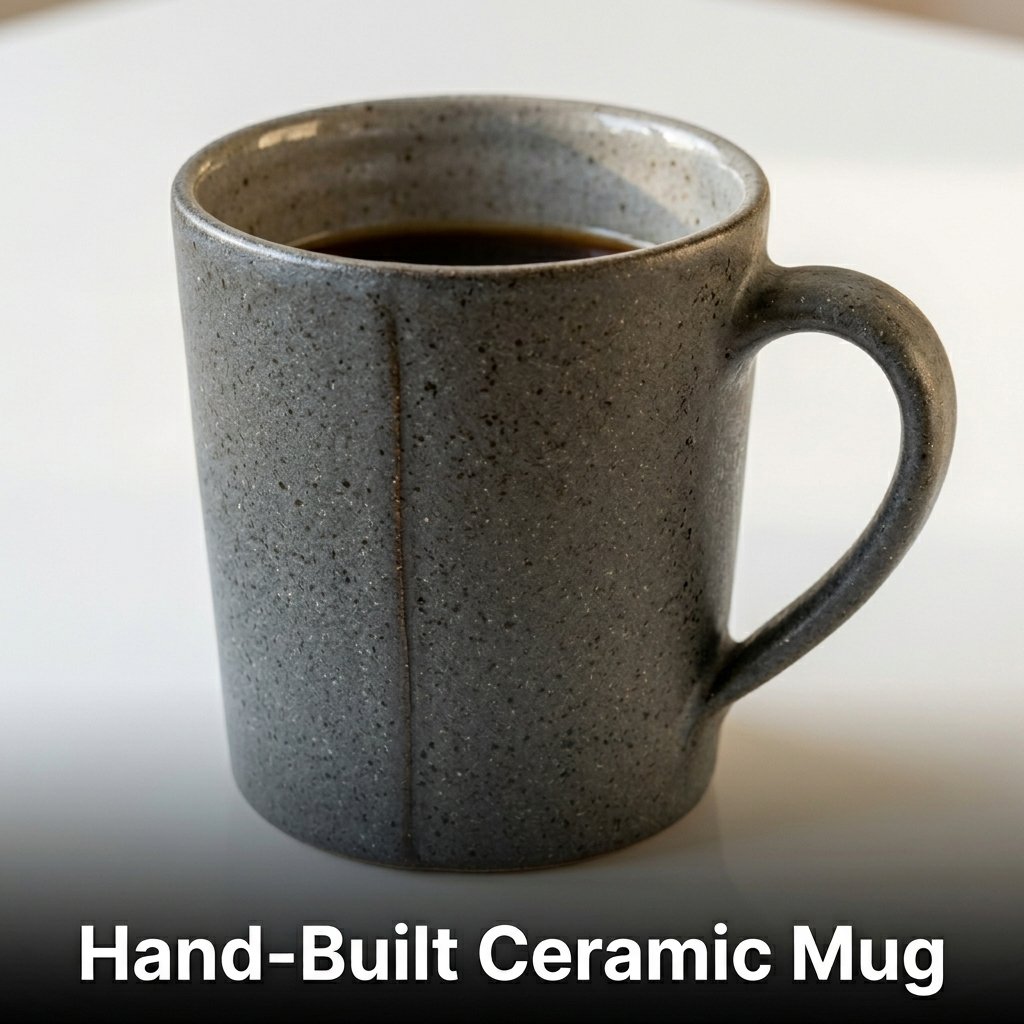
2. Hand-Built Ceramic Mug
A hand-built ceramic mug uses slab construction to produce a cylindrical drinking vessel without a pottery wheel, making it one of the most practical handmade ceramics ideas for makers without wheel access. I built my first slab mug in a workshop using stoneware clay rolled to 6 mm thickness. After firing and a matte glaze application, it became my daily coffee mug and has survived 3 years of daily use and dishwasher washing.
Stoneware clay produces the most durable hand-built mug because it fires to a dense, non-porous body at temperatures between 1200 and 1280 degrees Celsius.
Rolling and Cutting Slab Panels for a Mug
Roll stoneware clay to a consistent 6 mm thickness using guide sticks placed on either side of the clay slab. Cut a rectangle at 28 x 9 cm for the mug body and a circle at 8 cm diameter for the base. Score the joining edges with a serrated tool and apply slip before pressing the body rectangle into a cylinder. Join the vertical seam, then attach the base circle, smoothing all joins from the inside with a wooden tool.
Attaching a Handle to a Hand-Built Mug
Pull a handle from a thick coil of clay by gripping the coil firmly and drawing downward with a wet hand to taper and thin it. Cut a 12 cm length of pulled handle and allow it to stiffen slightly for 20 minutes before attaching. Score and slip both attachment points on the mug body. Press the handle ends firmly into the scored areas and blend the joins smoothly with a modeling tool. Allow the assembled mug to dry slowly under plastic sheeting for 48 hours before firing.
3. Ceramic Jewelry Dish
A ceramic jewelry dish is a shallow, flat-based handmade ceramics idea that holds rings, earrings, and small accessories on a vanity or bedside table. I made one at a pottery class using white stoneware pressed into a small wooden mold. The finished dish measured 12 cm across and 2 cm deep after firing and shrinkage. I glazed it with a matte blush pink underglaze and a clear gloss topcoat.
Jewelry dishes sell consistently on Etsy at 15 to 35 dollars each, making them one of the highest-margin small handmade ceramics ideas for studio potters and home ceramic sellers.

How to Form a Ceramic Jewelry Dish by Press Molding
Roll clay to 5 mm thickness. Cut a circle at 14 cm diameter. Press the clay circle gently into a small bowl or mold with a smooth interior, smoothing the clay against the mold surface with your fingers. Fold and pinch the edge of the clay upward by 1 to 2 cm to create a low rim. Allow the clay to stiffen inside the mold for 2 hours before removing. This prevents the dish from flattening out as it dries on a flat surface.
Decorating a Ceramic Jewelry Dish
Apply underglaze to the leather-hard dish surface using a soft brush before bisque firing. Underglaze colors remain stable through firing and produce consistent results when covered with a clear gloss glaze coat applied after bisque firing. Stamped patterns pressed into the clay surface before drying add texture that the glaze pools into during firing, producing a depth of surface detail not achievable with paint alone. Simple geometric stamps produce the cleanest results on small dish surfaces.
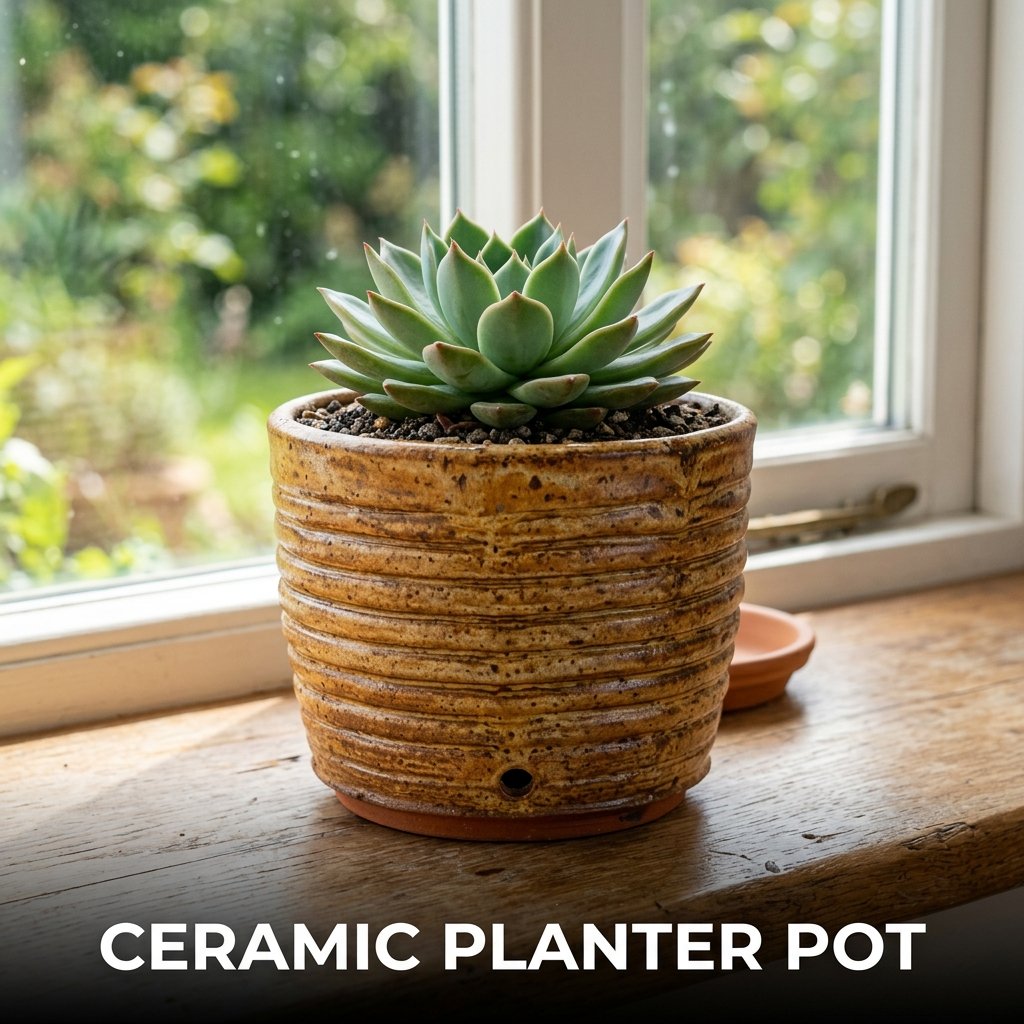
4. Ceramic Planter Pot
A ceramic planter pot uses coil building or slab construction to produce a vessel for growing houseplants, with a drainage hole in the base to allow water to escape. I built a set of 3 coil-built planters in a studio over 2 sessions. Each session was 90 minutes. The finished pots hold small succulents on my windowsill and have not cracked or leaked through 2 years of regular watering.
Planters require a drainage hole cut through the base clay before drying, as drilling through fired ceramic without specialist equipment risks cracking the finished piece.
Coil Building a Ceramic Planter
Roll clay into coils approximately 2 cm in diameter. Press the first coil into a flat circle for the base at 12 cm diameter. Stack subsequent coils on top of each other, scoring and slipping each join before pressing the coils together. Blend the coils on the interior surface using a wooden rib tool to strengthen the joins. Leave the exterior coil texture visible for a decorative effect or smooth it entirely for a clean finish. Cut a 1 cm drainage hole through the base before the clay stiffens.
Glazing Options for a Ceramic Planter
Apply a reactive glaze to a ceramic planter for a textured, multi-toned surface finish that suits rustic and boho interior styles. Reactive glazes containing iron oxide or rutile produce unpredictable color variations during firing that differ across each individual piece. Apply a solid matte glaze for a minimalist finish in a consistent single color. Leave the exterior unglazed and glaze only the interior of a planter for a raw, earthy appearance that shows the natural clay body color and texture.
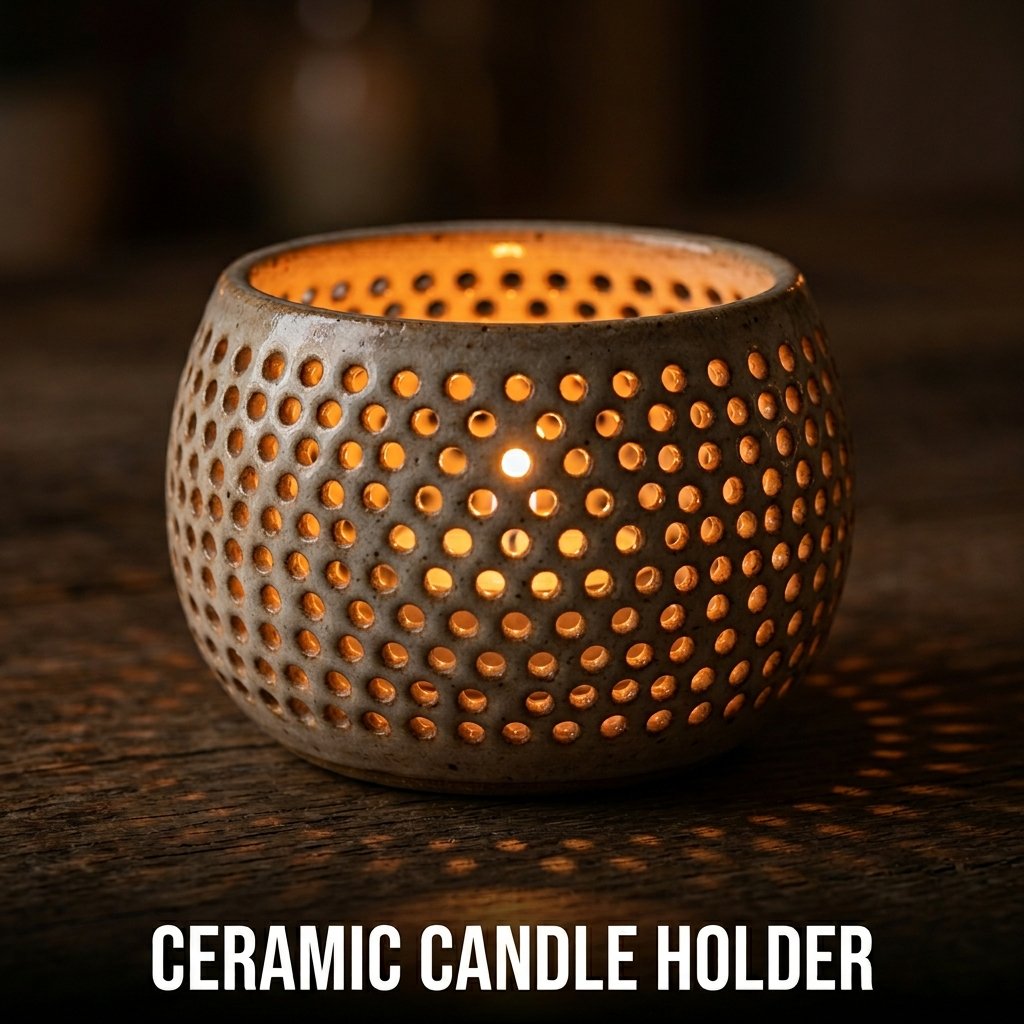
5. Ceramic Candle Holder
A ceramic candle holder uses pinch pot or slab construction to produce a vessel for holding tea light or pillar candles. I made a set of 6 tea light holders at a pottery studio over one 2-hour session using earthenware clay. After a transparent glaze firing, the holders glow with warm light when the tea light burns inside them. The set sells at my local craft market for 5 dollars each.
Tea light holders fire at earthenware temperatures of 1000 to 1060 degrees Celsius, which suits community studio kilns that do not reach stoneware temperatures.
Forming a Tea Light Candle Holder
Form a pinch pot at 7 cm in diameter and 5 cm tall using the standard pinch pot method. Keep the base flat and the walls vertical rather than curved outward. The wall thickness stays at 6 mm to allow light to glow through the fired clay walls at tea light intensity. Pierce small holes through the walls using a pointed tool before the clay reaches leather-hard stage, as piercing leather-hard clay without cracking requires firm, deliberate pressure from a sharp-pointed tool.
Piercing Patterns for Decorative Light Effects
Use a pattern of small circular holes, star shapes, or geometric grids to create a projected light pattern on surrounding surfaces when a candle burns inside the holder. Mark the hole positions with a pencil on the leather-hard clay surface before piercing. Punch each hole with a single firm press of a round-tipped tool rather than a twisting motion, which can crack the surrounding clay. Space holes at minimum 8 mm apart to prevent the clay wall from weakening between adjacent holes.
6. Wheel-Thrown Ceramic Bowl
A wheel-thrown ceramic bowl uses a pottery wheel to center a ball of clay and open, pull, and shape it into a functional bowl form. I threw my first bowl at a beginner wheel class after 3 practice sessions of centering only. The first bowl that survived trimming and firing measured 18 cm across and held its round shape through a cone 6 stoneware firing. I use it as a fruit bowl on my kitchen counter every day.
Wheel throwing produces a more uniform wall thickness and a smoother interior surface than hand building at comparable skill levels beyond the initial learning curve.

Centering Clay on a Pottery Wheel
Place 500 grams of stoneware clay on a wet wheel head and press it into a rough dome shape. Set the wheel speed to fast, approximately 150 rpm for a beginner. Wet both hands thoroughly. Press the clay firmly with both hands simultaneously: the left hand pushes inward from the side while the right hand presses downward from the top. Repeat until the clay spins without wobbling. Centering takes 3 to 10 minutes depending on the potter’s experience level.
Opening and Pulling a Bowl Form
Press both thumbs into the centered clay dome to open the base, leaving 1 cm of clay at the bottom. Pull the clay walls outward and upward by pinching between wet fingers on the inside and outside simultaneously while the wheel turns at medium speed. Increase the bowl diameter by angling your inside hand outward during each pull. Make 3 to 4 pulls to reach the final bowl diameter. Finish the rim by compressing it between wet fingers at slow wheel speed.
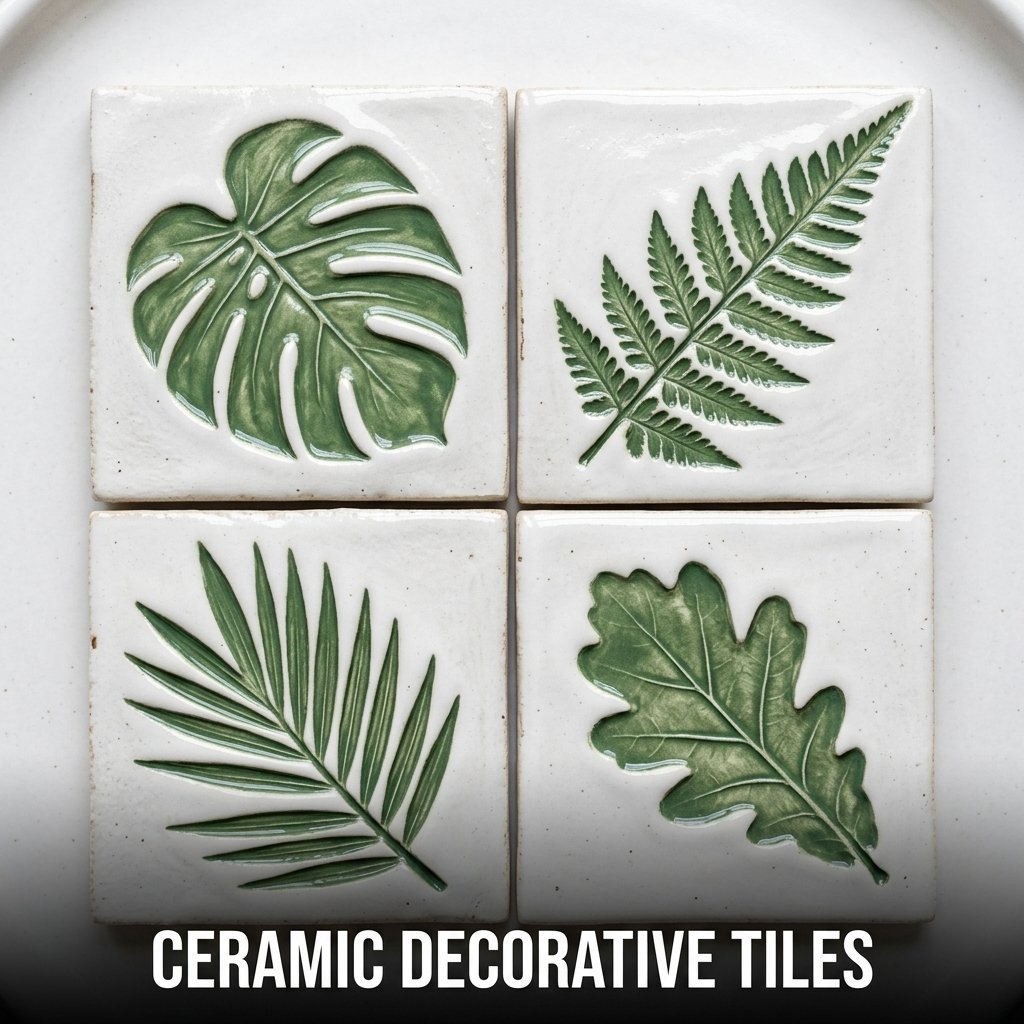
7. Ceramic Decorative Tiles
Ceramic decorative tiles use rolled clay slabs cut into uniform squares and decorated with stamps, carving, or underglaze painting before firing. I made a set of 12 tiles at 10 x 10 cm from white stoneware in one 3-hour studio session. After firing with a clear gloss glaze, the set installed as a small decorative panel above my kitchen sink using standard tile adhesive and grout. The total firing cost at a community studio was 8 dollars.
Decorative tiles are one of the most scalable handmade ceramics ideas for selling because a single rolling and cutting session produces multiple units simultaneously from one slab.
Rolling and Cutting Uniform Clay Tiles
Roll white stoneware clay to 8 mm thickness on a canvas work surface. Cut tiles at 10 x 10 cm using a tile cutter or sharp knife guided by a metal ruler. Cut all tiles from the same slab rolling to keep thickness consistent across the set. Place cut tiles on a flat board covered with canvas and allow them to dry under light plastic covering for 48 hours before moving. Tiles dried too quickly on hard surfaces develop a concave warp that makes flat installation impossible after firing.
Decorating Tiles With Stamps and Underglaze
Press a rubber or bisque clay stamp into the leather-hard tile surface with firm, even pressure for a crisp impression. Apply underglaze paint inside the stamped impressions using a fine brush for a two-tone decorative effect. Apply a contrasting underglaze color to the tile surface and wipe back to leave color only in the recessed stamp impressions. This color-wipe technique produces a clean, graphic result without requiring fine brush control across the full tile surface.
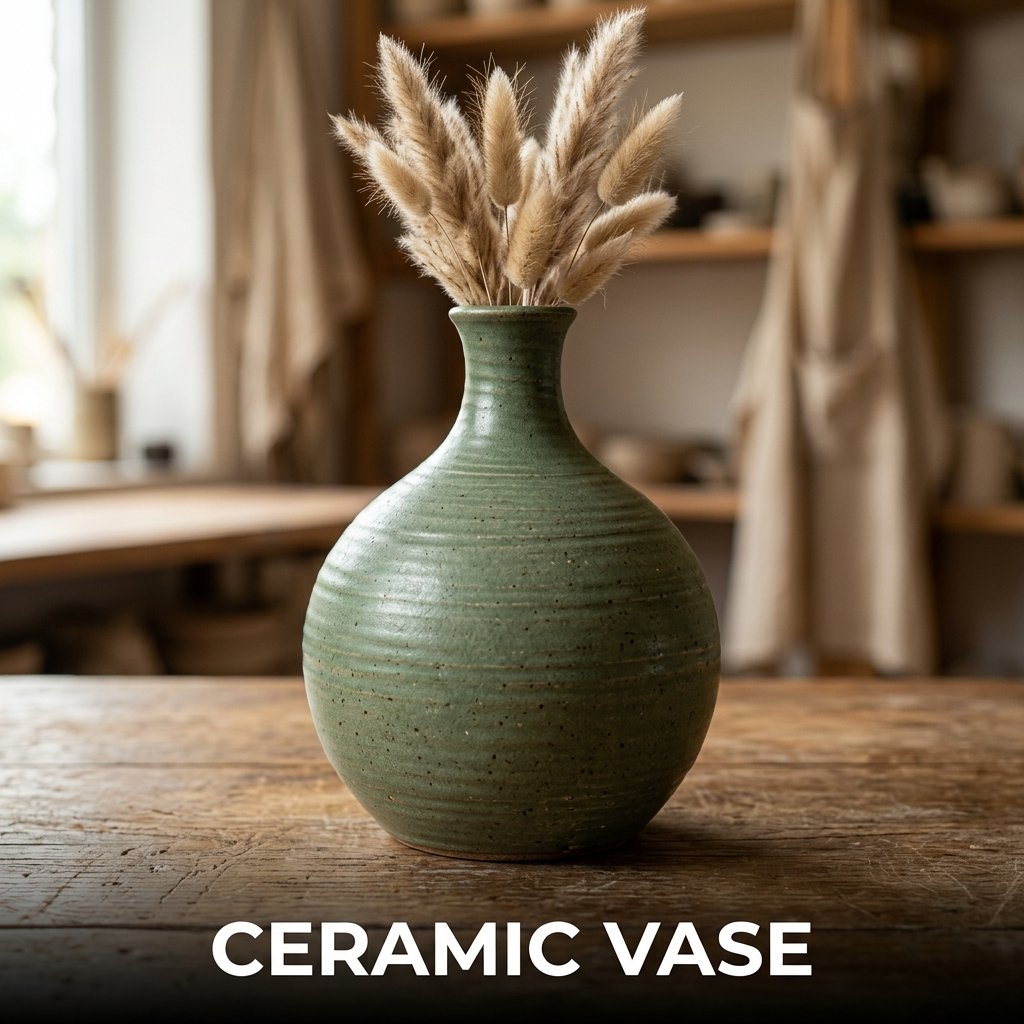
8. Ceramic Vase
A ceramic vase uses coil building, slab construction, or wheel throwing to produce a vessel for holding fresh or dried flowers. I coil-built a tall narrow vase at 25 cm height over 2 studio sessions using grogged stoneware clay. Grogged clay withstands the stress of building tall forms better than smooth clay because the grog particles in the clay body resist sagging during construction.
A tall ceramic vase is one of the most visually impressive handmade ceramics ideas for home display because the finished height creates a strong vertical element in a room composition.
Building a Tall Coil Vase Without Sagging
Build no more than 8 cm of coil height per session. Allow each section to stiffen for 30 minutes under light plastic before adding the next layer of coils. This staged drying method prevents the lower coils from collapsing under the weight of fresh wet clay added above them. Score and slip each coil join thoroughly before pressing coils together. Blend all interior joins completely with a wooden rib to produce a watertight wall that holds water for fresh flowers without a liner.
Neck and Rim Shaping on a Coil Vase
Taper the coils inward over the top 5 coil layers to narrow the neck diameter from the widest body point to the final opening diameter. Support the exterior of the neck with one hand while shaping from the inside with a curved metal rib tool to prevent the neck from collapsing inward under the shaping pressure. Finish the rim by rolling a thin coil and pressing it onto the top edge, then smoothing it flush with the neck walls using a wet finger and a gentle circular motion.
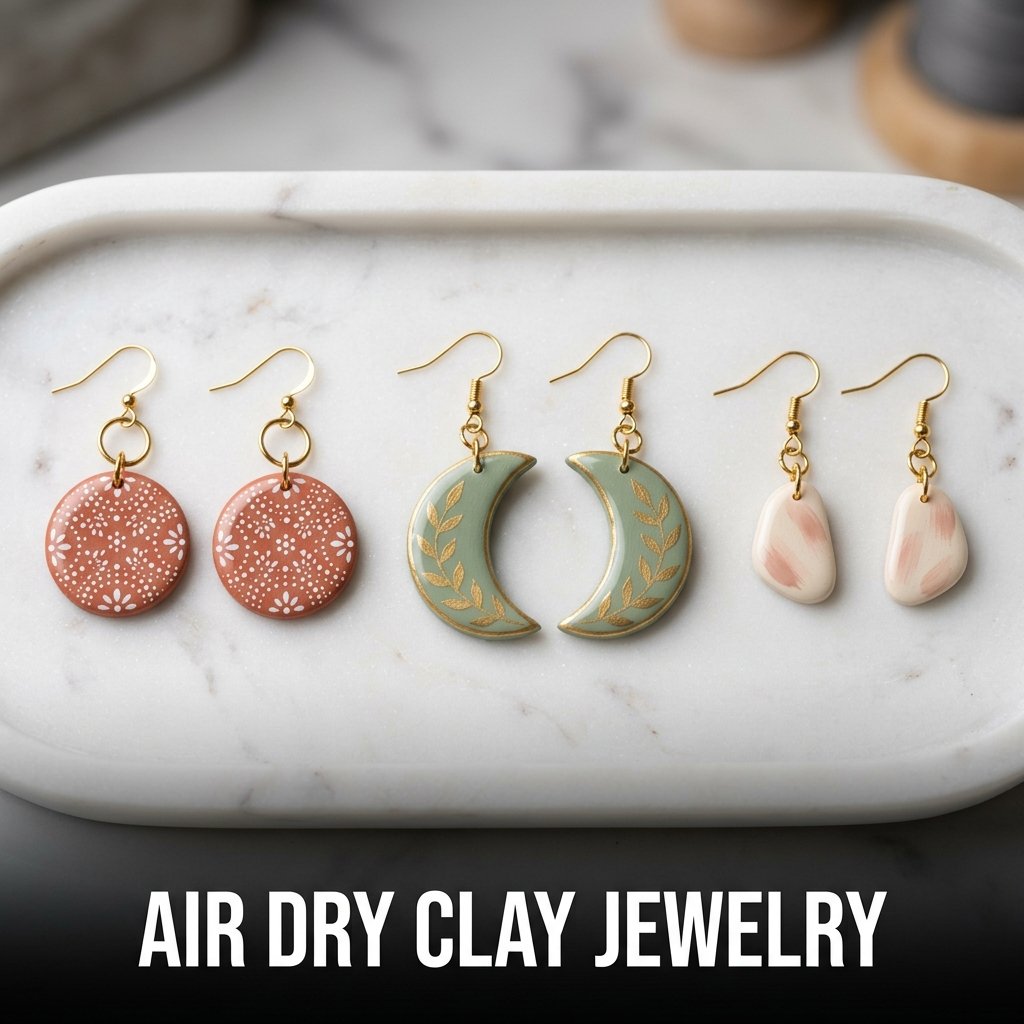
9. Air Dry Clay Jewelry
Air dry clay jewelry produces earrings, pendants, and charms from air dry clay that hardens at room temperature without kiln firing, making it the most accessible handmade ceramics idea for home crafters without studio access. I made my first set of earrings from white air dry clay in 30 minutes and painted them with acrylic paint after drying. The total material cost was 4 dollars for 6 pairs of earrings.
Air dry clay earrings sell on Etsy at 8 to 20 dollars per pair, making them one of the most profitable home-based ceramic craft ideas per hour of production time.
Shaping Air Dry Clay Earring Blanks
Roll air dry clay to 4 mm thickness on a smooth ceramic tile. Cut earring shapes using small clay cutters, a sharp knife, or the rim of a bottle cap for circles. Push an earring post or a small hole for a jump ring through the top of each shape before the clay begins to dry. Place the cut shapes on the ceramic tile and allow them to dry flat for 24 hours. Drying on a tile prevents the flat back surface from developing a rough texture during the drying process.
Painting and Sealing Air Dry Clay Earrings
Sand the fully dried earring blanks with 400-grit sandpaper to remove surface irregularities before painting. Apply 1 coat of white gesso as a base coat to produce even paint coverage. Apply 2 coats of acrylic paint in the desired design, allowing each coat to dry for 20 minutes. Seal with 2 coats of clear resin or strong varnish rated for wearable items. Standard craft varnish chips on jewelry during daily wear because wearable items experience friction that stationary display pieces do not.
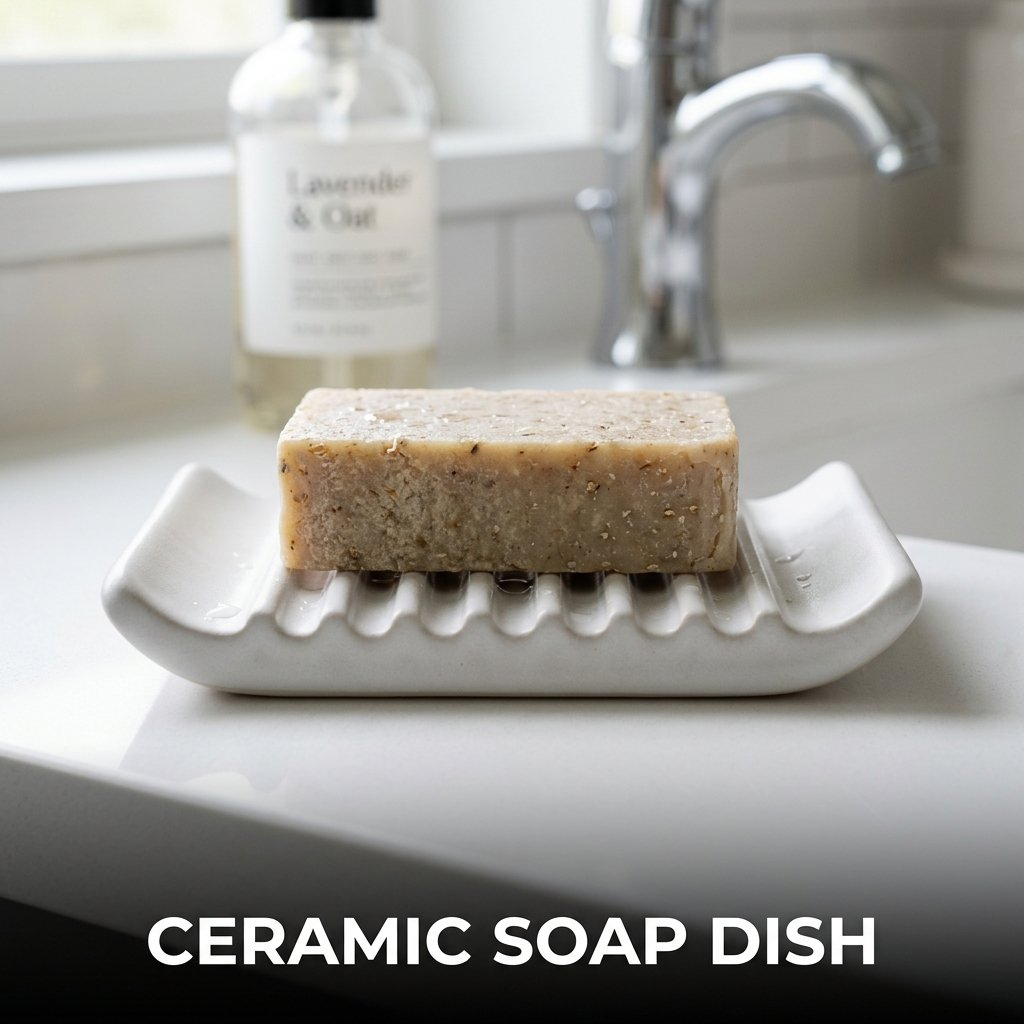
10. Ceramic Soap Dish
A ceramic soap dish uses slab construction with a textured or ridged base to hold a bar of soap above the dish surface, allowing water to drain away and extending the soap bar’s usable life. I pressed a slab into a small rectangular mold with ridges cut into the base and produced a functional soap dish at 10 x 7 x 2 cm in one studio session. After a matte white glaze firing, it sits beside my bathroom sink and holds its shape after 18 months of daily water contact.
Forming the Ridged Base of a Soap Dish
Roll stoneware clay to 6 mm thickness. Cut a rectangle at 12 x 9 cm. Use a serrated rib or a fork pressed across the clay surface to create parallel ridges at 1 cm intervals across the full base area. These ridges lift the soap bar above the dish base by 3 to 4 mm, which allows water to drain between the ridges rather than pooling under the soap. Press the ridged clay rectangle over a curved mold to produce a slight concave dish shape that prevents the soap from sliding off.
Glaze Choices for a Ceramic Soap Dish
Apply a matte white or matte grey glaze to a soap dish for a minimalist bathroom aesthetic. Matte glazes on soap dishes do not show water marks as visibly as gloss glazes, which reduces the appearance of water staining between cleaning sessions. Apply a food-safe glaze rated for daily water contact to prevent the glaze from crazing or absorbing water over time. Crazing refers to the network of fine cracks that develop in glaze when the glaze and clay body expand and contract at different rates during temperature changes.
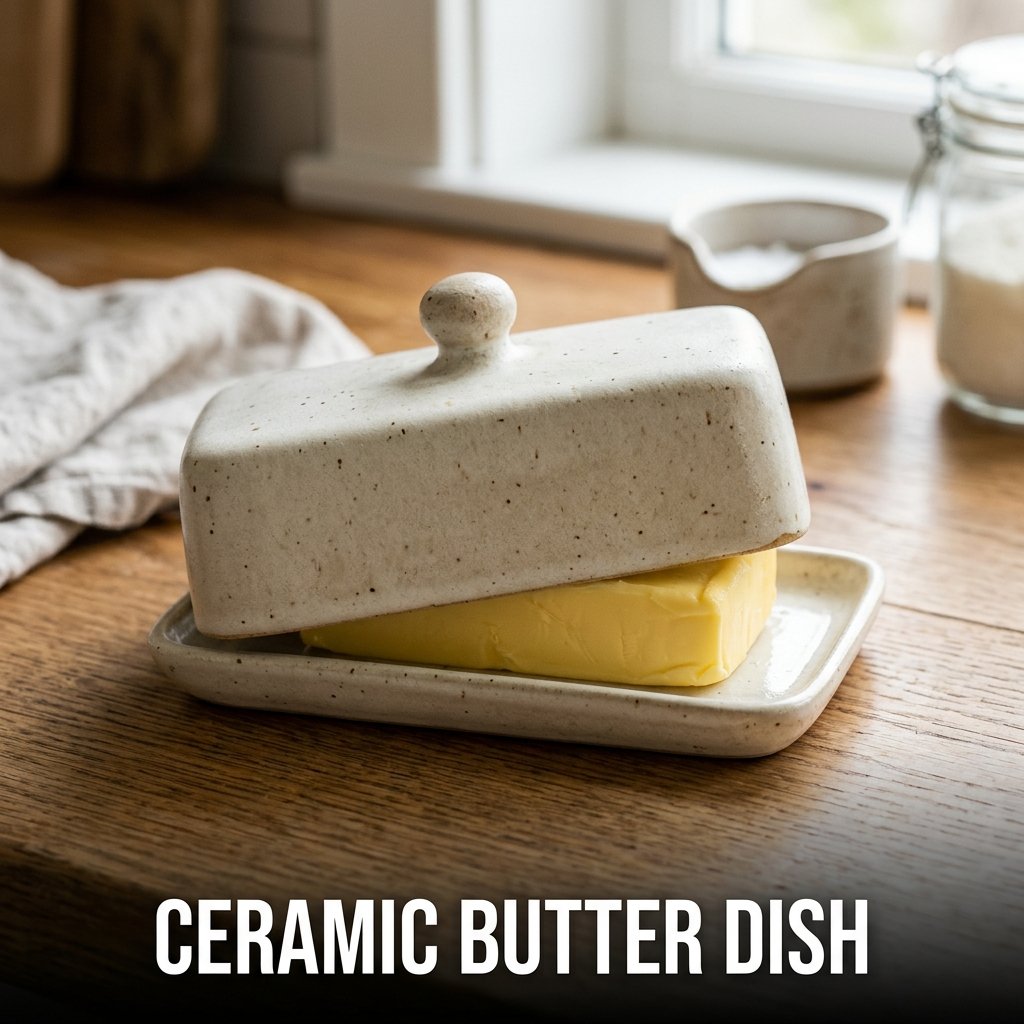
11. Ceramic Butter Dish
A ceramic butter dish uses slab or wheel-thrown construction to produce a lidded base for storing a standard butter block on a countertop. I threw the base and lid of a butter dish on a pottery wheel in separate sessions, trimming each piece after drying to create a fitted lid that sits flat on the base rim without rocking. The finished dish holds a 250-gram butter block and seals with a close-fitting lid that keeps the butter covered between uses.
Building a Slab Butter Dish Base
Cut a base rectangle at 14 x 9 cm from a 6 mm slab of stoneware. Cut 4 wall strips at 14 x 5 cm and 9 x 5 cm. Score and slip all joining edges. Attach the wall strips upright around the base rectangle, smoothing all interior joins with a modeling tool. The finished base interior measures 12 x 7 cm with 1 cm seam allowance on each side, which accommodates a standard 250-gram butter block with 5 mm clearance on each side for easy insertion and removal.
Making a Fitted Lid for a Ceramic Butter Dish
Cut the lid base at 14 x 9 cm from a 5 mm slab. Cut a gallery strip at 1.5 cm tall from the same slab to run along the inside perimeter of the lid, fitting inside the base walls when the lid closes. Score and slip the gallery strip to the underside of the lid base. The gallery strip positions the lid accurately over the base opening and prevents it from sliding sideways during use. Test the lid fit on the leather-hard base before firing, as clay shrinks 10 to 12 percent during firing and alters the lid-to-base fit.
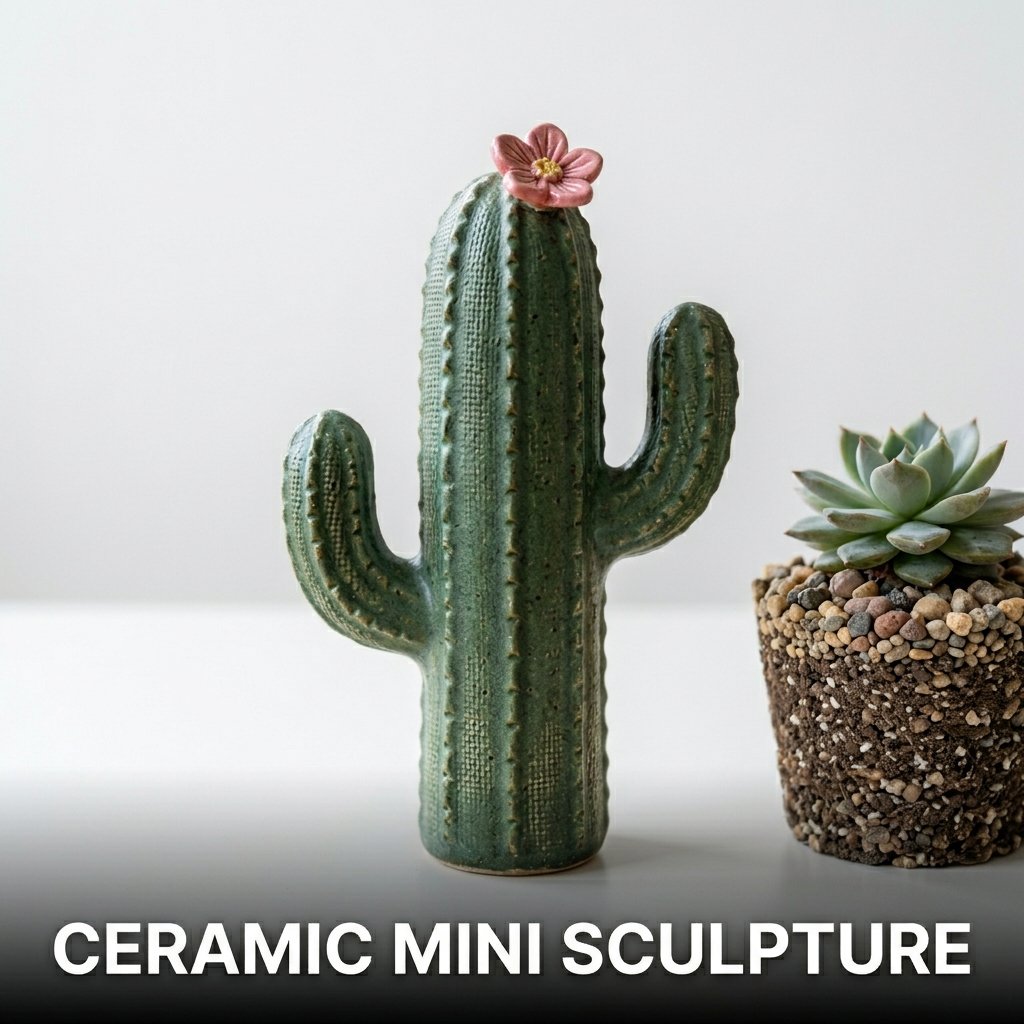
12. Ceramic Mini Sculpture
A ceramic mini sculpture uses hand building techniques to produce a three-dimensional decorative object between 5 and 15 cm tall, including small animal figures, abstract forms, and textured landscape pieces. I built a small ceramic cactus at 10 cm tall from grogged stoneware in one studio session. After firing with a matte green glaze, it sits on my desk beside a real succulent and gets mistaken for a commercial ceramic figure by everyone who sees it.
Armature Considerations for Ceramic Sculptures
Ceramic sculptures cannot use internal wire armatures because metal wire expands at a different rate than clay during kiln firing and causes the sculpture to crack. Instead, build hollow forms by rolling clay into thick coils and smoothing the interior surface. Leave a small hidden hole in the base of any enclosed form to allow steam to escape during firing. A sealed, solid ceramic form traps steam during kiln firing and explodes, damaging both the sculpture and other pieces in the kiln.
Surface Texture Techniques for Mini Sculptures
Press natural textures into the clay surface before drying to add visual detail to mini ceramic sculptures. Suitable textures include: fabric mesh, dried leaves, rough bark, and rope pressed against the clay surface. Each material leaves a different impression pattern in the clay that remains visible through the glaze firing. Underglaze applied selectively into textured recesses before a clear topcoat firing produces a color-highlighted texture effect that increases the visual detail of the finished sculpture surface.
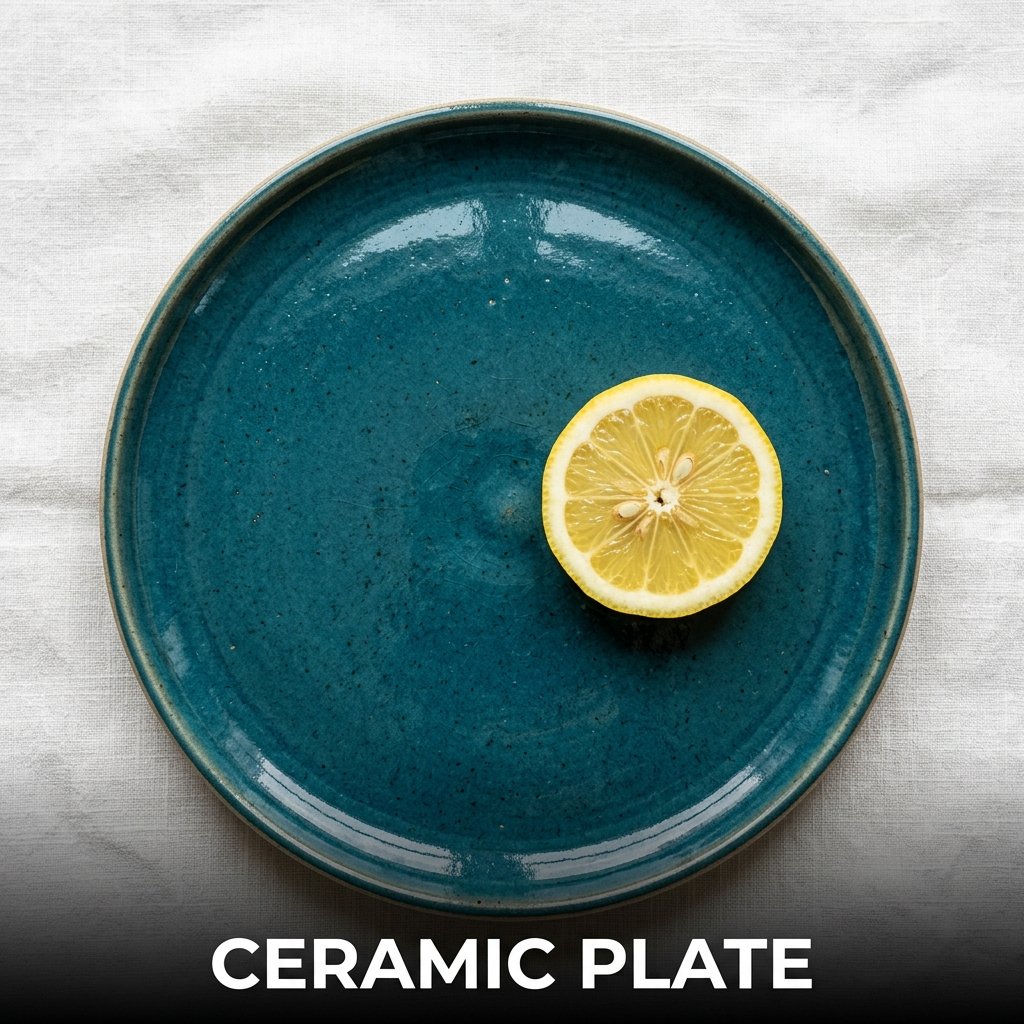
13. Ceramic Plate
A ceramic plate uses slab construction or wheel throwing to produce a flat eating surface with a raised rim for containing food. I rolled a 5 mm stoneware slab, cut it into a 22 cm circle, and draped it over a plaster hump mold to produce a slight dish curve before the clay stiffened. After bisque firing, 2 coats of food-safe gloss glaze, and a glaze firing to cone 6, the plate passed a water absorption test confirming it as food-safe and ready for daily use.
Food-safe ceramics require a clay body fired to full vitrification and a food-safe glaze with no lead or cadmium content, as these elements leach into food from improperly fired or formulated glazes.
Rolling a Slab for a Ceramic Plate
Roll stoneware clay to 5 mm thickness using guide sticks. Cut a circle at 24 cm diameter using a template and a sharp knife. Drape the cut circle over a clean plaster hump mold at 22 cm diameter, smoothing the clay over the mold surface with a soft rib tool. Allow the clay to stiffen on the mold for 2 to 3 hours until it holds its curved shape independently. Remove from the mold before the clay reaches leather-hard stage to prevent the clay from cracking as it contracts during drying.
Foot Ring Options for a Ceramic Plate
Attach a coil foot ring to the underside of the dried plate for a raised base that lifts the eating surface above the table. Roll a coil at 1 cm diameter and cut it to the circumference of a 16 cm circle. Score and slip both the coil and the plate underside before pressing the coil into a ring shape and attaching it to the plate center. Alternatively, trim a foot ring directly into the plate base after wheel throwing using a trimming tool on a slowly spinning wheel at leather-hard stage.
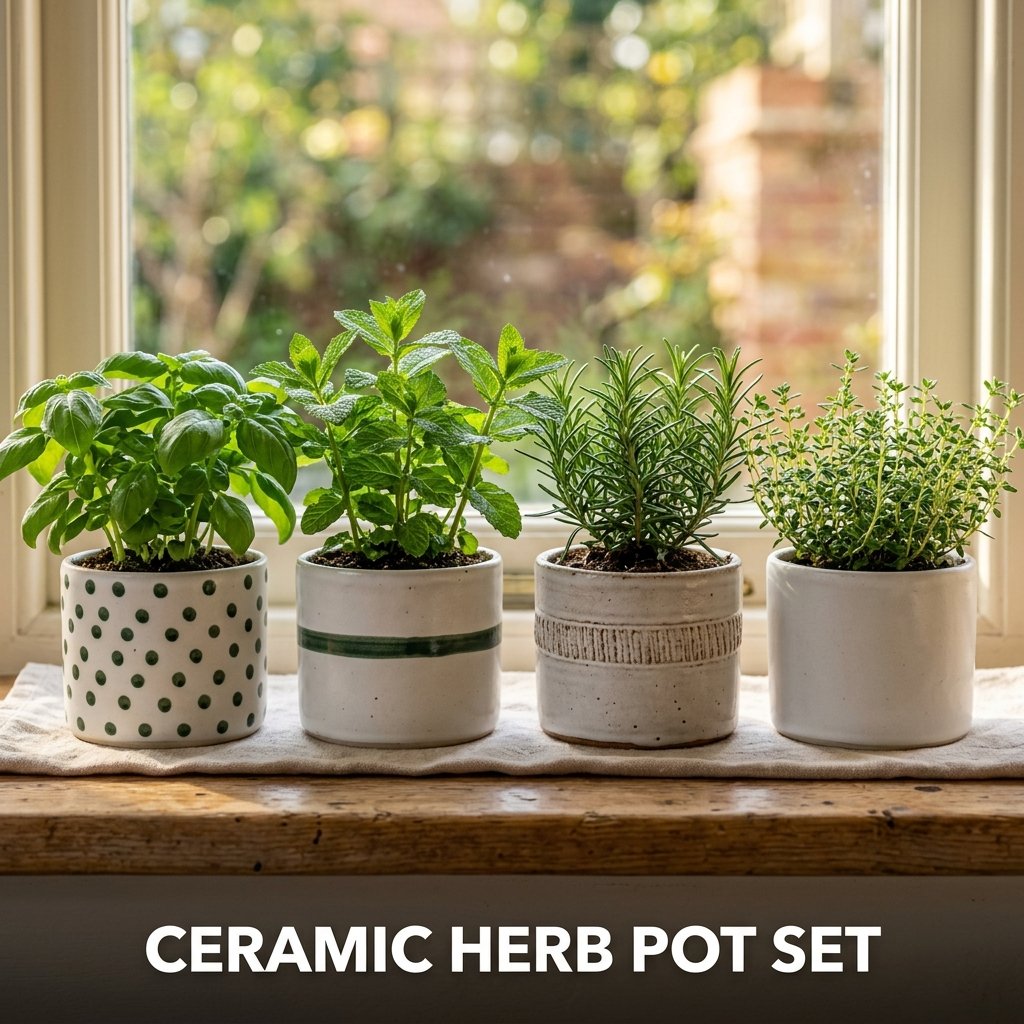
14. Ceramic Herb Pot Set
A ceramic herb pot set produces 3 to 5 small planters in matching or graduated sizes for growing kitchen herbs including basil, mint, and thyme on a windowsill. I made a set of 4 pinch pot herb pots at 8 cm diameter from earthenware clay in one 90-minute session. Each pot has a drainage hole in the base and sits in a small saucer formed from the same clay slab, cut into a 10 cm circle and slightly curved by hand.
A matching set of ceramic herb pots sells on Etsy at 35 to 65 dollars per set of 3, making this one of the most profitable multi-piece handmade ceramics ideas for studio sellers.
Matching the Size and Wall Thickness Across a Pot Set
Use a template cut from cardboard at the desired pot diameter to check all pots against the same size reference during building. Measure wall thickness at 4 points around each pot using a needle tool pushed through the wall at a standard pressure. Consistent wall thickness across all pots in a set produces even shrinkage during drying and firing, which keeps the finished set visually uniform in size even though each piece is built individually by hand.
Glazing a Herb Pot Set for Visual Cohesion
Apply the same base glaze color to all pots in the set for a coordinated appearance on a windowsill display. Vary the accent detail on each pot using a contrasting underglaze applied in a different simple pattern on each piece: dots on one, a stripe on the second, and a textured band on the third. This combination produces individual identity for each pot while the shared base color keeps the set reading as a coordinated group rather than unrelated individual pieces.
15. Ceramic Ring Dish With Raised Monogram
A ceramic ring dish with a raised monogram uses press molding or hand modeling to produce a small shallow dish with a single raised letter at the center for personalized jewelry storage. I made a monogram dish for a friend’s wedding gift using white porcelain clay pressed into a shallow mold with a letter stamp pressed into the center. After firing with a matte rose glaze, the letter read clearly through the glaze because the raised surface catches the light at a different angle than the surrounding flat dish area.
Monogrammed ceramic ring dishes sell on Etsy at 18 to 40 dollars each as personalized gifts, making them one of the most consistently searched handmade ceramics ideas in the personalized gift category.

Pressing a Raised Letter Into a Ring Dish
Press a bisque clay letter stamp or a commercial clay alphabet stamp firmly into the center of a rolled 5 mm clay slab before cutting the dish shape. The letter impression sits recessed in the clay at this stage. Cut the dish circle at 10 cm diameter and press it into a small bowl mold. As the clay curves over the mold, the recessed letter becomes raised on the concave interior surface of the finished dish. This press-molding technique produces a raised letter without hand modeling each letter individually.
Porcelain vs Stoneware for a Monogram Ring Dish
Porcelain produces the sharpest letter definition in a monogram dish because the fine particle size of porcelain clay holds crisp edges at the stamp impression borders. Stoneware produces a slightly softer impression edge due to the coarser clay particle size. Porcelain fires white and produces the strongest contrast under colored glazes. Stoneware fires grey or buff and suits earthy glaze colors including terracotta, sage green, and warm brown. Both clay bodies suit functional ring dish use at their respective firing temperatures.
FAQ
What clay works best for handmade ceramics ideas at home without a kiln?
Air dry clay works best for handmade ceramics ideas at home without a kiln because it hardens at room temperature without any firing equipment. White air dry clay produces the cleanest surface for painting with acrylic paints after drying. Air dry clay projects including jewelry dishes, earring blanks, and small decorative figures dry fully in 24 to 48 hours depending on thickness. Seal all finished air dry clay pieces with 2 coats of varnish or resin to prevent them from softening when exposed to water, as air dry clay is not waterproof without a protective sealant coating.
What are the easiest handmade ceramics ideas for complete beginners?
The easiest handmade ceramics ideas for complete beginners are pinch pot bowls, tea light candle holders, and ceramic jewelry dishes. All 3 projects use the pinch pot hand building technique, which requires no tools beyond the hands and a flat work surface. A beginner completes all 3 projects in a single 2-hour studio session. Pinch pots develop wall thickness control, the most important foundational skill in ceramic hand building. Completing 5 to 10 pinch pots before attempting slab building or wheel throwing produces faster skill development than starting with more technically demanding construction methods.
Do I need a pottery wheel for handmade ceramics ideas?
A pottery wheel is not required for most handmade ceramics ideas. Hand building techniques including pinch pot, coil building, and slab construction produce functional and decorative ceramics without any wheel. Pinch pots, coil-built vases, slab mugs, pressed tiles, and modeled sculptures all build without a wheel. Wheel throwing produces forms with more uniform wall thickness and a smoother interior surface than hand building at equivalent skill levels, but it requires 6 to 12 hours of practice before producing usable results. Hand building produces usable results within the first session for most beginners.
How much does it cost to start making handmade ceramics?
Starting handmade ceramics at home with air dry clay costs between 10 and 25 dollars for clay, basic tools, and paint supplies. Starting at a community pottery studio costs between 15 and 40 dollars per session including clay and kiln firing fees. Setting up a home studio with a pottery wheel and electric kiln costs between 800 and 3,000 dollars depending on equipment quality. Most beginners start at a community studio to develop skills before investing in home equipment. Community studios in most cities charge monthly membership fees between 50 and 120 dollars for unlimited studio access and kiln firing.
What handmade ceramics ideas sell best on Etsy?
Five handmade ceramics ideas sell most consistently on Etsy: monogrammed ring dishes at 18 to 40 dollars, ceramic jewelry dishes at 15 to 35 dollars, herb pot sets at 35 to 65 dollars per set, decorative tiles at 12 to 25 dollars each, and ceramic candle holders at 15 to 30 dollars each. Personalized pieces including monogram dishes and name-stamped items list at the higher end of each price range. Listings with multiple product photos showing the piece in a styled setting, from multiple angles, and with a size reference object generate significantly more views and sales than single-image listings on a plain background.