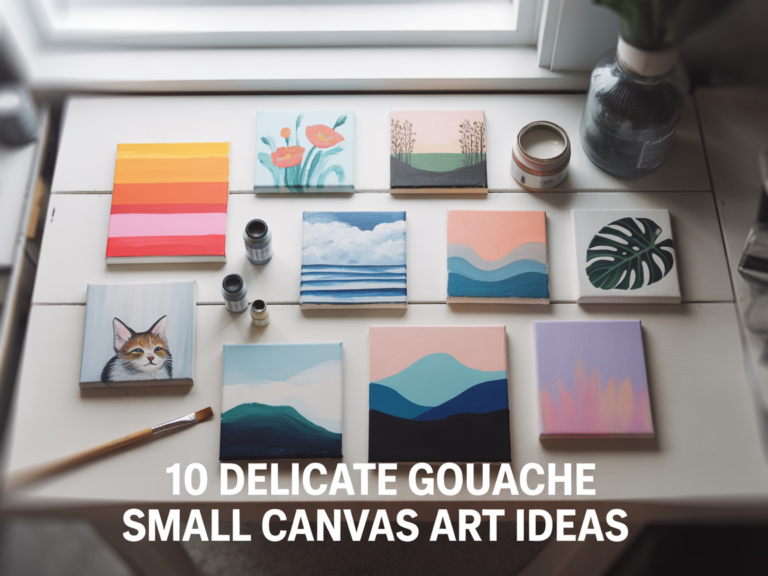
15 Mini Clay Ideas That Are Cute And Easy To Make
I bought my first block of polymer clay at a craft store with no plan and ended up spending three hours making a tiny donut with pink icing and rainbow sprinkles. It was 2 centimeters wide. I gave it to my niece as a charm and she asked me to make 12 more for her friends. That one small donut started a clay habit I have not recovered from.
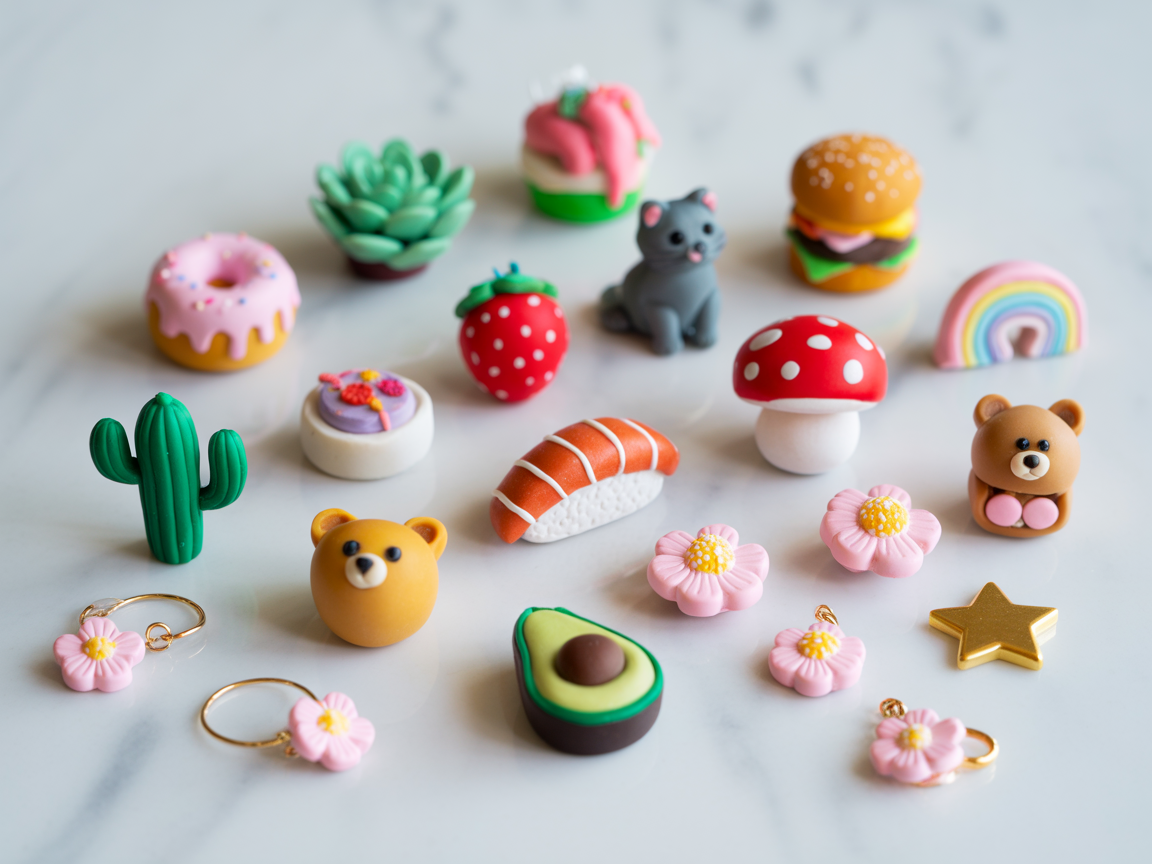
If you want mini clay ideas, all 15 options here use polymer clay or air dry clay and complete in under 60 minutes each. Every project suits beginners working at home without any specialist tools beyond a toothpick and a rolling surface.
These mini clay ideas cover food miniatures, animals, plants, keychains, and jewelry charms. I selected each one because the shape stays small enough to finish in one session, the tools needed are minimal, and the finished piece looks intentional enough to give as a gift or sell on Etsy.
Most projects here finish between 2 and 5 centimeters in size. Several qualify as cute mini clay ideas for kids aged 7 and above working with adult supervision during any baking steps.
Each section states the clay type, colors needed, tools used, and one tip that produces a noticeably better finished result on the first attempt.
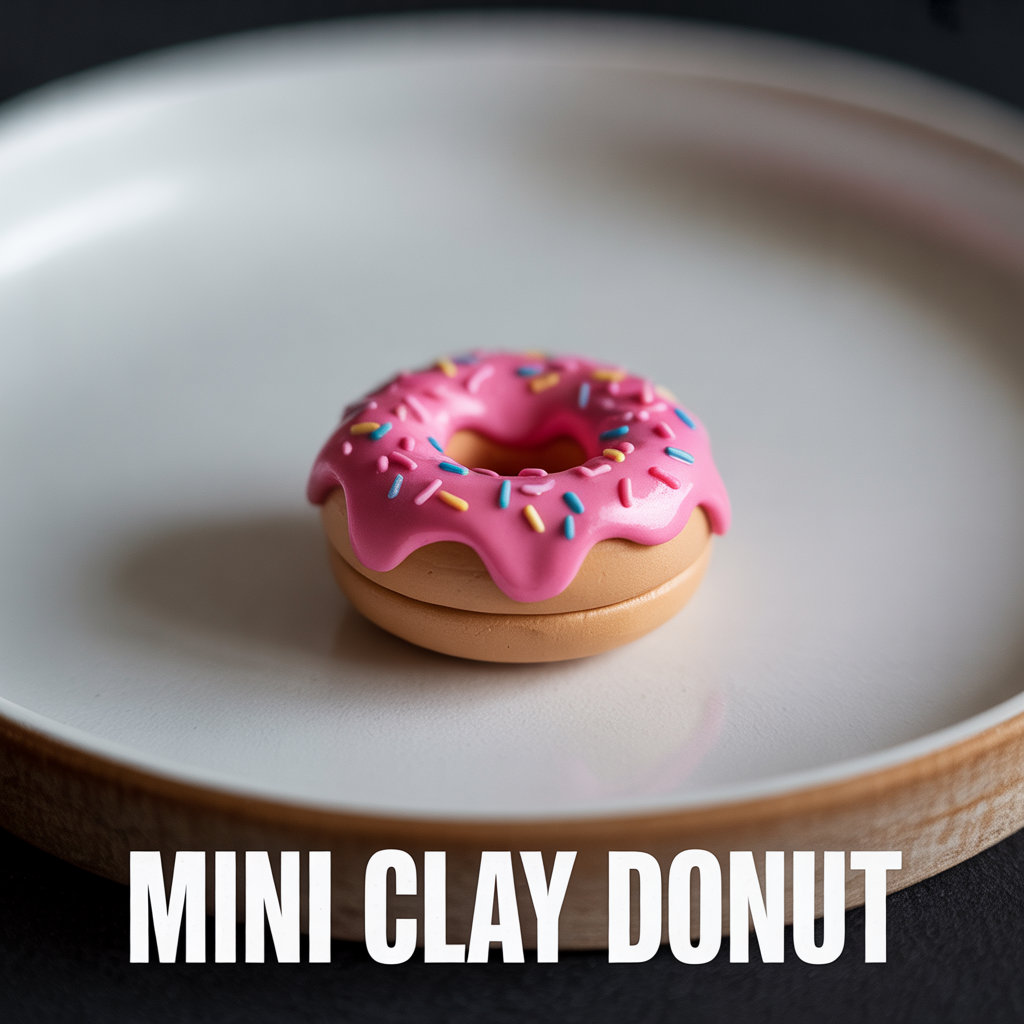
1. Mini Clay Donut
A mini clay donut uses a small ring of polymer clay shaped by hand, textured with a toothpick, and decorated with colored clay icing and sprinkle details to produce a 2 to 3 centimeter food miniature. I made my first set of 8 donut charms using Fimo soft polymer clay in pink, white, and chocolate brown. Each donut took 20 minutes to shape and decorate. After baking at 130 degrees Celsius for 30 minutes, the finished donuts received a coat of gloss varnish that made the icing surface look wet and edible.
Mini clay food ideas are among the most searched cute mini clay ideas on Pinterest because the recognizable shapes produce immediately satisfying results for beginners who have never worked with clay before.
Shaping a Mini Clay Donut Ring
Roll a small ball of beige or tan polymer clay at 2 cm diameter between your palms. Pierce the center of the ball with a pencil or thick toothpick and rotate the tool to open a hole at 8 mm diameter. Smooth the outer surface by rolling the ring gently between two fingers. Flatten the ring slightly by pressing it against a flat tile surface to produce the characteristic flat-bottomed donut shape. The finished raw donut ring measures approximately 25 mm across and 8 mm tall before baking.
Adding Icing and Sprinkles to a Clay Donut
Roll a thin sheet of colored polymer clay at 1 mm thickness using a small rolling pin or a smooth glass bottle. Cut a circle from the sheet at 20 mm diameter. Cut a smaller circle at 10 mm diameter from the center to produce a ring-shaped icing piece. Press the icing ring onto the top surface of the donut and smooth the edges downward slightly to simulate dripping icing. Add sprinkles by rolling tiny cylinders of brightly colored clay at 2 mm length and pressing them onto the wet-looking icing surface before baking.
2. Mini Clay Succulent
A mini clay succulent uses layered teardrop-shaped petals built outward from a center point to produce a realistic miniature succulent plant measuring 3 to 4 centimeters across in air dry clay or polymer clay. I made a set of 6 mini succulents in different green tones and placed them in small terracotta pots on my desk. They have sat there for 8 months and I have received 14 comments from visitors who thought they were real plants until they picked one up.
Mini clay plants are one of the most popular mini clay ideas for beginners because the petal-building technique develops basic clay shaping skills while producing a finished piece that suits desk decor, gift-giving, and Etsy selling.
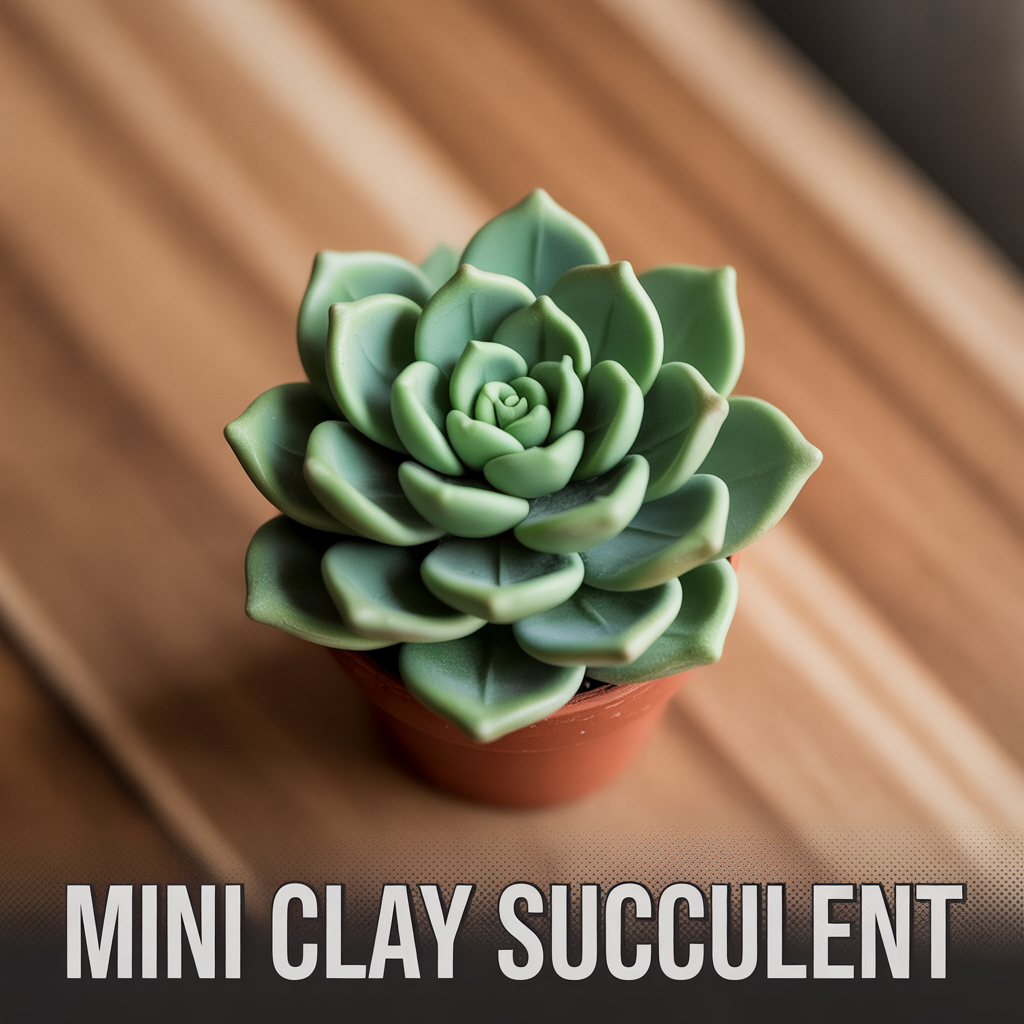
Shaping the Succulent Petals
Pinch a small piece of green polymer clay into a teardrop shape at 8 mm length and 5 mm width. Press it flat to 2 mm thickness using a fingertip. Curl the tip of the teardrop slightly upward. Make 5 to 6 identical petals for the outer ring, 4 slightly smaller petals for the middle ring, and 3 even smaller petals for the inner ring. The graduated petal sizes from outside to inside produce the depth and perspective of a real succulent rosette when assembled.
Assembling a Mini Clay Succulent Rosette
Press a small flat disc of green clay at 15 mm diameter onto a baking tile as the base. Attach the 5 outer petals around the base disc edge by pressing their flat base ends firmly into the clay disc surface. Overlap each petal slightly over its neighbor. Press the 4 middle ring petals between and above the outer ring gaps. Add the 3 inner petals standing more upright than the outer rings. Press one tiny ball of lighter green clay at the center to complete the rosette. Bake at 130 degrees Celsius for 25 minutes.
3. Mini Clay Strawberry
A mini clay strawberry uses red polymer clay shaped into a teardrop, textured with a toothpick, and topped with a small green leaf cluster to produce a 2 centimeter food miniature charm. I made a set of 10 strawberry charms for a bracelet in 45 minutes total. The finished charms photographed well enough on a plain white background to list on Etsy at 4 dollars each. All 10 sold within 3 days of listing without any promotion.
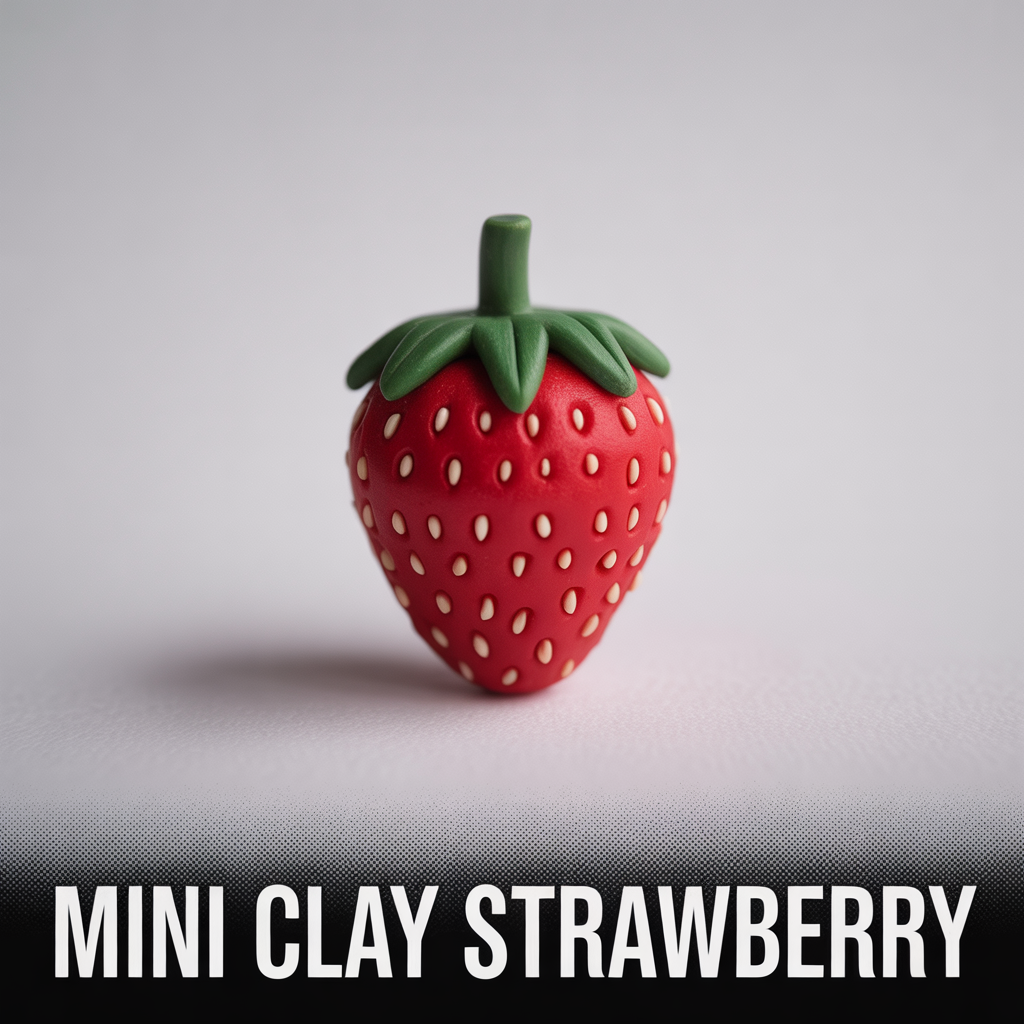
Shaping and Texturing a Clay Strawberry
Roll a 15 mm ball of red polymer clay and shape it into a teardrop by rolling one end between two fingers to produce a slight point at the base. Press small dots across the entire surface using a toothpick tip to represent the strawberry seeds. Space the dots at 2 to 3 mm intervals across all surfaces including the sides. Press each dot with a single firm toothpick press rather than dragging the tool, which produces a cleaner round depression rather than a scratched surface line.
Adding the Strawberry Top Leaf
Roll a small piece of green clay into a flat disc at 8 mm diameter. Cut 5 small triangular points around the edge of the disc using a craft knife or the edge of a toothpick to produce a star-shaped calyx. Press a small cylinder of green clay at 5 mm length upright from the center of the calyx for the stem. Press the assembled calyx and stem onto the flat top of the shaped strawberry body before baking. The stem allows the finished charm to hang from a jump ring on a bracelet or necklace without any additional drilling.
4. Mini Clay Cat Figurine
A mini clay cat figurine uses a simple sphere for the head, a rounded body, 2 pointed ear triangles, 4 short cylinder legs, and a curved tail to produce a sitting cat figure at 3 to 4 centimeters tall in polymer clay. I made my first mini clay cat using Sculpey III in grey and white and it became the most-requested item from anyone who saw my clay work in person. The face details take under 5 minutes using a toothpick and produce a recognizable cartoon cat expression.
Mini clay animal ideas suit beginners because the individual body parts use only basic ball and cylinder shapes that require no specialist tools or advanced sculpting technique to produce a recognizable finished figure.
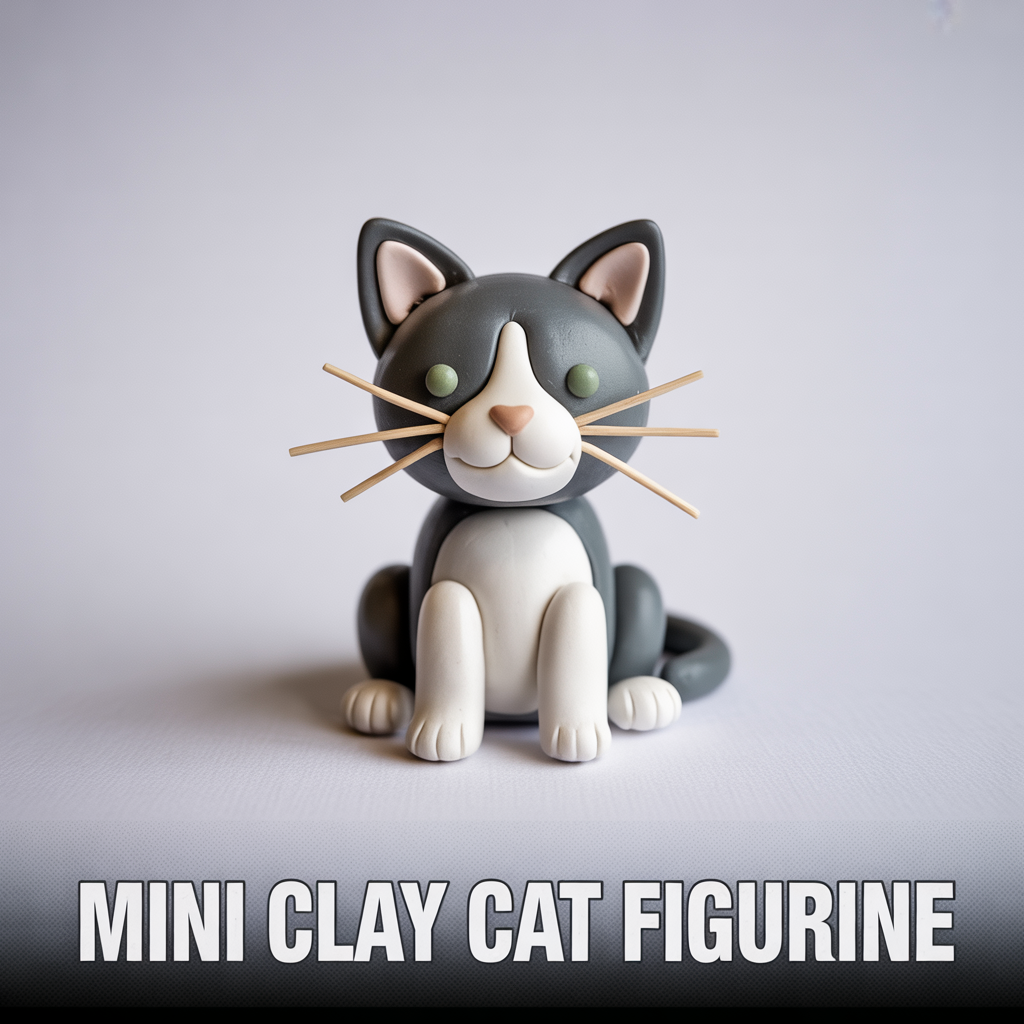
Building the Cat Body and Head
Roll a 20 mm ball of polymer clay for the body and shape it into a slight oval by pressing gently between both palms. Roll a 15 mm ball for the head. Roll 4 tiny cylinders at 8 mm length each for the legs. Press 2 legs to the front of the body base and 2 to the rear, bending the front legs slightly outward for a natural sitting position. Press the head onto the top of the body, blending the neck join smoothly with a fingertip. Roll a thin rope of clay for the tail and press it curving around one side of the seated body.
Adding Face Details to a Mini Clay Cat
Press 2 small triangles of matching clay color onto the top of the head for the ears. Press 2 tiny balls of green or blue clay for the eyes onto the face. Press a tiny triangle of pink clay for the nose below and between the eye positions. Use a toothpick to draw 3 whisker lines extending from each side of the nose. Draw a small curved smile below the nose using the toothpick tip. These 5 face elements take under 5 minutes to apply and produce a recognizable kawaii-style cat expression on the finished figurine.
5. Mini Clay Burger
A mini clay burger uses stacked layers of different colored clay to produce a miniature hamburger at 2 to 3 centimeters tall that resembles a real burger in cross-section when viewed from the side. I made a set of 12 mini burger charms last year as part of a food miniature charm pack. Each one used 6 separate clay layers and took 25 minutes to assemble. The finished charms listed on Etsy at 5 dollars each and sold as a full pack within one week.
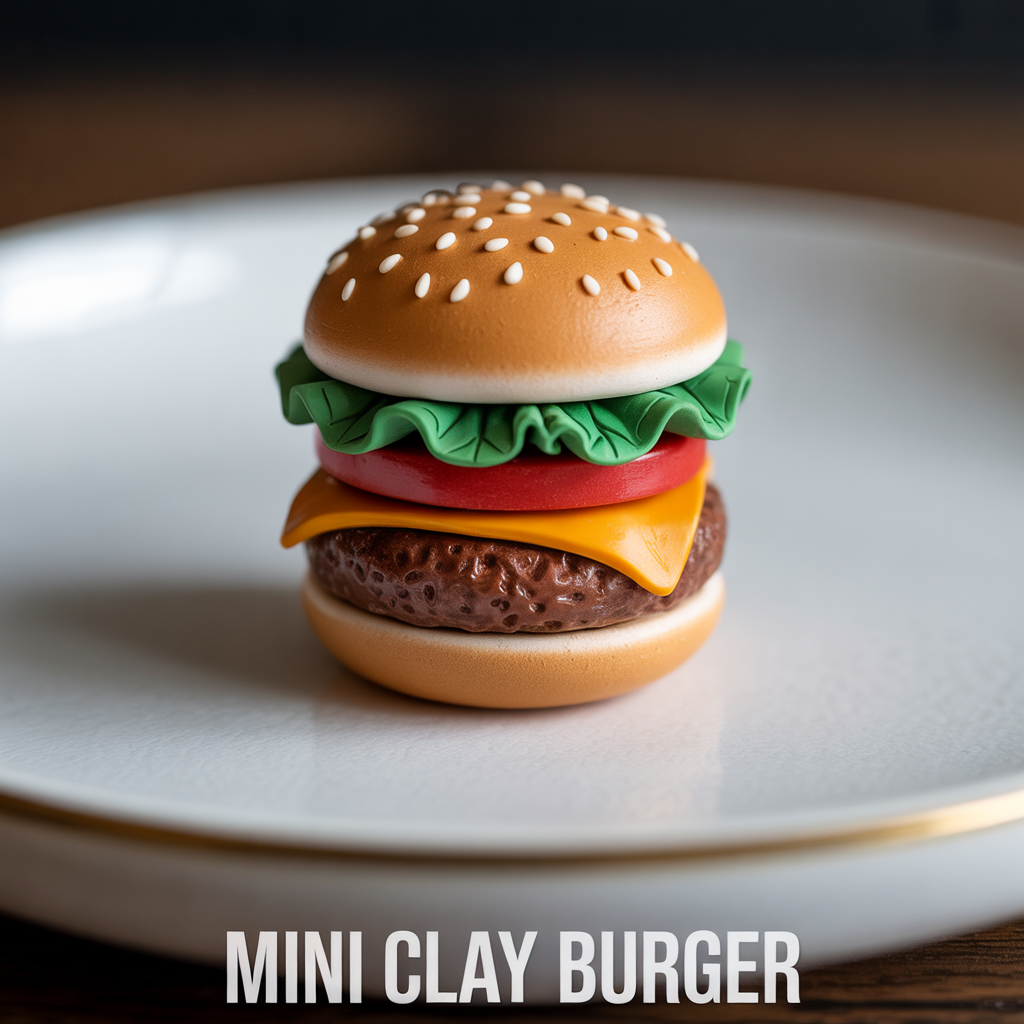
Layering a Mini Clay Burger
Shape the bottom bun from a flattened dome of tan clay at 18 mm diameter and 6 mm height. Add a flat disc of brown clay at 15 mm diameter and 3 mm height for the beef patty. Add a thin sheet of orange clay cut to the same diameter for the cheese layer. Add a flat disc of green clay cut into a leaf shape for the lettuce. Add a flat red disc for the tomato. Top with a slightly larger dome of tan clay for the top bun. Press a toothpick across the top bun surface to produce a sesame seed texture and add tiny white clay dots as seeds.
Keeping Burger Layers Aligned During Assembly
Press each layer firmly onto the one below it before adding the next to prevent the stack from slipping during baking. The burger stack tilts during baking if the layers are not pressed together with adequate pressure at each join. Insert a toothpick vertically through the center of the full assembled burger before baking to hold all layers in alignment. Remove the toothpick after baking while the clay is still warm and pliable. The toothpick hole at the top serves as the jump ring attachment point for converting the burger into a keychain or necklace charm.
6. Mini Clay Mushroom
A mini clay mushroom uses a red spotted cap over a white stem to produce a kawaii-style miniature mushroom at 2 to 3 centimeters tall in polymer clay. I made a set of 8 mushroom charms and used them as gift toppers on small presents at Christmas. Every recipient kept the clay mushroom long after discarding the gift wrapping. The red and white color combination produces immediate visual recognition as the classic toadstool character without requiring any detailed sculpting.
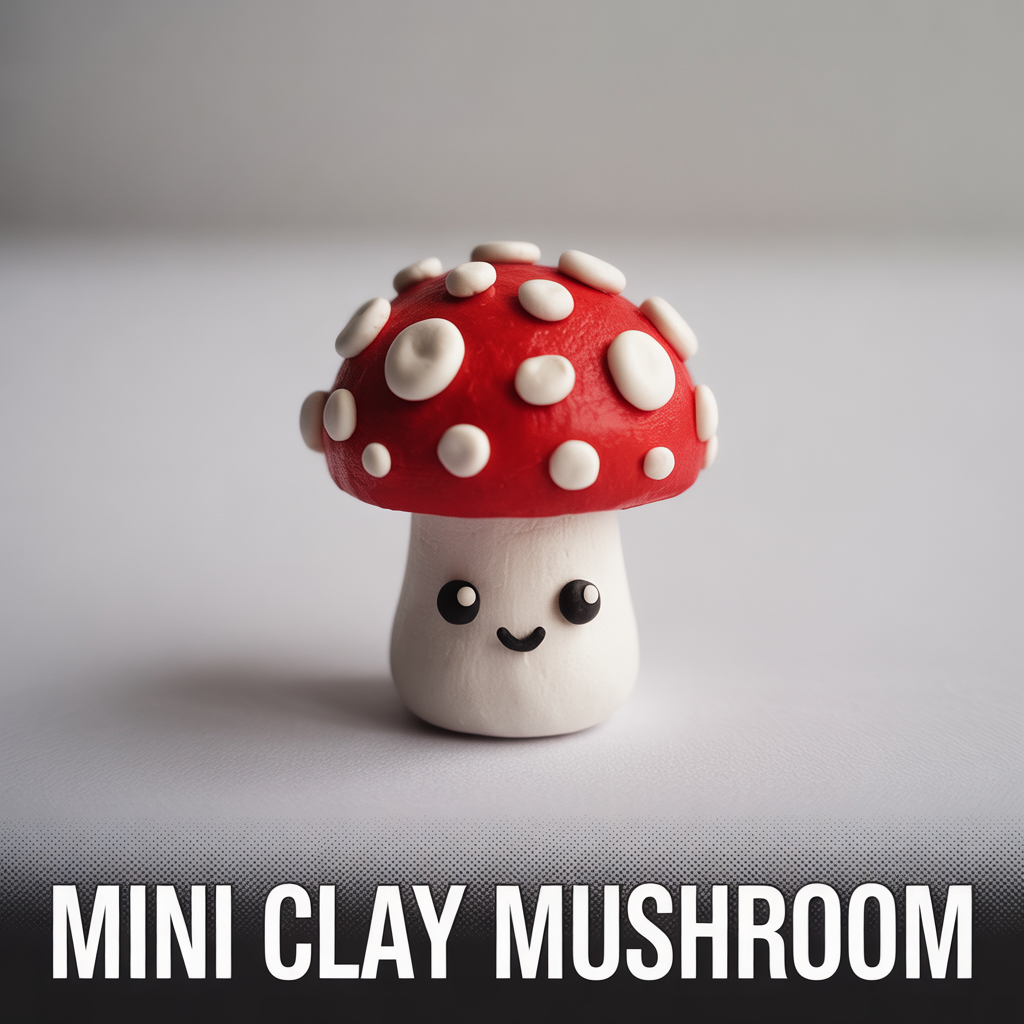
Shaping the Mushroom Cap and Stem
Roll a 15 mm ball of red polymer clay and press it into a dome shape at 20 mm wide and 12 mm tall by pressing the flat base against a tile surface. Roll a cylinder of white clay at 10 mm diameter and 15 mm tall for the stem. Flatten the base of the cylinder slightly for stability. Press the dome cap onto the top of the stem. Blend the join between cap and stem by smoothing the edge of the cap downward with a fingertip to produce the characteristic mushroom silhouette.
Adding White Spots to the Mushroom Cap
Roll 5 to 7 tiny balls of white polymer clay at 3 to 4 mm diameter each. Press each ball flat against the red dome cap surface using a fingertip, distributing them across the full cap surface in an irregular scattered arrangement. Apply light, even pressure to flatten each spot to 1 mm thickness without distorting the surrounding red cap surface. Add 2 small oval eyes and a curved smile to the lower front of the stem using a black clay tool or toothpick for a kawaii facial expression before baking.
7. Mini Clay Ring Dish
A mini clay ring dish uses air dry clay pressed into a small shallow mold or shaped by hand into a 5 centimeter round dish with a low rim for holding rings, earrings, and small jewelry items. I made a set of 4 ring dishes using air dry clay and painted them with pastel acrylic paint after drying. They sit beside my bathroom mirror holding daily jewelry and have not cracked, chipped, or warped after 14 months of regular use on a flat surface.
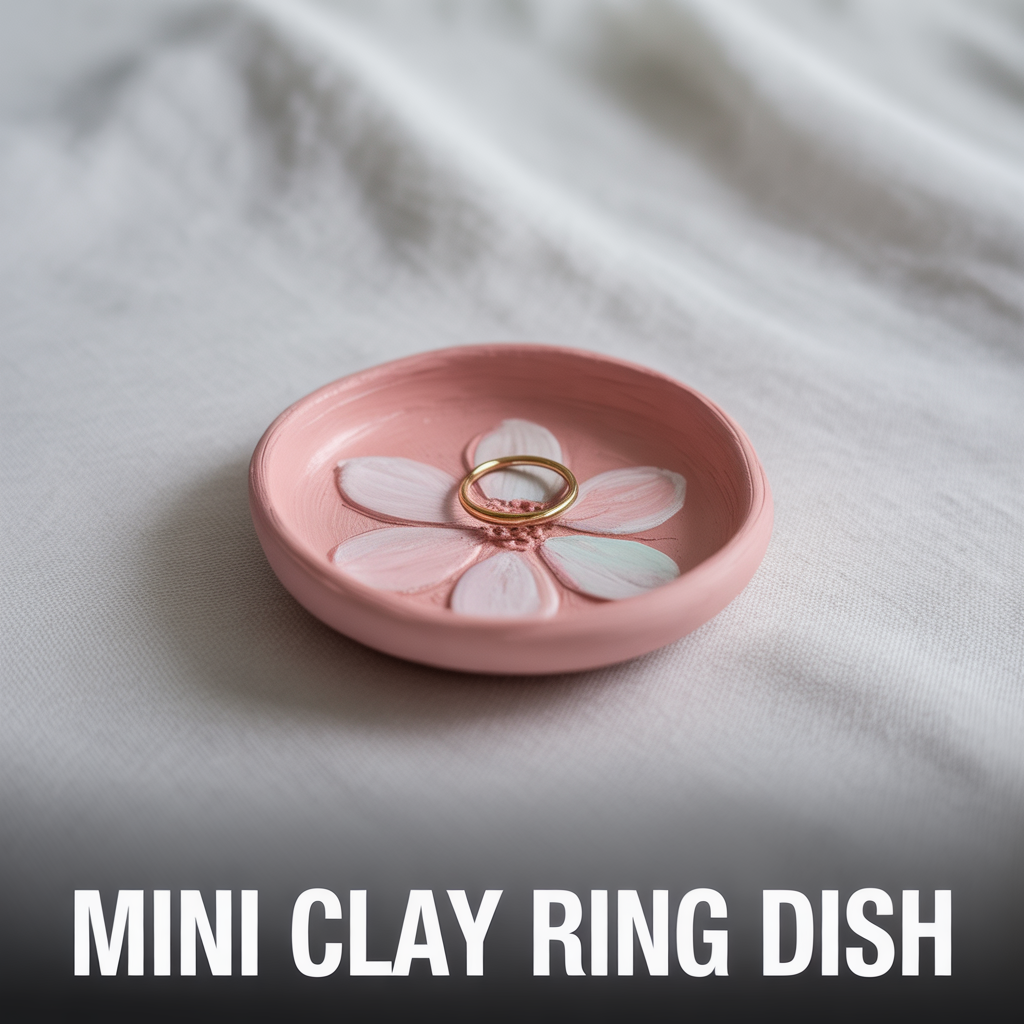
Forming a Mini Clay Ring Dish by Hand
Roll air dry clay to 5 mm thickness on a smooth tile. Cut a circle at 55 mm diameter using a bottle cap or round cutter pressed firmly through the clay. Press the circle into a small round bowl or teacup as a mold, smoothing the clay against the curved surface with a fingertip. Allow the clay to stiffen inside the mold for 2 hours before removing to prevent the dish from flattening as it dries on a flat surface. Transfer to a flat board to complete drying over 24 hours.
Painting and Sealing a Mini Clay Ring Dish
Sand the fully dried dish lightly with 220-grit sandpaper to remove any surface texture before painting. Apply one coat of white gesso as a base. Apply 2 coats of pastel acrylic paint in the desired color, allowing each coat to dry for 20 minutes. Add a small painted detail: a simple flower, a geometric pattern, or a short word in a contrasting color using a fine brush. Apply 2 coats of clear gloss varnish after all paint dries completely to seal the surface and protect it from moisture during daily jewelry contact.
8. Mini Clay Sushi
Mini clay sushi uses white clay for the rice block, colored clay for the fish topping, and a thin black clay strip for the nori seaweed wrap to produce a miniature sushi piece at 2 centimeters wide in polymer clay. I made a 6-piece sushi set as a charm collection and it became the most photographed clay project I have made. The 3-part construction, rice, fish, and nori, produces a realistic result at this small scale because the color contrast between the white, pink, and black layers reads as sushi immediately from any viewing distance.
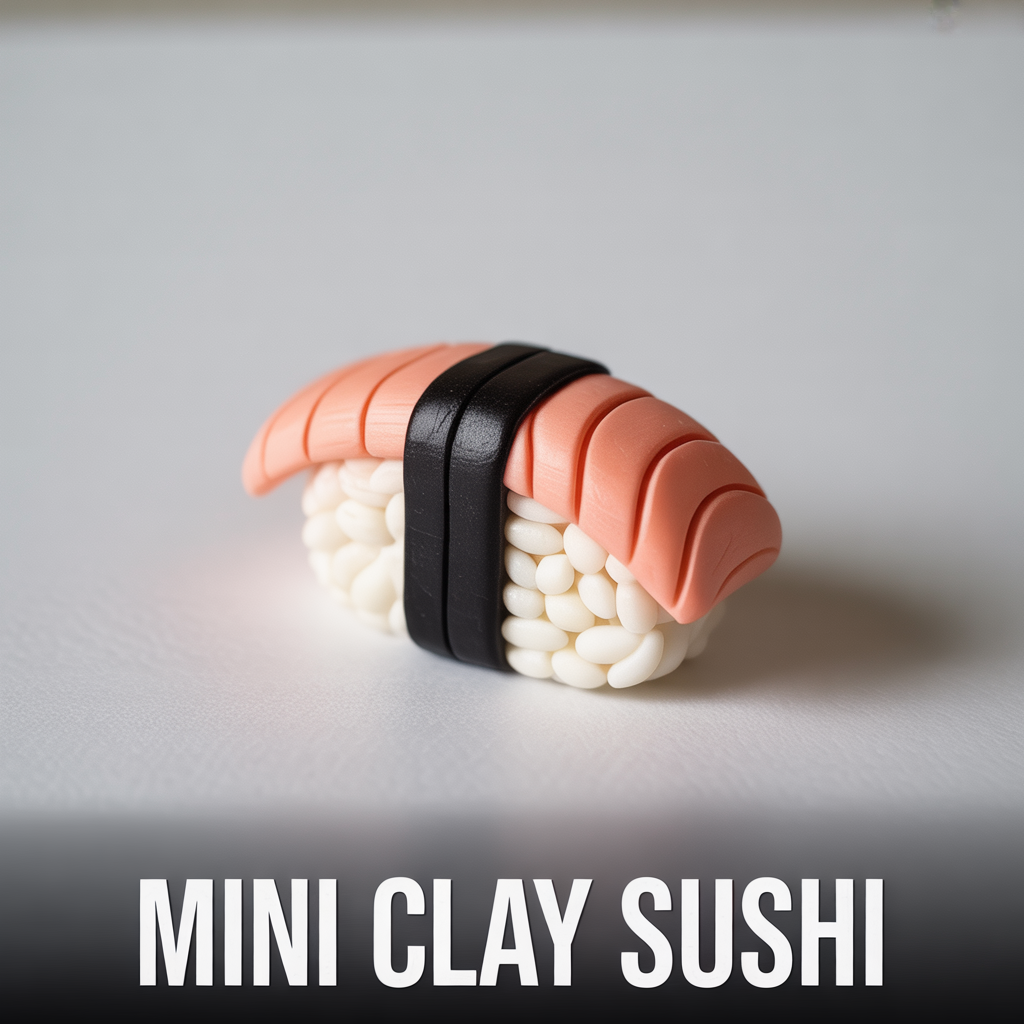
Shaping the Sushi Rice Block
Roll a piece of white polymer clay into a rectangle at 20 x 12 x 8 mm by pressing and rolling it between two fingers. The slightly rounded top surface of the rectangle represents the rice portion of a nigiri sushi piece. Texture the white rectangle lightly using a toothpick pressed repeatedly across the full surface in short downward marks to simulate individual rice grains. This texture step takes 2 minutes and significantly improves the realism of the finished sushi piece compared to a smooth, untextured white block.
Adding the Fish Topping and Nori Wrap
Roll a thin oval of salmon-pink or orange clay at 22 x 12 mm and 2 mm thickness for the fish topping. Press it onto the rounded top of the white rice block, curving it slightly to follow the rice block surface. Cut a thin strip of black clay at 20 x 4 mm for the nori wrap. Press the black strip around the outside of the rice block at the lower half, overlapping the two ends at the back of the piece. Blend the join smoothly with a fingertip before baking at 130 degrees Celsius for 25 minutes.
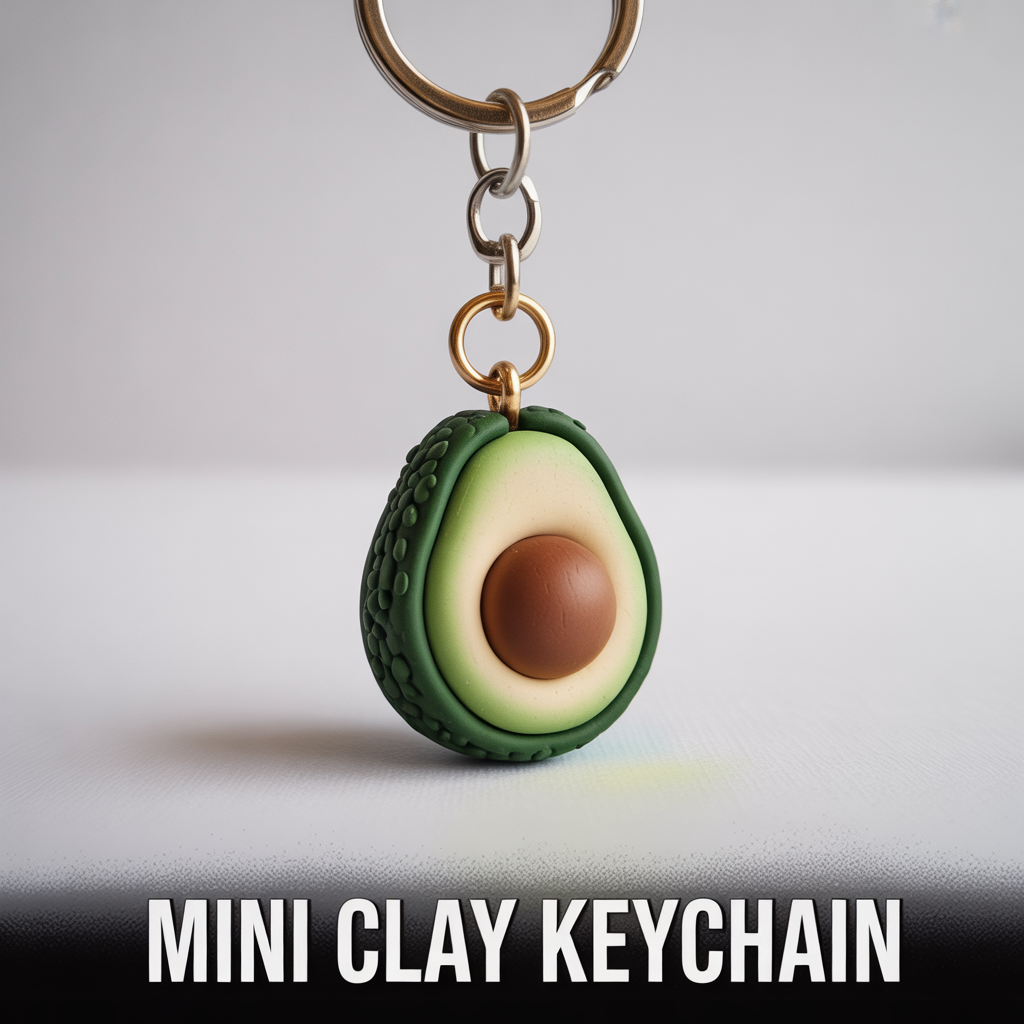
9. Mini Clay Keychain
A mini clay keychain attaches a small polymer clay figure, food item, or geometric shape to a metal key ring using a jump ring through a pre-baked hole to produce a personalized functional accessory. I made my first keychain using a mini clay avocado shape and attached it to my house keys. It has survived 18 months of daily key bag contact without cracking, chipping, or losing paint because I sealed it with 2 coats of strong resin varnish before attaching the hardware.
Mini clay keychain ideas are among the most searched cute mini clay ideas for gifts because the finished item is immediately functional and costs under 2 dollars in materials per piece.
Creating a Hanging Hole in a Clay Keychain
Pierce a 3 mm hole through the top of the unbaked clay piece using a round toothpick or a headpin wire. Position the hole 3 mm from the top edge of the piece rather than at the very top edge, where the clay wall is too thin to hold the metal jump ring without tearing during regular use. Rotate the toothpick gently to widen the hole to 3 mm diameter without distorting the surrounding clay surface. Leave the toothpick in the hole during baking to prevent the hole from closing as the clay softens during the heating phase.
Attaching the Jump Ring and Key Ring
Open a 6 mm metal jump ring using two flat-nose pliers, gripping each side of the ring gap and rotating one side forward and one side backward rather than pulling the gap open sideways. Thread the open jump ring through the baked and sealed clay piece’s hanging hole. Thread the key ring onto the open jump ring before closing it. Close the jump ring by reversing the rotation until the two ring ends meet flush with no visible gap. A correctly closed jump ring shows no gap at the join that could catch on fabric or skin during daily use.
10. Mini Clay Cactus
A mini clay cactus uses a tall cylinder of green clay with small spine texture details and 2 shorter curved arm cylinders to produce a miniature cactus figure at 3 to 4 centimeters tall in polymer clay or air dry clay. I made a collection of 5 mini clay cacti in different sizes and grouped them on a small wooden board as a desktop display. The group took 90 minutes to make and has sat on my desk as a permanent decoration for 2 years without any maintenance.
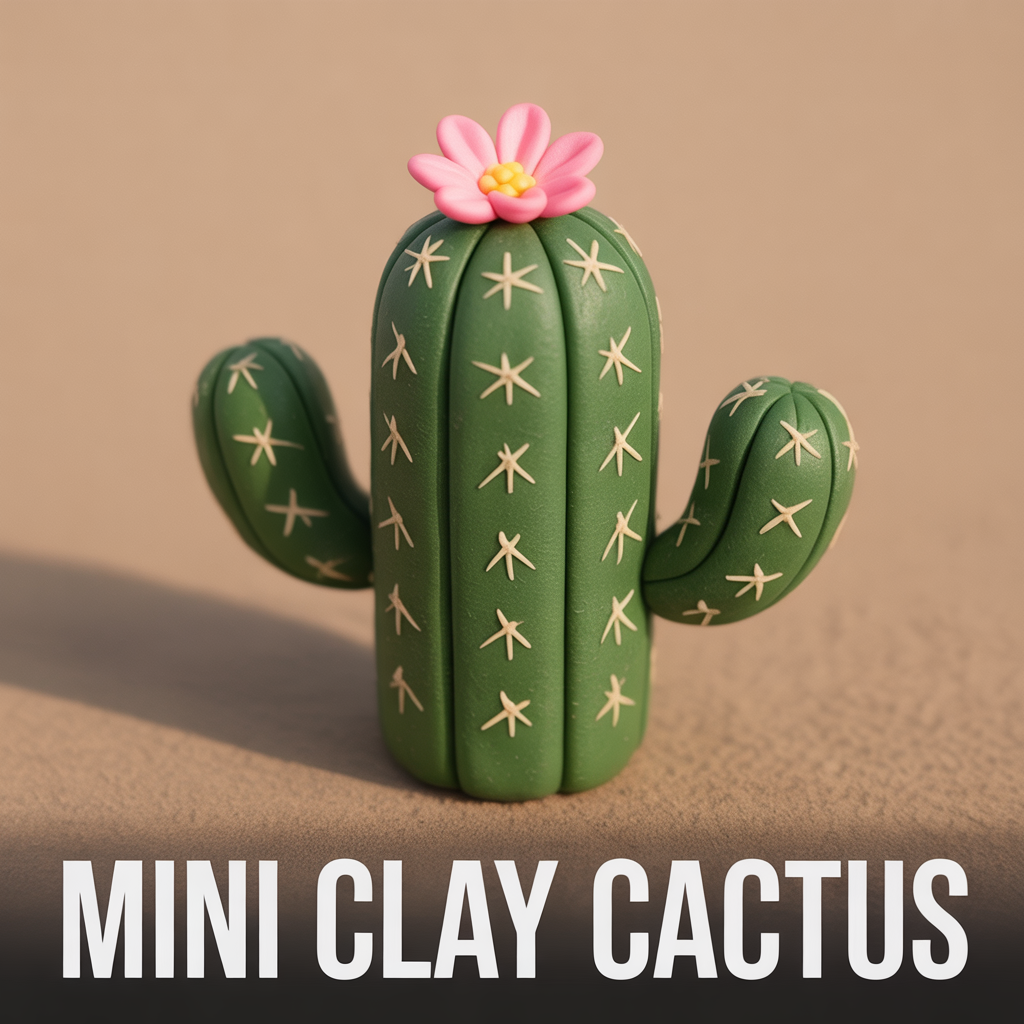
Shaping the Cactus Body and Arms
Roll a cylinder of green polymer clay at 12 mm diameter and 30 mm tall. Flatten the base slightly for stability. Roll 2 shorter cylinders at 8 mm diameter and 15 mm tall for the arms. Bend each arm cylinder into a gentle upward curve. Press each arm onto the side of the main body at the lower third of the total body height, blending the join with a toothpick to smooth the connection. The 2 arms should point in slightly different directions to avoid a perfectly symmetrical appearance.
Texturing a Mini Clay Cactus Surface
Press small groups of 3 to 4 toothpick marks radiating from a central point across the full cactus surface to represent the spine clusters of a real cactus. Space each spine cluster at 5 mm intervals across all surfaces including the arms. Add a small pink or red clay flower at the top of the main body for a decorative detail: shape 5 small petals from pink clay, arrange them in a circle, and press a tiny yellow center ball into the middle. Attach the flower to the cactus top before baking.
11. Mini Clay Bear Charm
A mini clay bear charm uses a round head, small semicircle ears, and a simplified body to produce a kawaii-style bear figure at 2 to 3 centimeters tall that attaches to a bracelet, necklace, or bag as a charm. I made my first mini clay bear charm using Sculpey in caramel brown and it became the most requested item in my small Etsy shop. The simplified kawaii face uses only 3 elements: 2 black dot eyes and an oval nose, which suits beginners who have never added detail work to clay before.
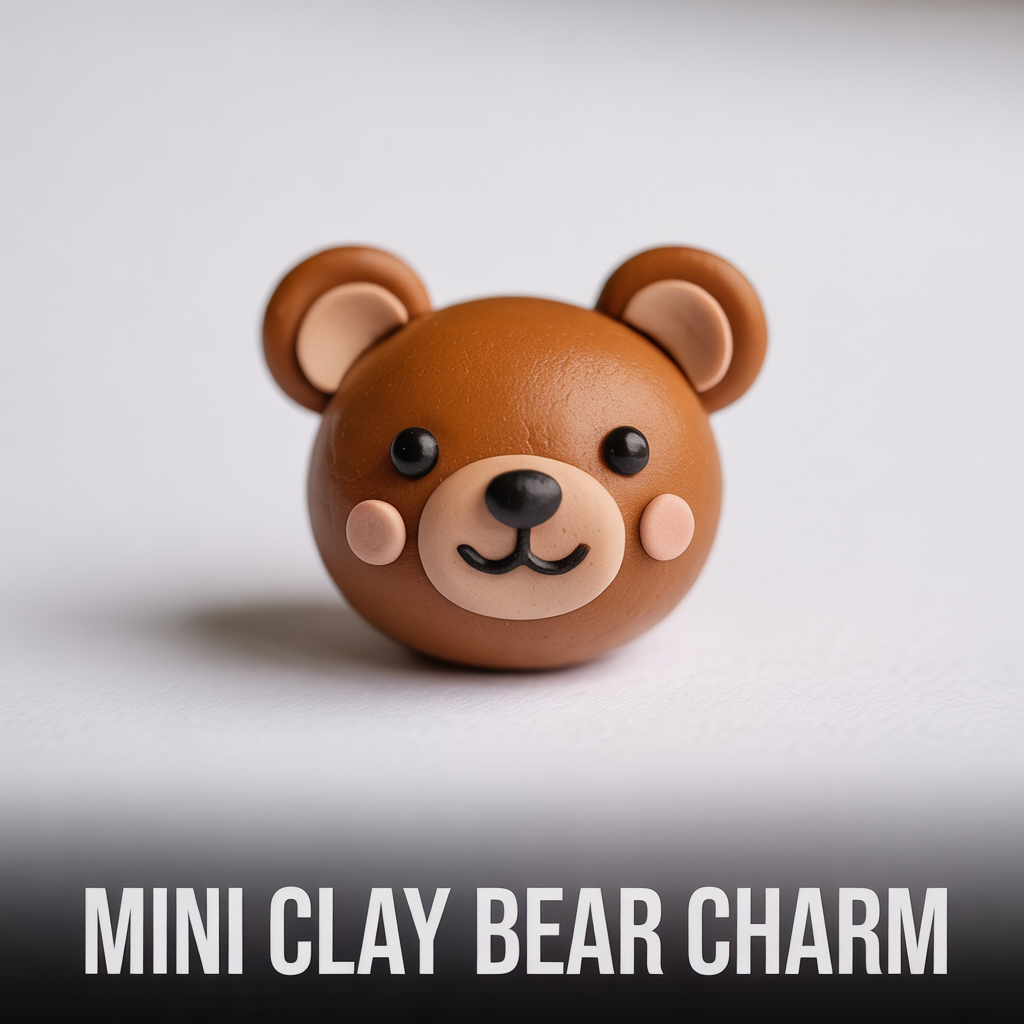
Shaping a Mini Clay Bear Head
Roll a 15 mm ball of brown polymer clay. Flatten it very slightly by pressing between two fingers to produce a slight oval rather than a perfect sphere. Roll 2 small balls at 6 mm diameter for the ears. Flatten each ear ball and press it to the upper sides of the head. Roll a small oval of lighter brown clay at 8 x 6 mm for the muzzle. Press it onto the lower center of the face, blending only the top edge against the face surface while leaving the lower edge raised for a 3-dimensional muzzle effect.
Adding Face Details to a Clay Bear
Press 2 tiny balls of black clay at 2 mm diameter onto the face above the muzzle for the eyes. Roll a tiny oval of dark brown or black clay at 3 mm width for the nose. Press it onto the top center of the muzzle. Use a toothpick to draw a small curved smile below the nose on the muzzle surface. Add a tiny round blush circle of pink clay on each cheek beside the muzzle for the characteristic kawaii expression. These 5 detail steps take under 3 minutes and define the finished bear character completely.
12. Mini Clay Rainbow
A mini clay rainbow uses arched strips of colored polymer clay stacked in the correct color sequence to produce a miniature rainbow decoration at 3 to 4 centimeters wide for shelf display, gift topping, or earring making. I made a set of 10 mini clay rainbows and used them as decorations on birthday gift bags. Each one cost under 50 cents in clay materials. Recipients kept every rainbow as a decoration long after using the gift bags.
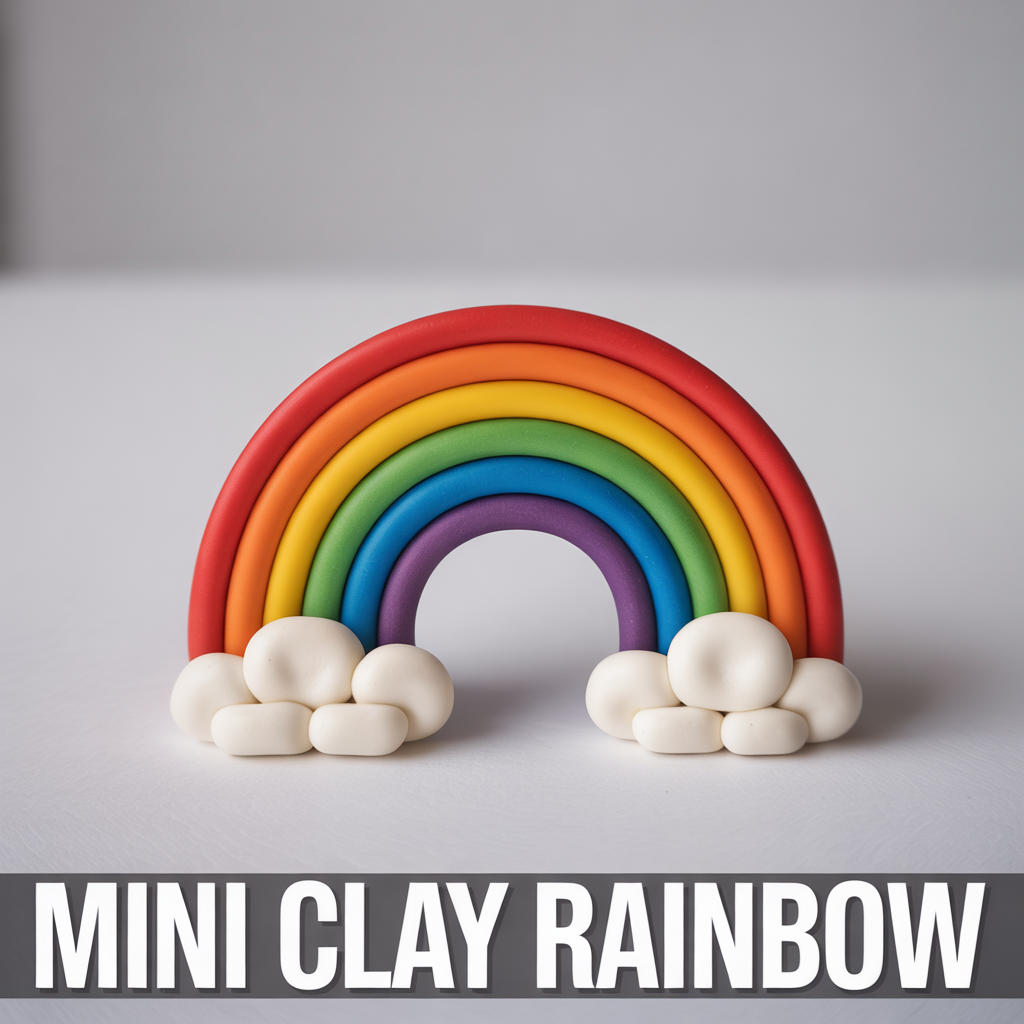
Rolling Colored Clay Strips for a Rainbow
Roll 6 thin ropes of polymer clay in the correct rainbow color order: red, orange, yellow, green, blue, and purple. Each rope measures 2 mm diameter and 40 mm length at the start before curving. Flatten each rope slightly by pressing it against a flat tile to produce a strip at 3 mm wide and 1.5 mm tall rather than a round rope cross-section. The flat-sided strips stack more cleanly against each other than round ropes, which produce visible gaps between layers in the finished rainbow shape.
Assembling the Rainbow Arch
Arrange the 6 flattened strips side by side in color sequence on a flat tile. Press all 6 strips together firmly along their full length. Lift the combined strip and bend it into an arch shape, pressing the two ends flat against the tile to form the rainbow’s base legs. Add 2 small cloud shapes from white clay at each base leg, pressing them flat against the tile surface around the rainbow ends. Bake the full assembly flat on the tile at 130 degrees Celsius for 20 minutes to preserve the arch shape during the curing process.
13. Mini Clay Flower Earrings
Mini clay flower earrings use thin petals of polymer clay arranged around a central dot to produce flat flower-shaped earring blanks at 1.5 to 2 centimeters diameter that attach to earring hooks after baking and sealing. I made my first pair of clay flower earrings using pastel pink and yellow polymer clay in 30 minutes. After baking, sealing with 2 coats of resin varnish, and attaching gold earring hooks, the finished earrings looked like items from a boutique jewelry store. I wore that pair for 6 months before gifting them.
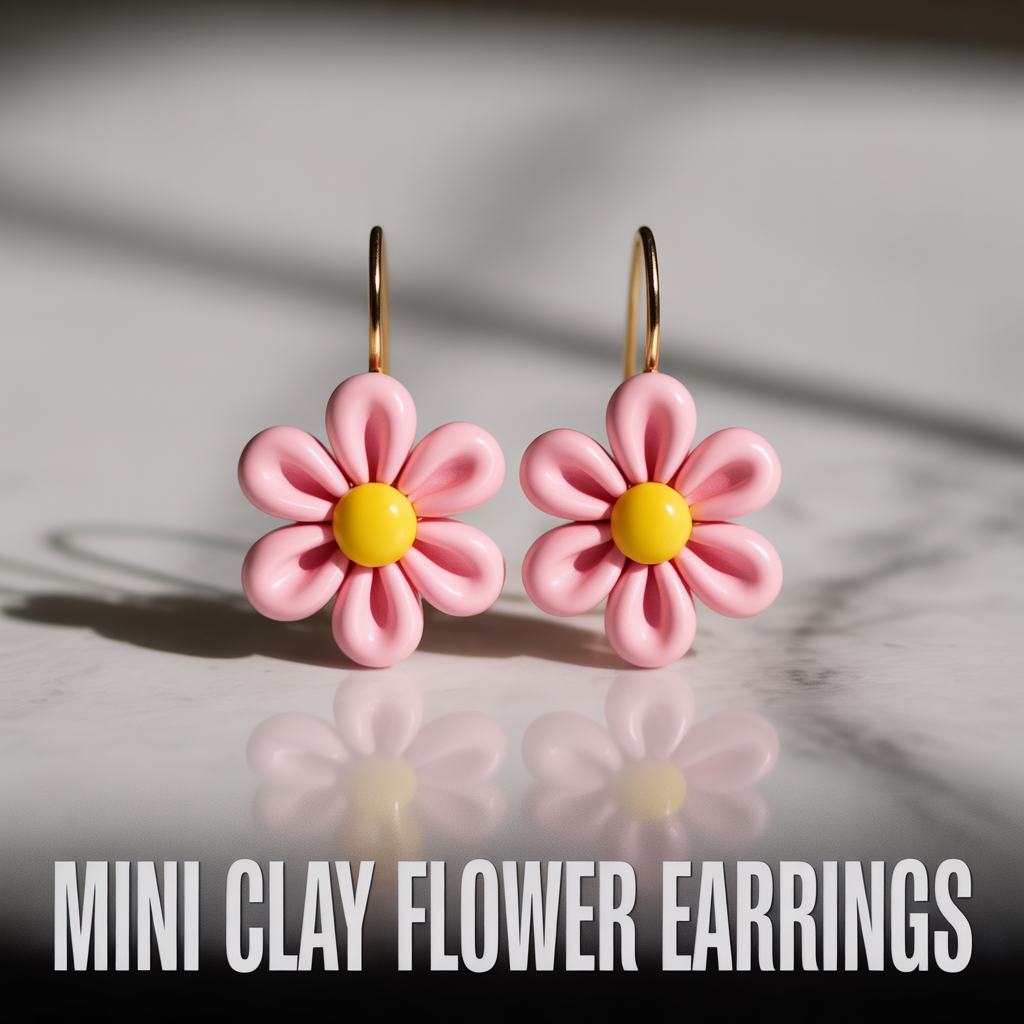
Shaping Clay Flower Petals for Earrings
Roll a small ball of polymer clay at 5 mm diameter for each petal. Press each ball flat to 1.5 mm thickness using a fingertip or the flat base of a glass. Shape each flattened ball into an oval with a slightly pointed tip to produce a teardrop petal form. Arrange 5 petals in a circle on a flat tile, pressing the base end of each petal toward the center point. Overlap the petals slightly at their base ends to lock them in a circular arrangement without any adhesive.
Finishing Clay Flower Earrings
Press a 5 mm ball of contrasting clay color into the center of the petal arrangement and flatten it to cover the base joins of all 5 petals. Pierce a 2 mm hole through the top petal of each flower earring blank using a headpin before baking. Bake at the polymer clay manufacturer’s recommended temperature for 30 minutes. After cooling, apply 2 coats of UV resin or strong gloss varnish. Attach a gold-plated earring hook through the baked hole using a 4 mm jump ring. One pair of earrings uses under 5 grams of clay and takes under 40 minutes total.
14. Mini Clay Avocado
A mini clay avocado uses a pear-shaped green outer shell, a white inner layer, and a brown seed ball to produce a cross-section avocado miniature at 2 to 3 centimeters wide in polymer clay. I made a set of 6 avocado charms as keychains last summer and sold every one within 48 hours of listing on a local online selling platform. The distinctive cross-section design photographs clearly from any angle, which makes it one of the most aesthetically photogenic mini clay food ideas for product photography.
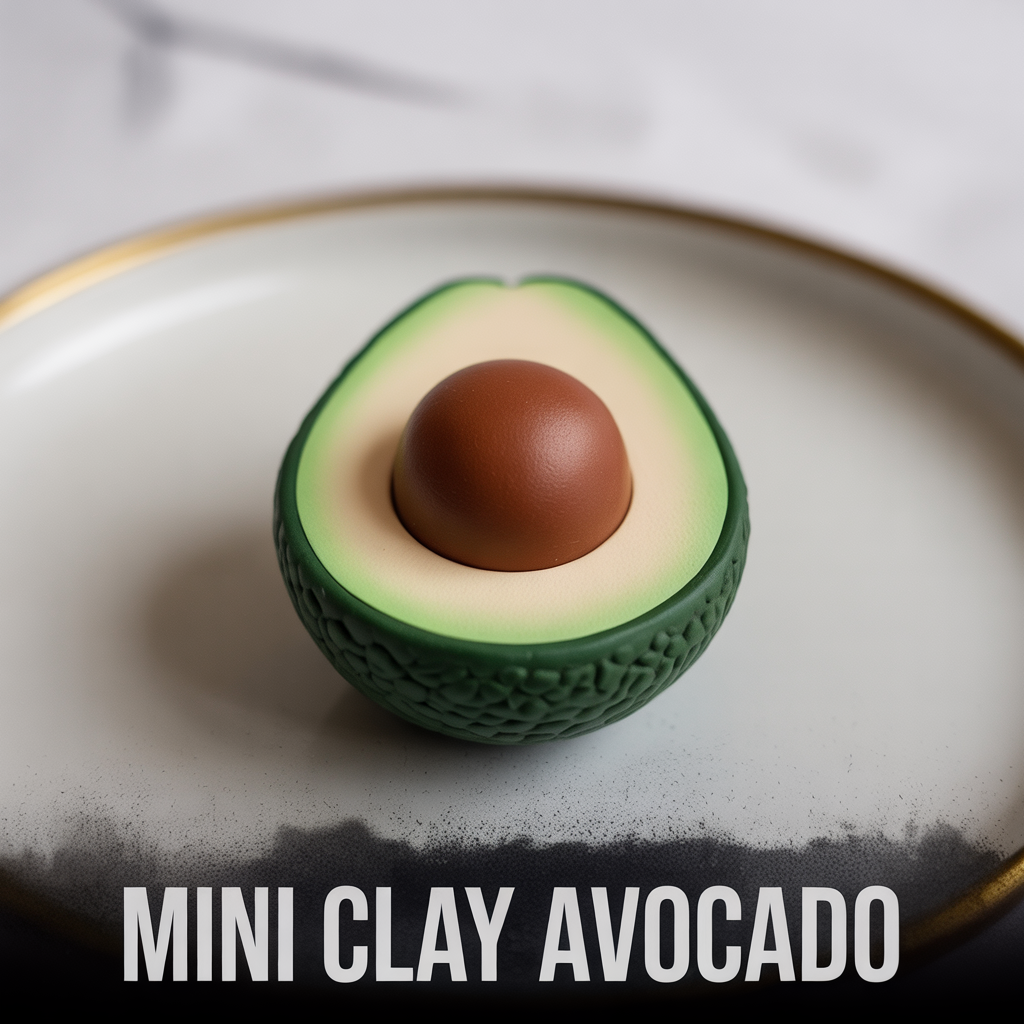
Shaping the Avocado Cross-Section
Roll a 20 mm ball of dark green polymer clay and shape it into a pear form: wider at one end and narrowing to a gentle point at the other. Slice the pear shape in half lengthwise using a craft knife or clay blade to produce 2 matching halves. Press a thin sheet of lighter green clay at 1 mm thickness inside the cut face of each half, covering the full interior surface. Press a sheet of white or cream clay at 2 mm thickness inside the lighter green layer. Press a brown clay ball at 10 mm diameter into the center of the cream layer for the seed.
Detailing the Avocado Surface
Texture the dark green outer skin surface with a toothpick pressed repeatedly across it in short random marks to simulate the bumpy texture of a real avocado skin. Smooth the cream and white inner layers with a finger for a clean, contrasting finish against the textured exterior. Attach a small loop of wire or pre-bake a toothpick hole at the top of each avocado half before baking if converting the piece to a keychain or pendant. Bake at 130 degrees Celsius for 30 minutes and apply 2 coats of gloss varnish after cooling for a finished edible-looking surface appearance.
15. Mini Clay Star Charm
A mini clay star charm uses a small flat star-shaped piece of polymer clay in a single color, metallic finish, or pastel tone to produce a simple geometric charm at 2 centimeters wide for keychains, earrings, and necklace pendants. I made a set of 20 star charms in gold polymer clay as gift bag decorations for a party. Each charm took 5 minutes to make and cost under 10 cents in materials. The gold star charms looked more intentional and high-quality than any purchased paper star decoration I could have bought at a similar price point.
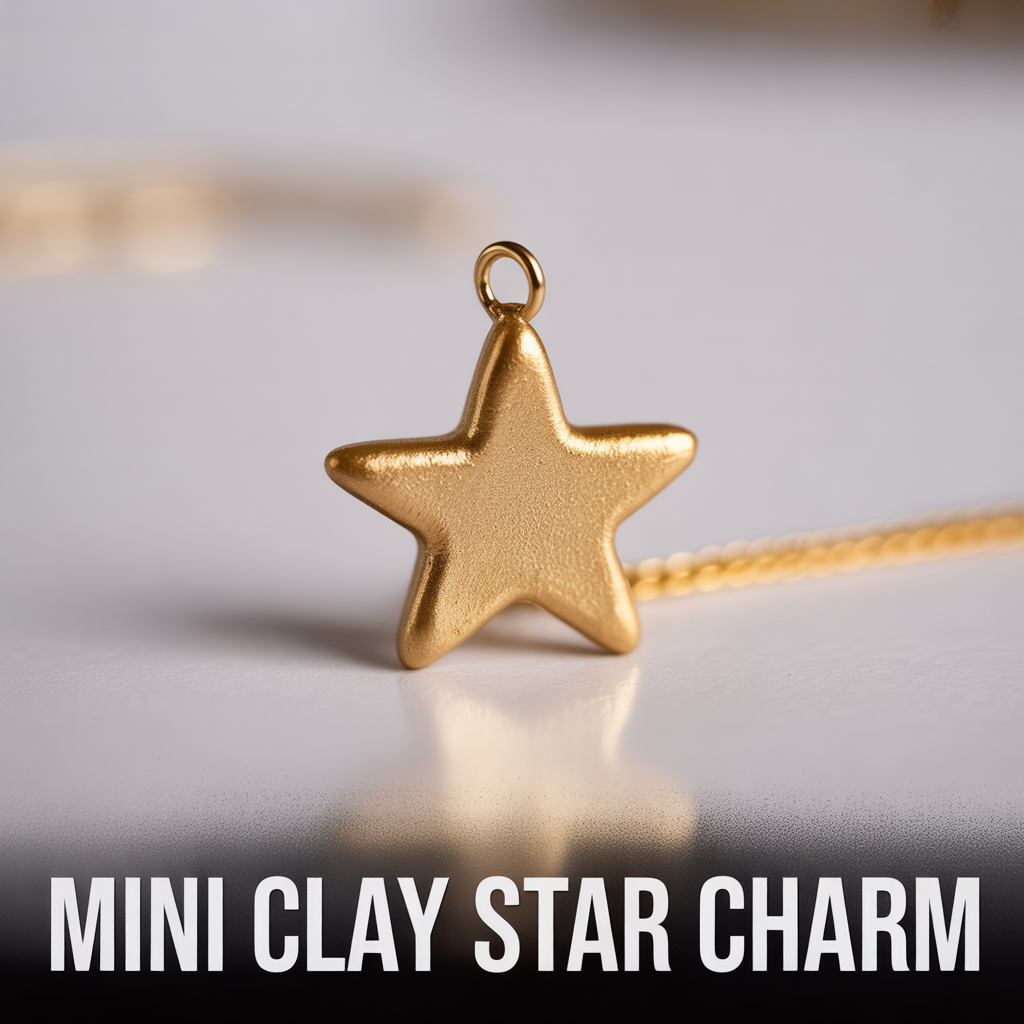
Cutting a Star Shape From Clay
Roll polymer clay to 3 mm thickness using a rolling pin on a flat tile. Press a 5-pointed star cutter firmly through the clay sheet. Remove the cutter and gently peel the clay star from the tile surface. Pierce a 2 mm hole at the top point of the star using a toothpick before baking. For a metallic effect without metallic clay, apply gold or silver mica powder to the star surface using a dry soft brush before baking. The mica powder bakes permanently into the clay surface and produces a metallic sheen without any additional painting or varnishing after baking.
Variations on a Mini Clay Star Charm
Three star charm variations produce different aesthetic results from the same basic star shape. A pastel rainbow set uses the same star cutter across 6 different pastel clay colors for a coordinated charm collection. A galaxy effect mixes black, navy, and silver clay together partially before rolling and cutting for a marbled dark star. A layered star uses 2 star cutters at different sizes, placing a smaller contrasting color star centered on top of a larger star base before baking both layers simultaneously. All 3 variations use the same basic star cutting technique with only the clay color or layering changing between them.
FAQ
What clay works best for mini clay ideas at home?
Polymer clay works best for mini clay ideas at home because it stays soft and workable at room temperature indefinitely until baked, produces a durable finished piece after oven curing at 110 to 135 degrees Celsius, and is available in over 50 colors without mixing or painting. Sculpey III, Fimo Soft, and Premo Sculpey are the 3 most widely available polymer clay brands. Air dry clay suits mini clay ideas for kids aged 5 to 10 because it hardens at room temperature without any oven step, which removes the adult supervision requirement during the curing process.
How do I make mini clay ideas for beginners step by step?
Mini clay ideas for beginners start with 3 preparation steps: condition the clay by kneading it for 2 minutes until soft, gather 3 basic tools including a rolling pin, toothpick, and flat tile, and choose a shape that uses only ball and cylinder forms. The 5 easiest beginner shapes are donuts, strawberries, stars, mushrooms, and bears. Each shape uses only round balls pressed and shaped by hand with no specialist sculpting tools. A complete beginner finishes all 5 shapes in a single 90-minute session. Bake at the manufacturer’s recommended temperature for 30 minutes and apply gloss varnish after cooling.
What mini clay ideas sell best on Etsy?
Five mini clay ideas sell most consistently on Etsy: food charm sets including donuts and sushi at 15 to 25 dollars per set, clay flower earrings at 8 to 18 dollars per pair, kawaii animal keychains at 6 to 12 dollars each, mini succulent decor sets at 12 to 20 dollars per group of 3, and personalized initial charm keychains at 8 to 15 dollars each. Food charm sets generate the highest search volume during November and December. Earrings sell consistently throughout the year. Listings with multiple product photos on a clean white background and a styled lifestyle image generate 3 to 4 times more sales than single-photo listings.
How do I keep mini clay ideas from cracking during drying?
Polymer clay does not crack during baking because it cures through a chemical hardening process rather than moisture evaporation. Air dry clay cracks during drying when the clay dries too quickly, when the wall thickness varies significantly between sections, or when the piece dries on a surface that restricts natural shrinkage. Prevent cracking in air dry clay by covering the piece with a light plastic sheet during the first 12 hours of drying, keeping all wall thicknesses consistent at 4 to 6 mm, and drying on a smooth ceramic tile rather than a porous wooden or fabric surface.
Can mini clay ideas be made without any tools?
Mini clay ideas using only hands and a toothpick include donuts, balls, simple animals, stars, and basic flower shapes. All 5 shapes form using only palm rolling for spheres and cylinders, fingertip pressing for flattening, and a toothpick for adding surface texture and detail lines. A toothpick costs under 50 cents for a full box. No rolling pin, clay cutters, or sculpting tools are required for these 5 shapes. Adding a rolling pin improves slab thickness consistency for flat pieces like ring dishes and earring blanks but is not required for the rounded food and animal shapes on this list.