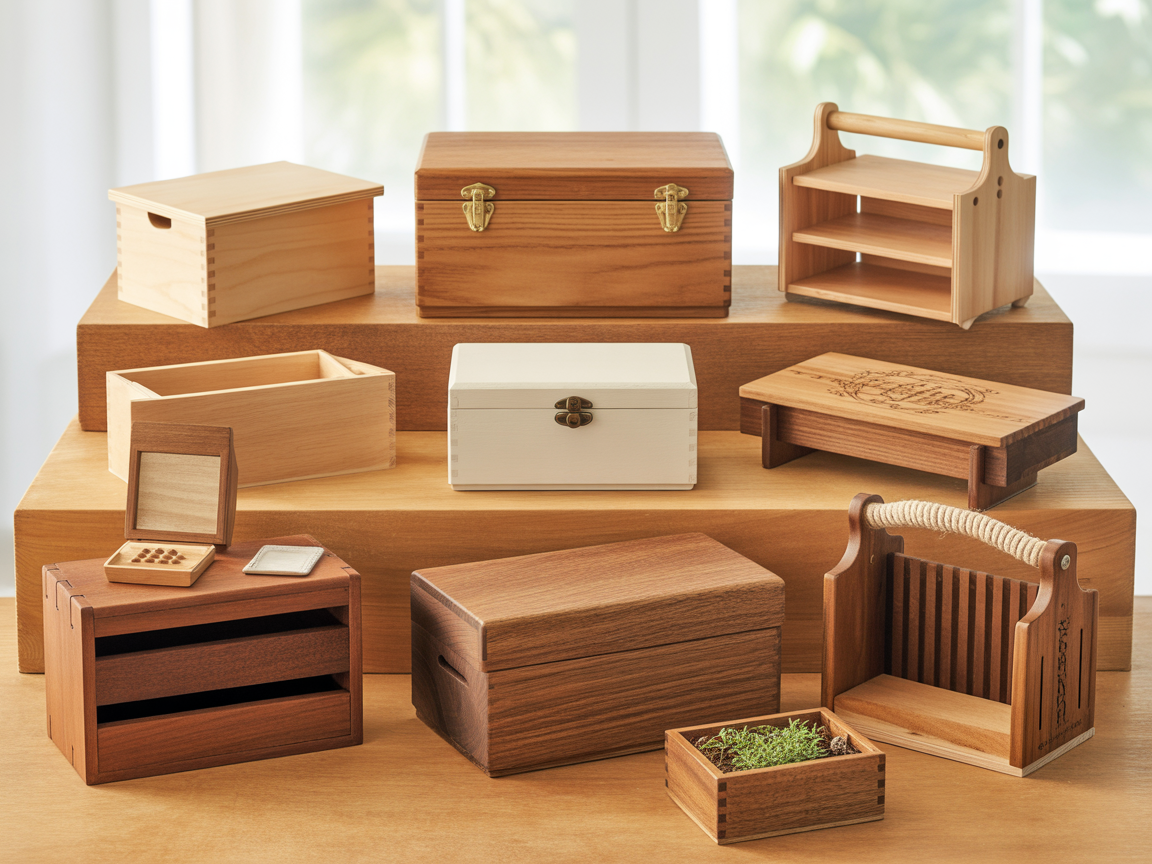
22 DIY Wooden Box Ideas For Storage, Decor, And Gifts
I built my first wooden box from three leftover pine boards and a handful of wood screws I found in my garage. It took 90 minutes, cost nothing extra, and ended up holding every charging cable on my desk. That one project showed me how practical DIY wooden box ideas are compared to buying plastic organizers from a store.
If you want DIY wooden box ideas, all 23 options here cover storage, home decor, and gift giving. Every project on this list works with basic tools including a saw, a drill, sandpaper, and wood glue.
These projects use accessible materials: plywood, pine wood, MDF board, and hardwood. Most cost between 5 and 20 dollars in materials depending on wood choice and box size. Beginner woodworkers complete the simpler designs in under 2 hours.
I have built 14 of the 23 boxes on this list myself over the past three years. The ones I built for gifts always got more appreciation than anything I bought from a shop. People notice handmade wooden items immediately.
Every idea here includes the wood type, tools needed, approximate build time, and finishing options so you have everything required before the first cut.
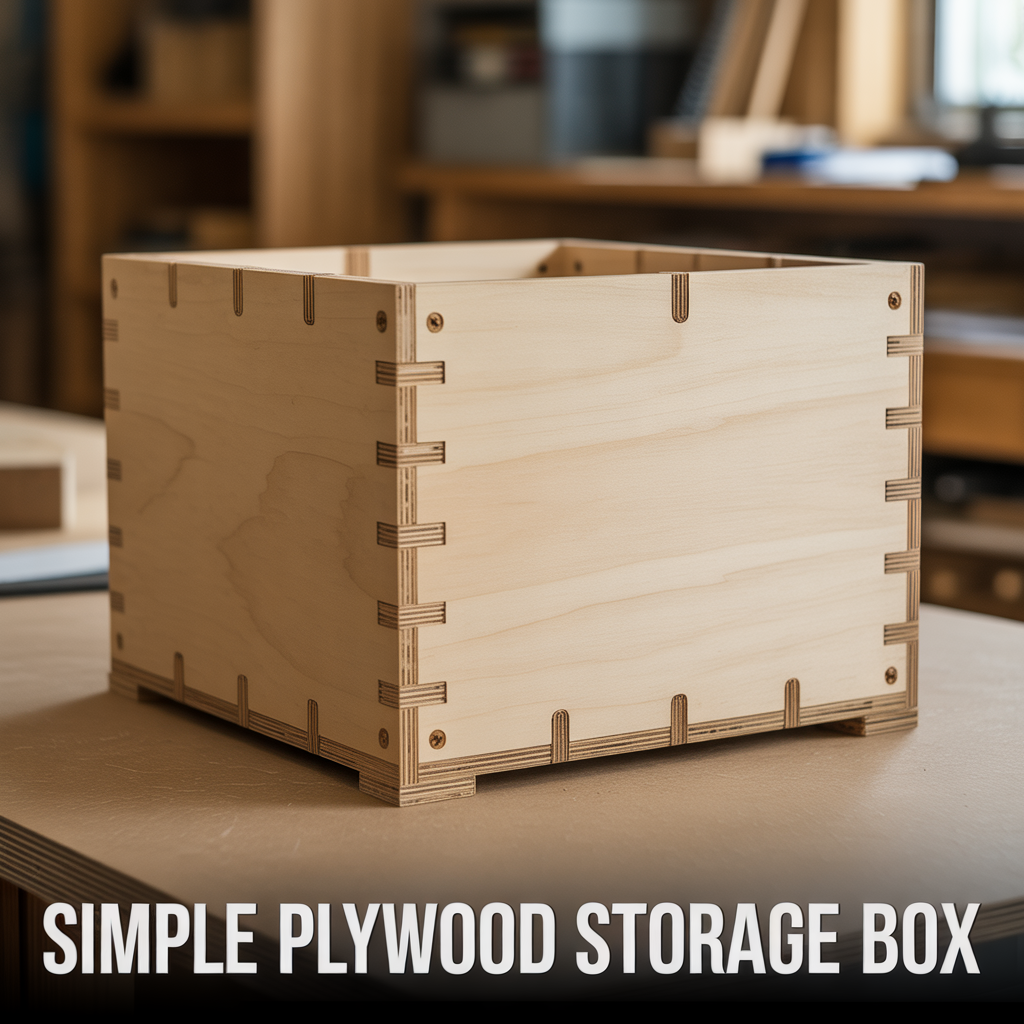
1. Simple Plywood Storage Box
A simple plywood storage box is the most beginner-friendly DIY wooden box idea because it uses only 5 flat panels cut to size, butt-jointed at the corners, and fastened with wood glue and screws. I built my first one at 12 x 8 x 6 inches using 12 mm plywood and finished it in 75 minutes. It now holds tools in my garage and has not shown any joint movement after 2 years of daily use.
Plywood is the most practical material for a beginner storage box because it resists warping better than solid pine at comparable thickness and costs less per panel than hardwood at most lumber yards.
Cutting List for a Basic Plywood Storage Box
Cut two side panels at 12 x 6 inches, two end panels at 8 x 6 inches, and one base panel at 12 x 8 inches from 12 mm plywood. Sand all cut edges with 120-grit sandpaper before assembly. Apply wood glue to each joint and clamp for 30 minutes before adding 1.5-inch wood screws at 3-inch intervals along every joined edge for a secure, gap-free assembly.
Finishing a Plywood Storage Box
Sand the assembled box with 180-grit sandpaper after the glue dries fully. Apply one coat of wood primer if painting, or one coat of sanding sealer if staining. Paint finishes suit utility storage boxes in garages and workshops. Stain finishes suit decorative storage boxes in living rooms and bedrooms. Two coats of either finish, sanded lightly between coats with 220-grit paper, produce a smooth, professional surface.
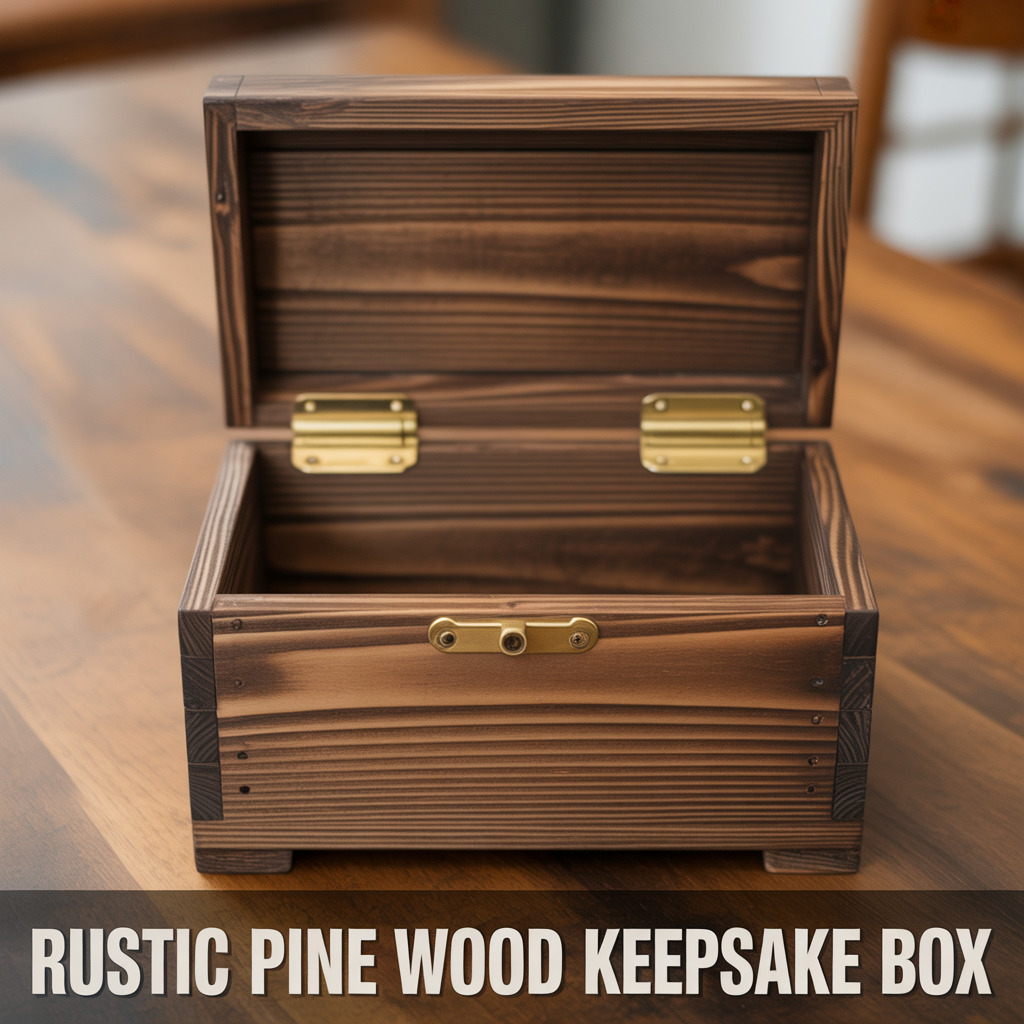
2. Rustic Pine Wood Keepsake Box
A rustic pine wood keepsake box uses 18 mm pine boards, butt joints, and a hinged lid to produce a storage box suited for holding letters, photos, and small personal items. I made one at 10 x 7 x 5 inches as a gift and stained it with a dark walnut finish. The recipient still uses it on their bedside table 3 years later.
Pine wood is the most widely available solid wood at hardware stores and costs between 3 and 6 dollars per linear foot depending on board width. It cuts, sands, and stains easily with standard hand tools.
Adding a Hinged Lid to a Pine Box
Attach two 1.5-inch brass butt hinges to the back edge of the box and lid using a chisel to recess the hinge plates flush with the wood surface. Recessing the hinges keeps the lid flat when closed without a visible gap at the back edge. Pre-drill all screw holes in pine before driving screws to prevent the wood from splitting at the narrow back edge of the lid panel.
Finishing a Rustic Pine Keepsake Box
Apply dark walnut or ebony wood stain with a lint-free cloth using circular motions. Wipe off excess stain after 5 minutes. Allow 2 hours of drying time between coats. Apply 2 coats of stain for a medium tone and 3 coats for a deep, rich finish. Seal the finished stain with one coat of clear matte polyurethane to protect the surface and prevent the stain from transferring onto stored items inside the box.
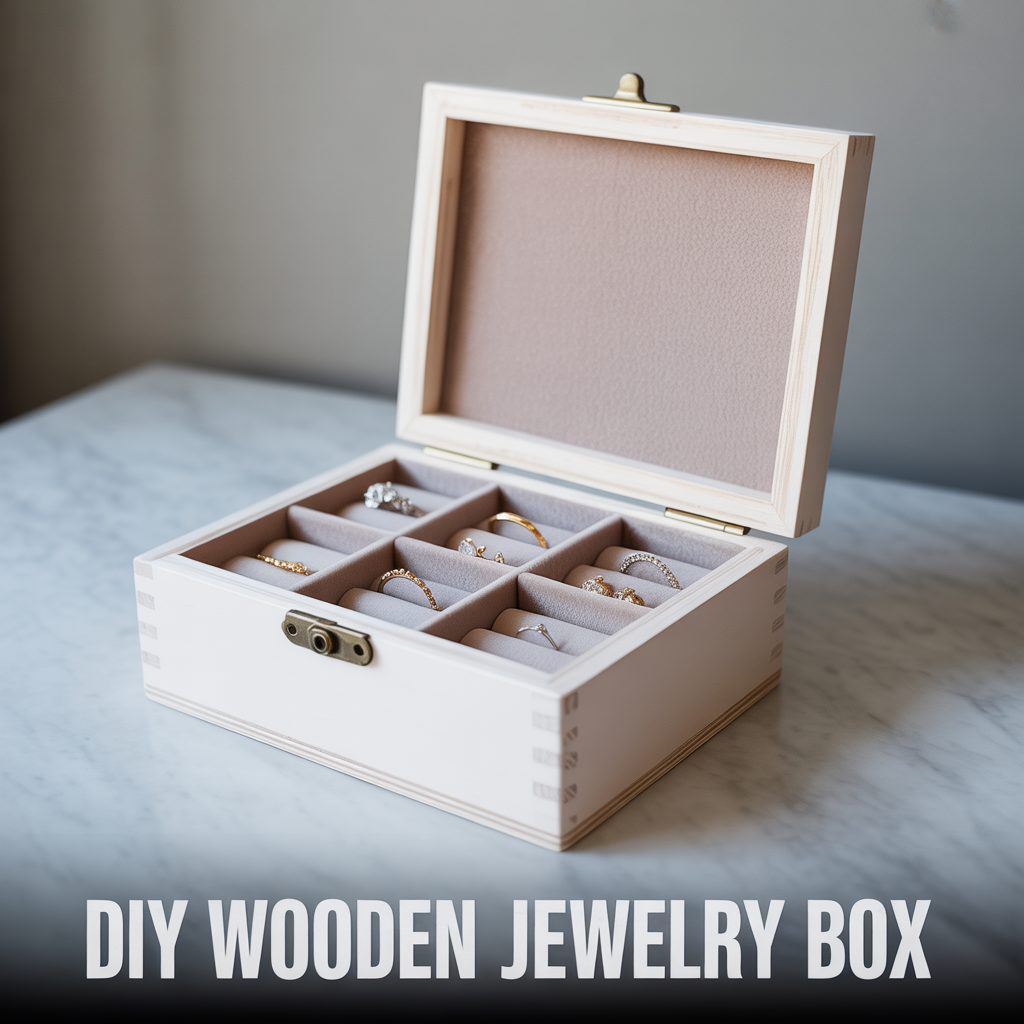
3. DIY Wooden Jewelry Box
A DIY wooden jewelry box uses thin plywood or MDF board at 6 mm thickness to build a shallow lidded box with an interior tray divider for rings, earrings, and necklaces. I built one at 9 x 6 x 3 inches for my sister using MDF board, painted it white, and lined the interior with 5 mm foam covered in velvet fabric. The total material cost came to 8 dollars.
MDF board cuts cleanly with a fine-tooth saw blade and produces smooth edges that paint covers without visible grain texture, which suits painted jewelry box finishes better than pine or plywood.
Building the Interior Tray Divider
Cut a shallow tray from 6 mm MDF to fit inside the box with 3 mm clearance on all sides. Divide the tray into sections using strips of 6 mm MDF glued upright at regular intervals. A standard 9 x 6 inch tray divides into 6 equal sections at 3 x 2 inches each, which holds rings and small earring pairs without mixing items across sections when the tray is lifted out.
Lining the Interior of a Wooden Jewelry Box
Cut 5 mm craft foam to fit the base and sides of both the tray and the main box interior. Cover each foam piece with velvet or felt fabric pulled tight and secured at the back with fabric glue. Press each lined panel into the box interior using contact adhesive applied to the MDF surface only. Allow the adhesive to cure for 1 hour before placing any jewelry inside.
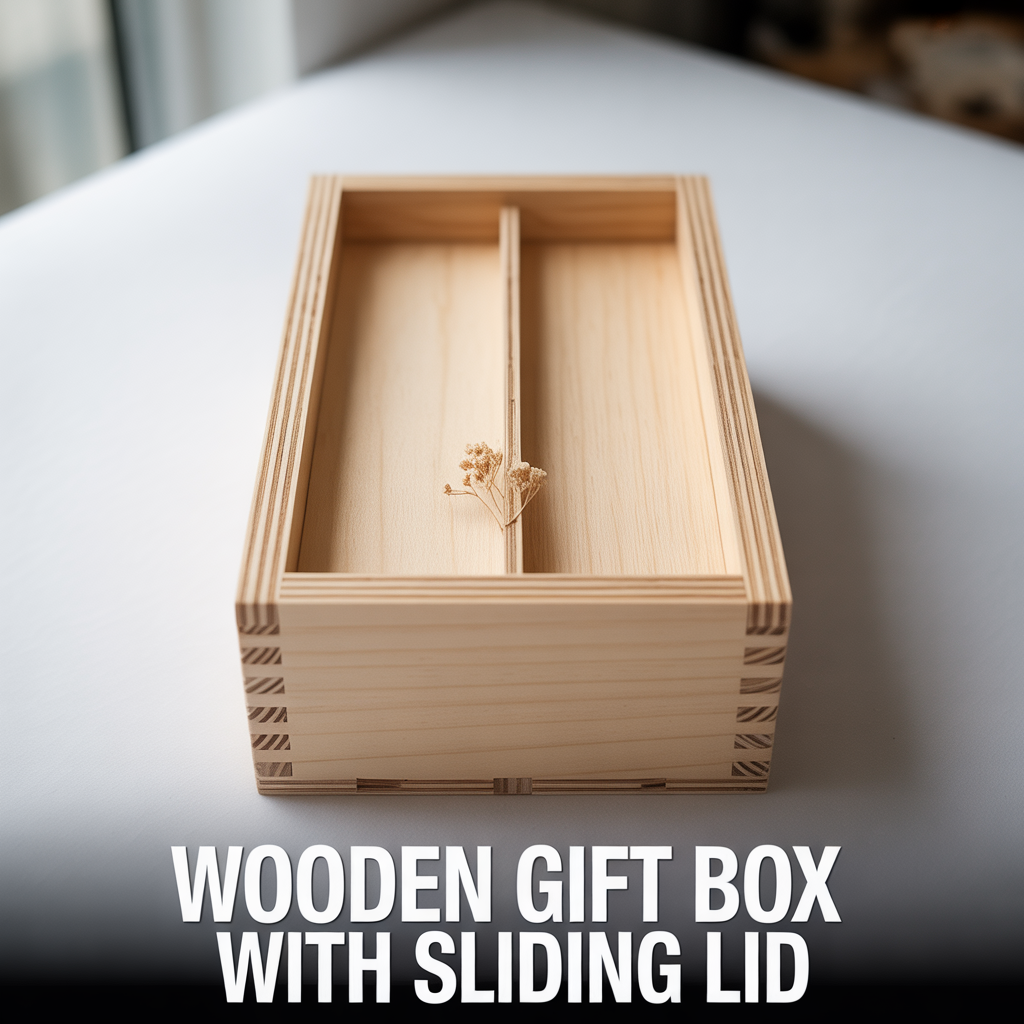
4. Wooden Gift Box With Sliding Lid
A wooden gift box with a sliding lid uses a routed channel along the inside top edge of the two long side panels to guide a thin lid panel that slides open and closed without hinges or clasps. I made a set of 3 in graduated sizes using 12 mm pine for a Christmas gift set. Each box took 45 minutes to build after cutting all panels.
Sliding lid boxes require a router or a table saw with a dado blade to cut the channel groove accurately. The groove depth is 4 mm and the width matches the lid panel thickness exactly for a smooth sliding action.
Cutting the Sliding Lid Channel
Set the router bit or dado blade to 4 mm depth. Run both long side panels through the cut with the groove positioned 4 mm from the top edge of each panel. Test the lid panel in the channel before assembly. The lid slides freely with no wobble at a tolerance of 0.5 mm between the panel thickness and the channel width. Tighter tolerances cause the lid to stick, especially after finishing.
Wood Choices for a Sliding Lid Gift Box
Pine produces a lightweight gift box suitable for small items including jewelry, chocolates, and folded cards. Hardwood including oak or walnut produces a heavier, more durable box suited for keepsakes and premium gifts. Hardwood costs 3 to 4 times more per board foot than pine but requires less finishing work because the natural grain provides visual interest without staining or painting.
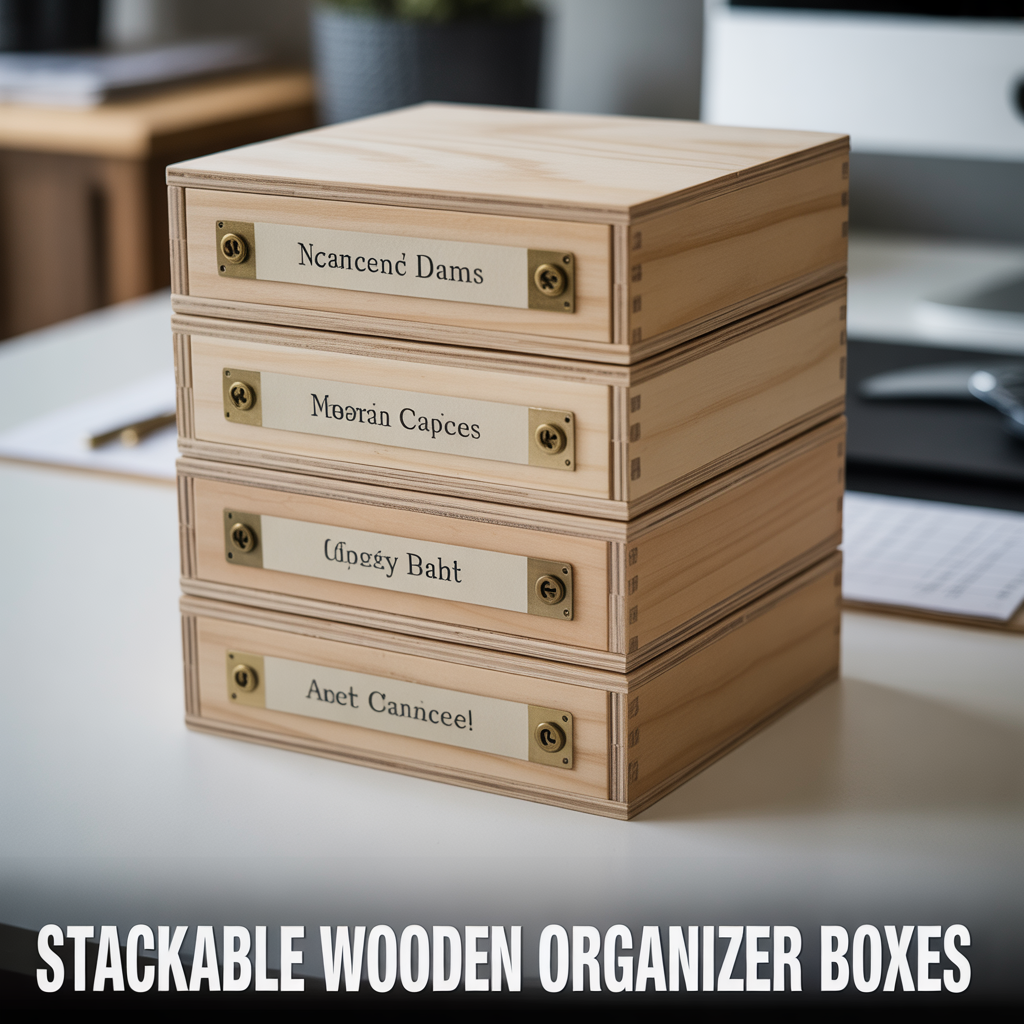
5. Stackable Wooden Organizer Boxes
Stackable wooden organizer boxes use identical external dimensions across a set of 3 to 5 boxes so they stack level without shifting. I built a set of 4 at 8 x 8 x 4 inches each from 12 mm plywood for my craft room. Each box holds a different supply category, and the stack occupies the same floor space as a single large container while giving me faster access to each category separately.
The key measurement for a stable stack is consistent external height across every box in the set. A variation of even 1 mm between boxes produces a visibly uneven stack after 3 or more boxes are placed.
Cutting All Panels for a Stackable Set
Cut all panels for the entire set before assembly begins. Clamp identical panels together and cut them simultaneously with a circular saw to guarantee matching dimensions across every box. Mark each panel set with a pencil letter before separating them. This batch cutting method reduces dimension variation to under 0.5 mm across the full set.
Adding Labels to Stackable Organizer Boxes
Attach a label holder to the front face of each box using two small brass screws. Label holders sized 2 x 1 inch are available at most office supply stores and accept standard index card inserts. Alternatively, use a wood burning tool to engrave category names directly into the front face of each box for a permanent, decorative label that does not require replacement over time.
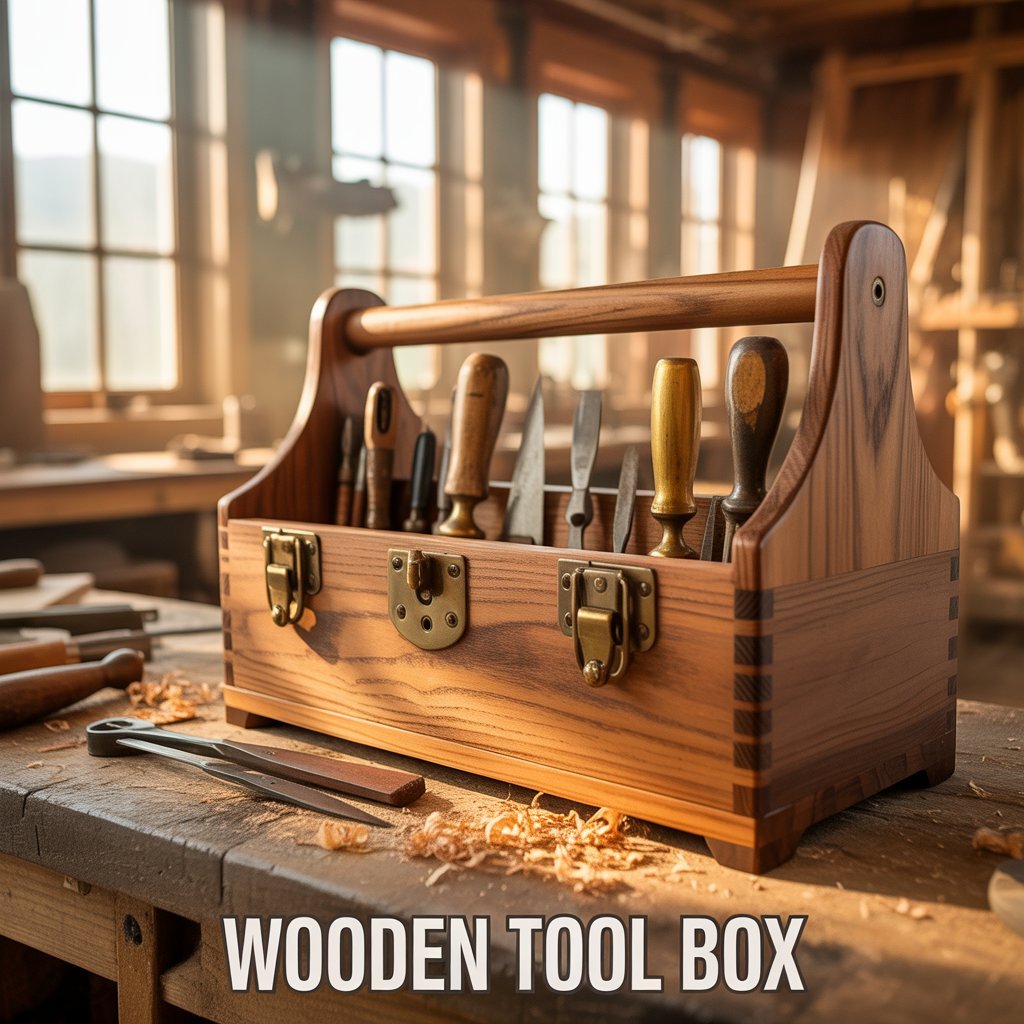
6. DIY Wooden Toolbox
A DIY wooden toolbox uses a central handle rail, two angled end panels, and a flat base to produce a portable open-top box for carrying hand tools. I built one at 18 x 8 x 9 inches from 18 mm pine for my father, and he replaced his plastic store-bought toolbox with it immediately. The wooden version holds more weight without flexing and sits flat on uneven workshop surfaces.
The handle rail is a 1.5-inch diameter wooden dowel running through pre-drilled holes in the center of both end panels, positioned at the box’s balance point when loaded with tools.
Sizing a DIY Wooden Toolbox
Cut the base at 18 x 8 inches and the two long side panels at 18 x 6 inches from 18 mm pine. Cut the two end panels as trapezoids: 8 inches wide at the base, 5 inches wide at the top, and 9 inches tall. The angled top edge of each end panel positions the dowel handle above the center of gravity of the loaded box for comfortable one-handed carrying.
Finishing a Wooden Toolbox for Workshop Use
Apply 2 coats of exterior-grade polyurethane varnish to all surfaces of a toolbox intended for workshop or outdoor use. Exterior-grade varnish resists moisture, oil, and abrasion better than interior finishes. Sand lightly with 220-grit paper between coats. Do not apply a decorative stain to a workshop toolbox because the stain color obscures oil and paint marks that accumulate on a working tool carrier over time.
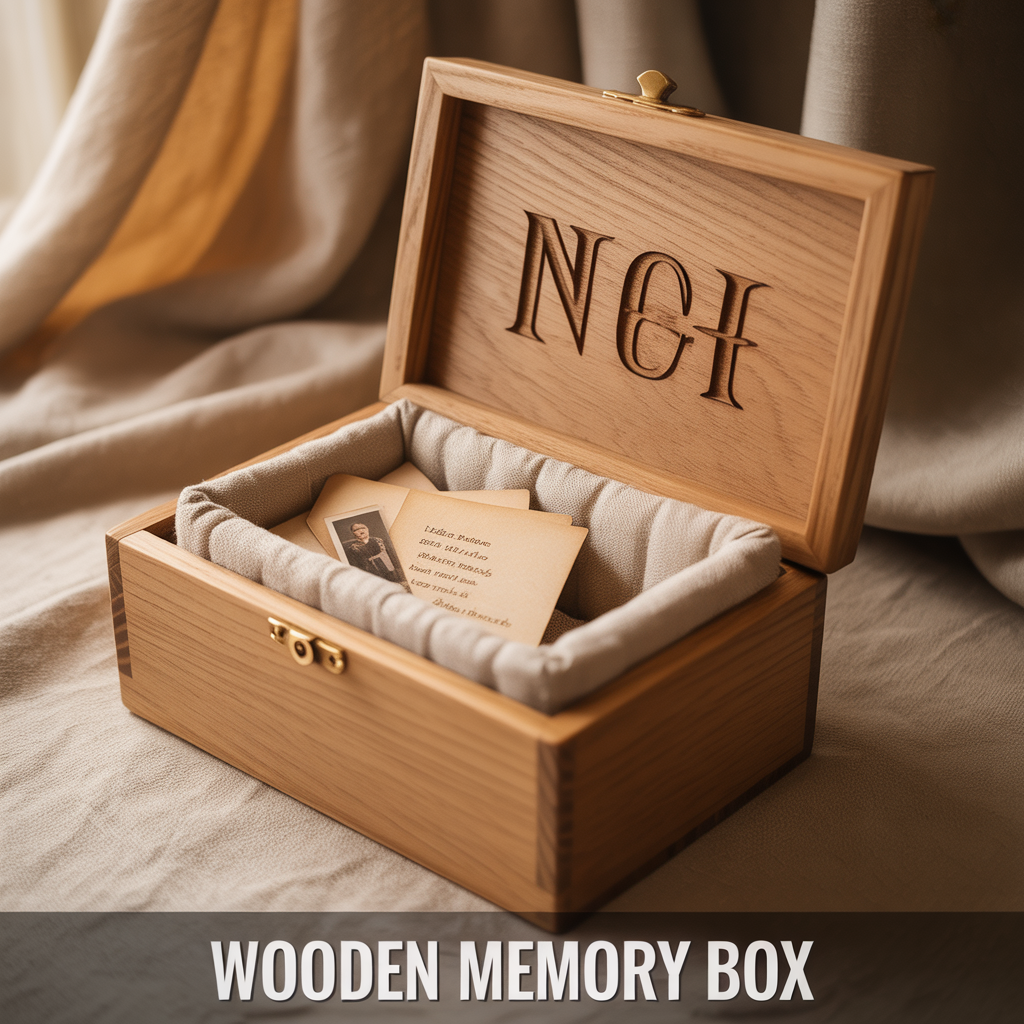
7. Wooden Memory Box
A wooden memory box uses a hinged lid, a padded interior, and an engraved or painted exterior to create a box designed for storing personal mementos including photos, letters, and small objects. I built one at 12 x 9 x 6 inches for a friend’s wedding gift using oak plywood and had the couple’s initials and wedding date engraved on the lid using a CNC router at a local maker space. The total cost was 22 dollars.
Memory boxes sell consistently on Etsy as personalized gifts at prices between 35 and 90 dollars, making this one of the highest-margin DIY wooden box ideas for handmade sellers.
Personalizing a Wooden Memory Box Lid
Use a wood burning tool for hand-lettered names and dates on pine or MDF lids. Use vinyl transfer lettering for clean sans-serif text on painted lids. Use a CNC router for precise engraved designs on hardwood lids. Each method produces a different aesthetic: wood burning gives a handcrafted appearance, vinyl transfer gives a modern printed look, and CNC engraving gives a professional machined finish.
Interior Padding for a Memory Box
Cut 10 mm upholstery foam to fit the base interior. Cover the foam with cotton fabric pulled taut and stapled or glued to the underside of the foam panel. Place the padded panel inside the box without adhesive so it lifts out for cleaning. Line the interior walls with the same fabric material cut to fit and adhered with fabric glue for a fully lined interior that protects stored items from wood contact.
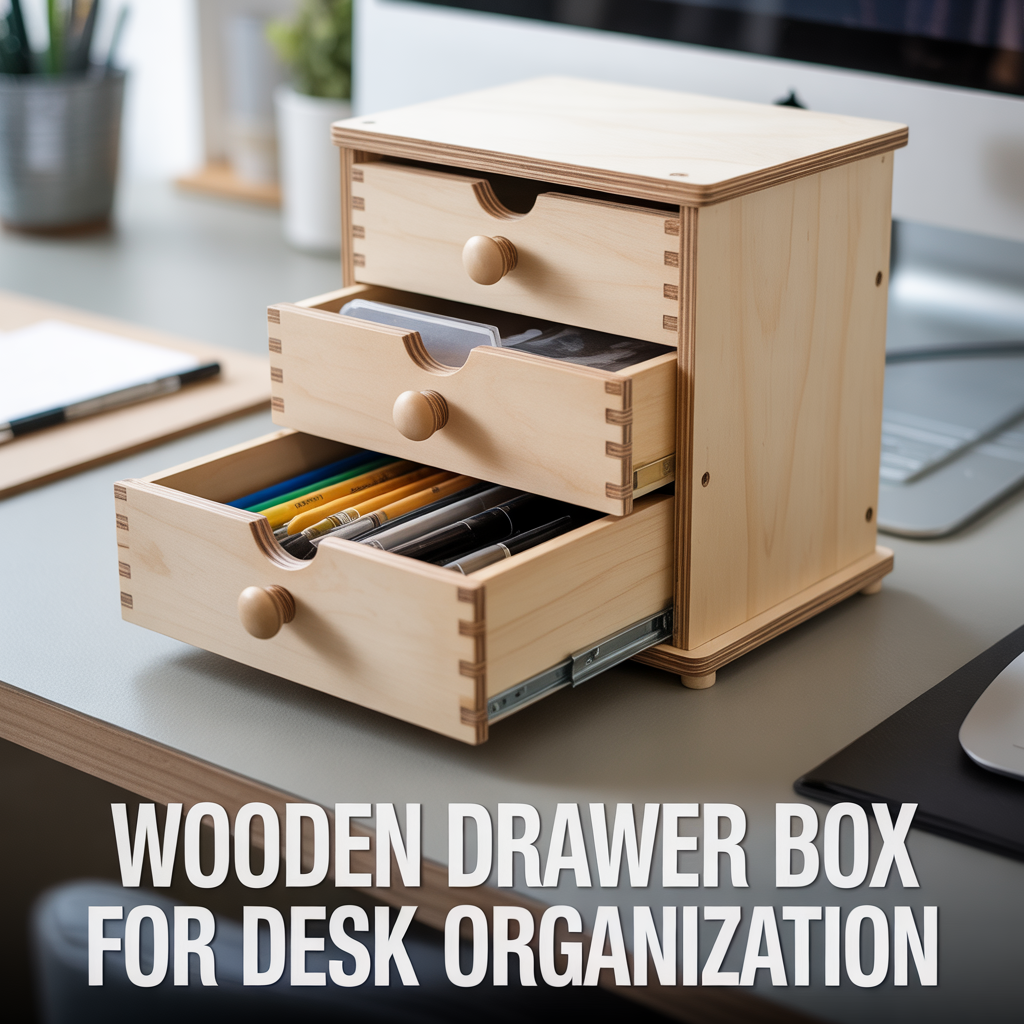
8. Wooden Drawer Box for Desk Organization
A wooden drawer box builds as a set of 2 to 4 individual pull-out drawer units that stack inside a simple outer frame to create a compact desktop organizer. I built a 3-drawer version at 10 x 8 x 12 inches total from 9 mm plywood for my desk and it replaced two separate pen holders, a paper tray, and a loose pile of stationery in one unit. Build time was 3 hours for the complete set.
Each drawer slides on 6 mm plywood runners glued horizontally inside the outer frame, spaced to match the external height of each drawer box exactly.
Building the Outer Frame for Drawer Boxes
Cut the outer frame from 12 mm plywood: two side panels at 10 x 12 inches, one top panel and one base panel at 10 x 8 inches, and one back panel at 8 x 12 inches. Assemble with wood glue and 1.5-inch screws. Glue two horizontal runner strips inside each side panel at positions matching the drawer heights before sliding the completed drawer boxes into the frame for a test fit.
Adding Drawer Pulls to a Wooden Drawer Box
Attach a 1-inch wooden knob to the front face of each drawer using a single bolt through a pre-drilled center hole. Wooden knobs in pine, oak, and walnut are available at hardware stores for 0.50 to 2.00 dollars each. Center the knob on the drawer front both horizontally and vertically before drilling to keep the visual alignment consistent across all drawers in the stack.
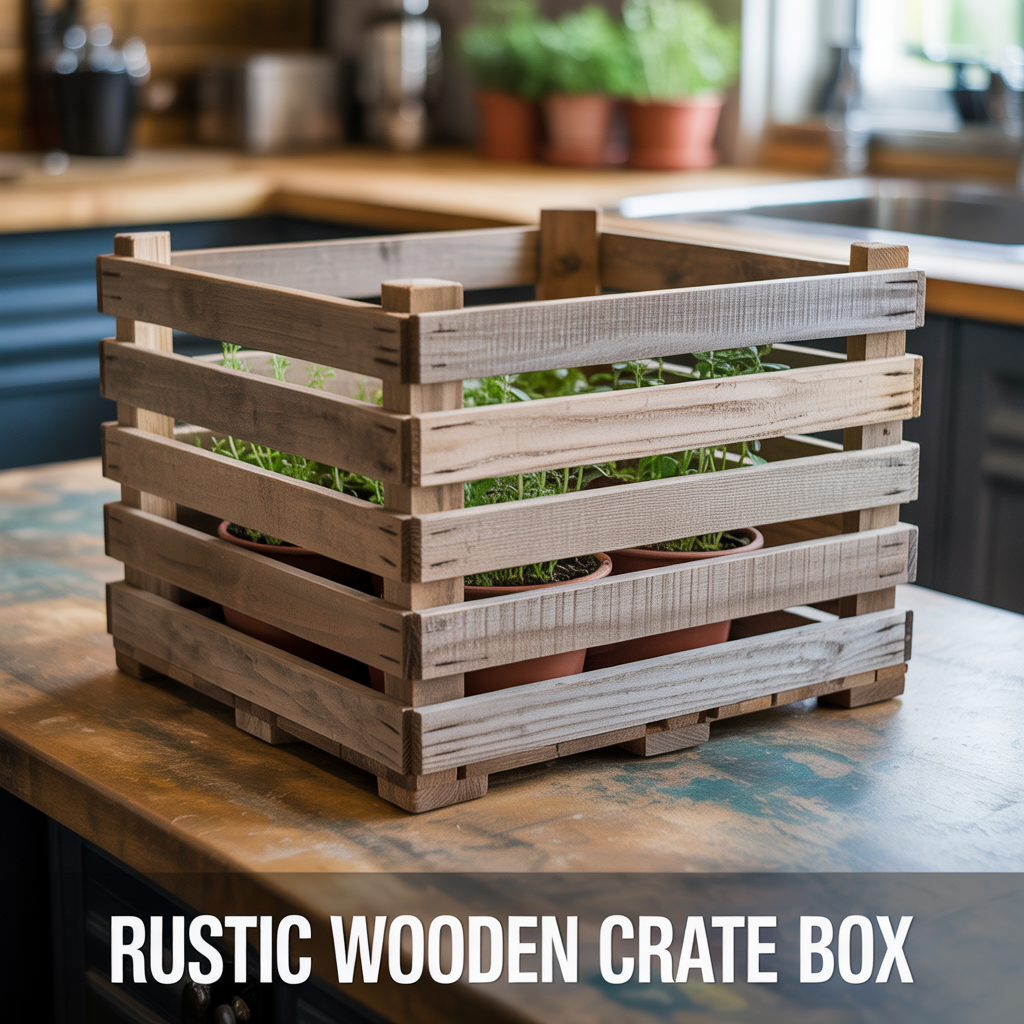
9. Rustic Wooden Crate Box
A rustic wooden crate box uses spaced slat construction on the four sides instead of solid panels, which produces an open-sided storage box that suits plants, bottles, and kitchen storage displays. I made three at 12 x 8 x 6 inches from reclaimed pallet wood for a kitchen counter display. Each one cost zero dollars in materials and took 40 minutes to build using only a hand saw and a drill.
Pallet wood gives an immediate rustic finish without any staining because the weathered surface texture reads as aged wood from the moment it is assembled.
How to Build a Wooden Slat Crate
Cut 8 slats at 12 x 2 inches and 8 slats at 8 x 2 inches from 18 mm pallet wood for the long and short sides respectively. Cut 4 corner posts at 6 inches tall from 3 x 3 cm square stock. Attach the slats to the corner posts using 1.25-inch nails with a 1 cm gap between each slat. Cut a solid base panel at 12 x 8 inches and nail it to the bottom of the four corner posts to complete the crate structure.
Finishing a Rustic Wooden Crate
Leave reclaimed pallet wood unfinished for a natural weathered appearance. Apply white chalk paint for a Scandinavian farmhouse style. Apply dark walnut stain for a traditional rustic look. Lightly sand all surfaces with 80-grit sandpaper before any finish application to remove splinters without removing the natural weathering patina that gives reclaimed wood its characteristic surface texture.
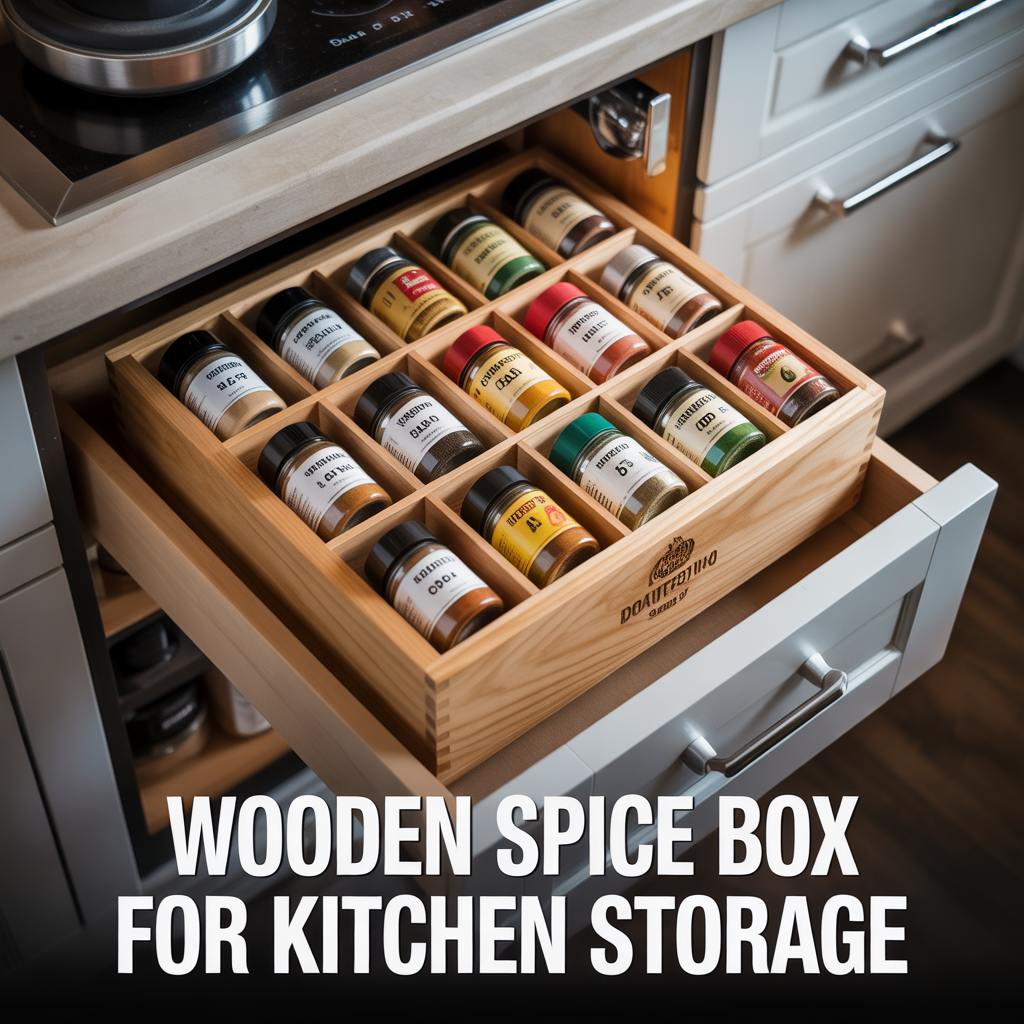
10. Wooden Spice Box for Kitchen Storage
A wooden spice box uses a series of individual small compartments within a single lidded or open-top box to organize spice jars in a kitchen drawer or on a countertop. I built a 12-compartment version at 14 x 10 x 3 inches from 9 mm pine for my kitchen drawer and it fits 12 standard spice jars standing upright with their labels visible from above. Build time was 90 minutes.
Kitchen storage boxes benefit from a food-safe interior finish. Apply food-safe mineral oil or beeswax polish to all interior surfaces of any wooden box used for food storage or contact.
Sizing the Compartments for a Spice Box
Measure the diameter of the spice jars used in your kitchen before cutting any compartment dividers. Standard spice jars measure 45 mm in diameter. Cut interior divider strips to produce compartments at 50 x 50 mm each for a 5 mm clearance around every jar. A 14 x 10 inch base produces a 4 x 3 grid of 12 compartments at this spacing with 10 mm border space at all outer edges.
Wood Choice for a Kitchen Spice Box
Use pine or maple for a kitchen spice box because both are closed-grain woods that absorb less moisture and food residue than open-grain woods such as oak or ash. Closed-grain wood surfaces are easier to clean and resist staining from spice residue better than open-grain alternatives. Apply food-safe mineral oil to all surfaces including the interior compartment walls before placing any spice jars inside.
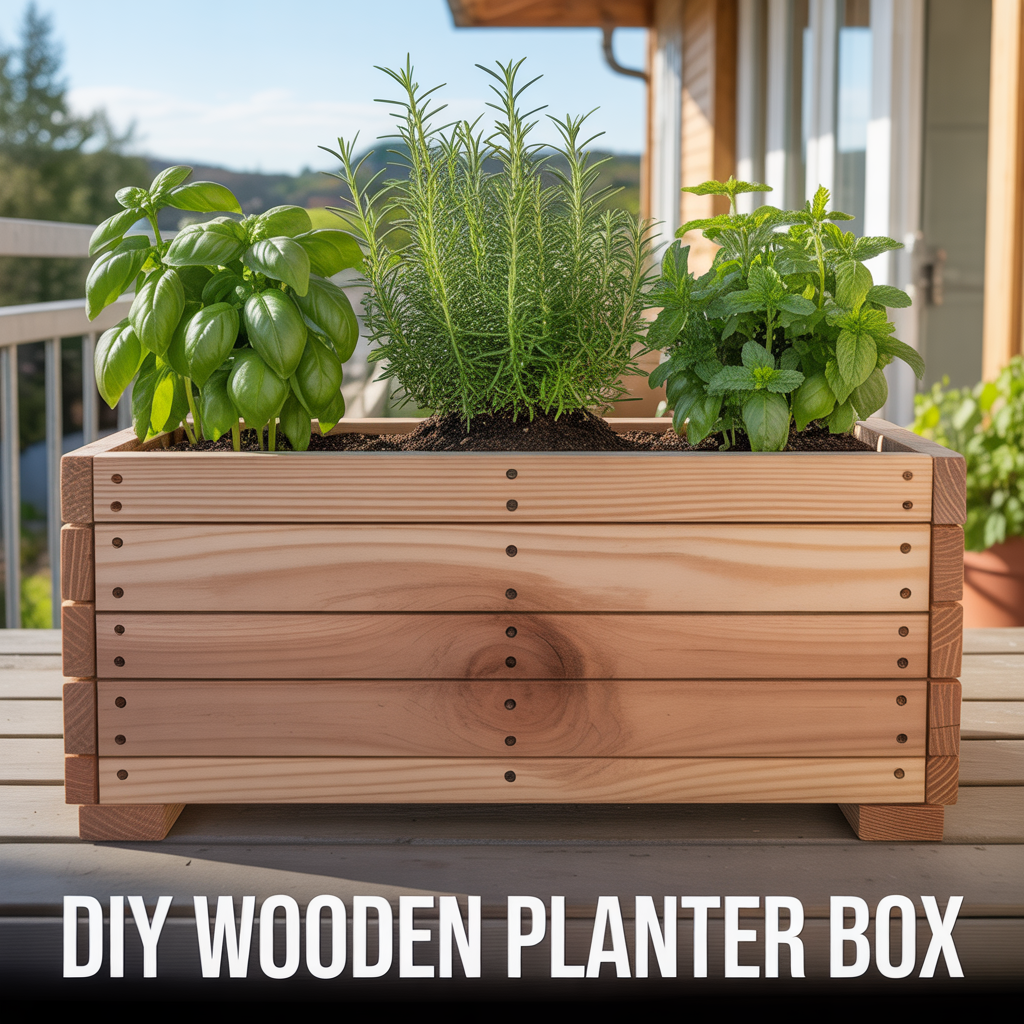
11. DIY Wooden Planter Box
A DIY wooden planter box uses cedar or pressure-treated pine to build an outdoor or indoor box for holding potted plants or growing herbs directly in soil. I built a 36 x 12 x 10 inch cedar planter for my balcony in 2 hours using fence boards. Cedar costs more than pine but resists outdoor moisture without any sealant treatment, which saves finishing time on large planter projects.
Planter boxes require drainage holes in the base panel: drill 10 mm holes spaced 6 inches apart across the entire base area to prevent waterlogging of plant roots.
Wood Treatment for an Outdoor Planter Box
Apply exterior-grade wood sealant to all outer surfaces of a pine planter box before outdoor use. Do not apply sealant to interior surfaces that contact soil because treated wood chemicals leach into the soil and affect plant health. Line the interior with heavy-duty plastic sheeting stapled to the inner walls to separate the soil from the wood completely while still allowing drainage through the base holes.
Indoor Herb Planter Box Dimensions
Cut a 3-compartment indoor herb planter at 18 x 6 x 5 inches total to fit a standard kitchen windowsill width. Each compartment measures 6 x 6 inches and holds one 5-inch diameter herb pot. Use 12 mm pine for an indoor planter because the lighter material weight keeps the finished box easy to move during watering and cleaning without the structural demands that outdoor planters require.
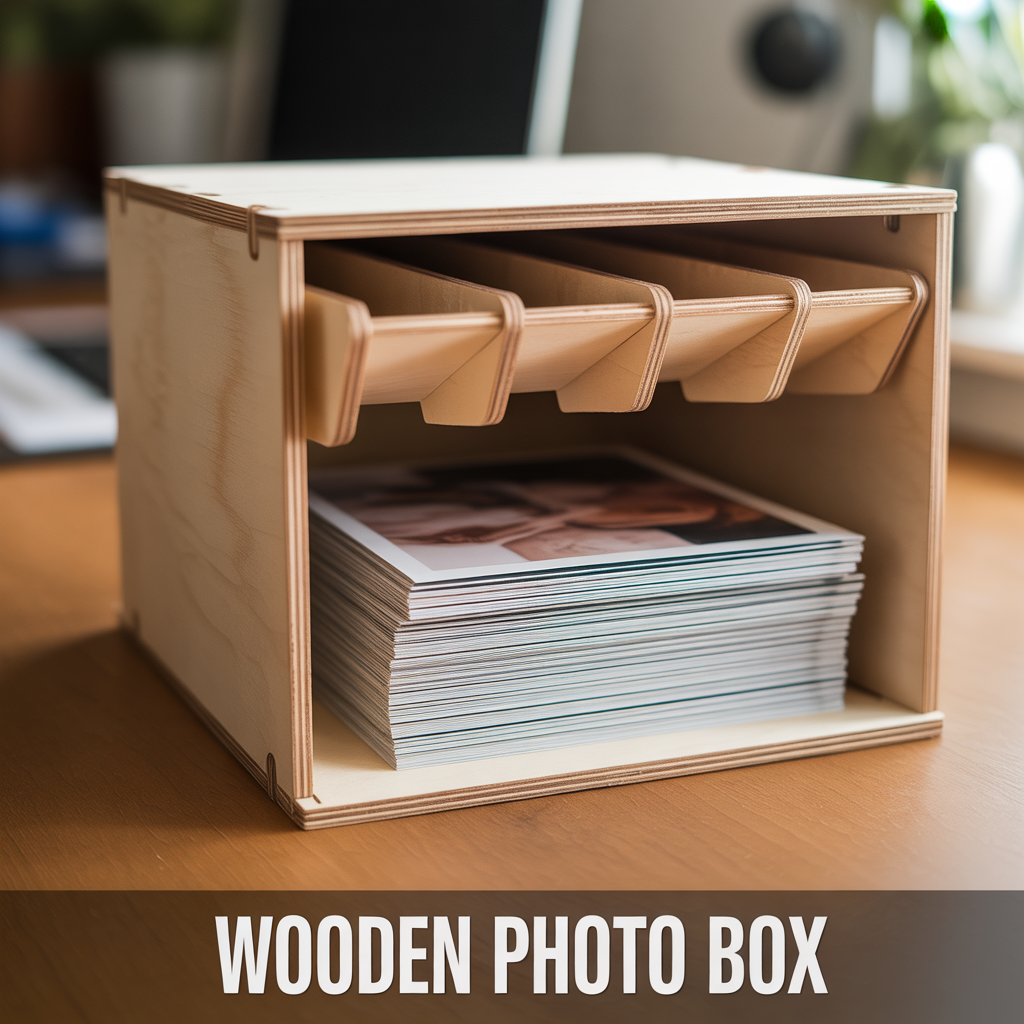
12. Wooden Photo Box
A wooden photo box stores printed photographs in a flat-stacked format inside a lidded box sized to standard photo print dimensions. I built one at 7 x 5 x 4 inches from 9 mm MDF to store 6 x 4 inch print photographs. The box holds approximately 200 prints stacked flat with 5 mm of headroom above the top print when the lid closes. The total material cost was 4 dollars.
Photo storage boxes benefit from an acid-free interior lining because untreated wood releases tannins and acids over time that yellow and degrade paper prints stored in direct contact with the wood surface.
Lining a Photo Box for Archival Storage
Line all interior surfaces with acid-free tissue paper or archival craft paper cut to fit and adhered with a water-based PVA glue diluted to 50% concentration. Allow the lining to dry completely before placing any photographs inside. Acid-free paper creates a barrier between the wood surface and the prints that prevents chemical transfer and extends the storage life of printed photographs significantly over an unlined wooden box.
Adding a Tab Divider System Inside a Photo Box
Cut 5 mm MDF divider cards at 6.8 x 4.8 inches to fit inside a 7 x 5 inch photo box with 2 mm clearance on all sides. Round one corner of each divider card at a different position: top left, top center, and top right. This staggered tab system allows each divider to be identified and pulled out individually without disturbing the prints in adjacent sections of the storage box.
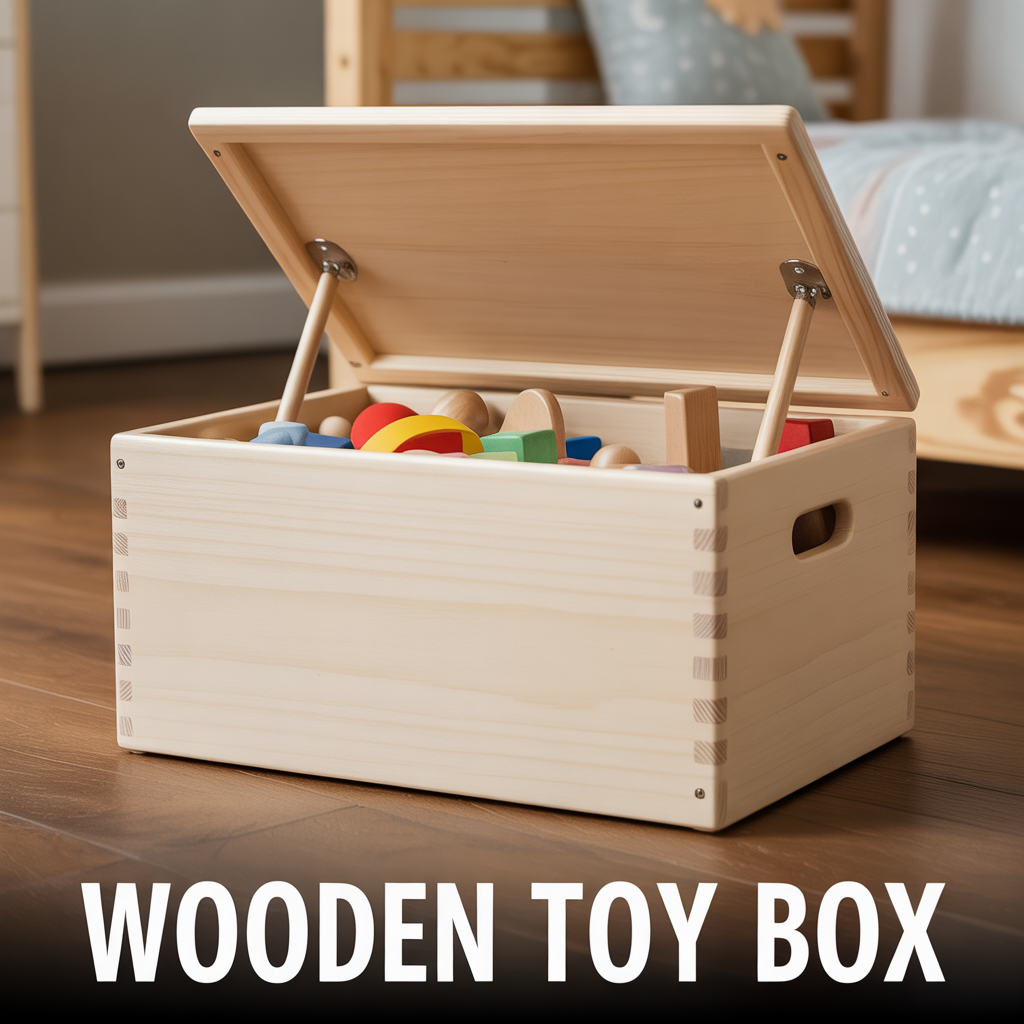
13.Wooden Toy Box
A wooden toy box uses 18 mm pine or plywood panels assembled into a large lidded box with a slow-close lid hinge to prevent the lid from dropping onto a child’s hands during use. I built one at 24 x 16 x 16 inches for my nephew’s bedroom using 18 mm pine and fitted it with two lid support hinges that hold the lid open at 90 degrees. Build time was 4 hours including sanding and painting.
Toy boxes require rounded or chamfered top edges on all exterior corners to prevent injury during play. Use a router with a 6 mm roundover bit or 80-grit sandpaper to round all sharp corners before painting.
Fitting a Slow-Close Lid Hinge on a Toy Box
Slow-close lid support hinges attach to the interior side walls of the box and the underside of the lid panel. Each hinge supports 50% of the lid weight. Two hinges placed 3 inches from each end of the lid provide full support across the lid width. Follow the manufacturer’s installation template for correct positioning because incorrect placement prevents the hinge from reaching its full open position.
Paint Finish for a Children’s Toy Box
Use water-based non-toxic paint certified to EN71-3 toy safety standard for any wooden box intended for children’s use. Apply primer first on MDF or pine surfaces before the color coat. Two coats of color paint, sanded lightly between coats with 220-grit paper, produce a smooth surface that cleans easily with a damp cloth. Avoid oil-based paints on children’s furniture because the drying time exceeds 24 hours and the solvent content is higher than water-based alternatives.
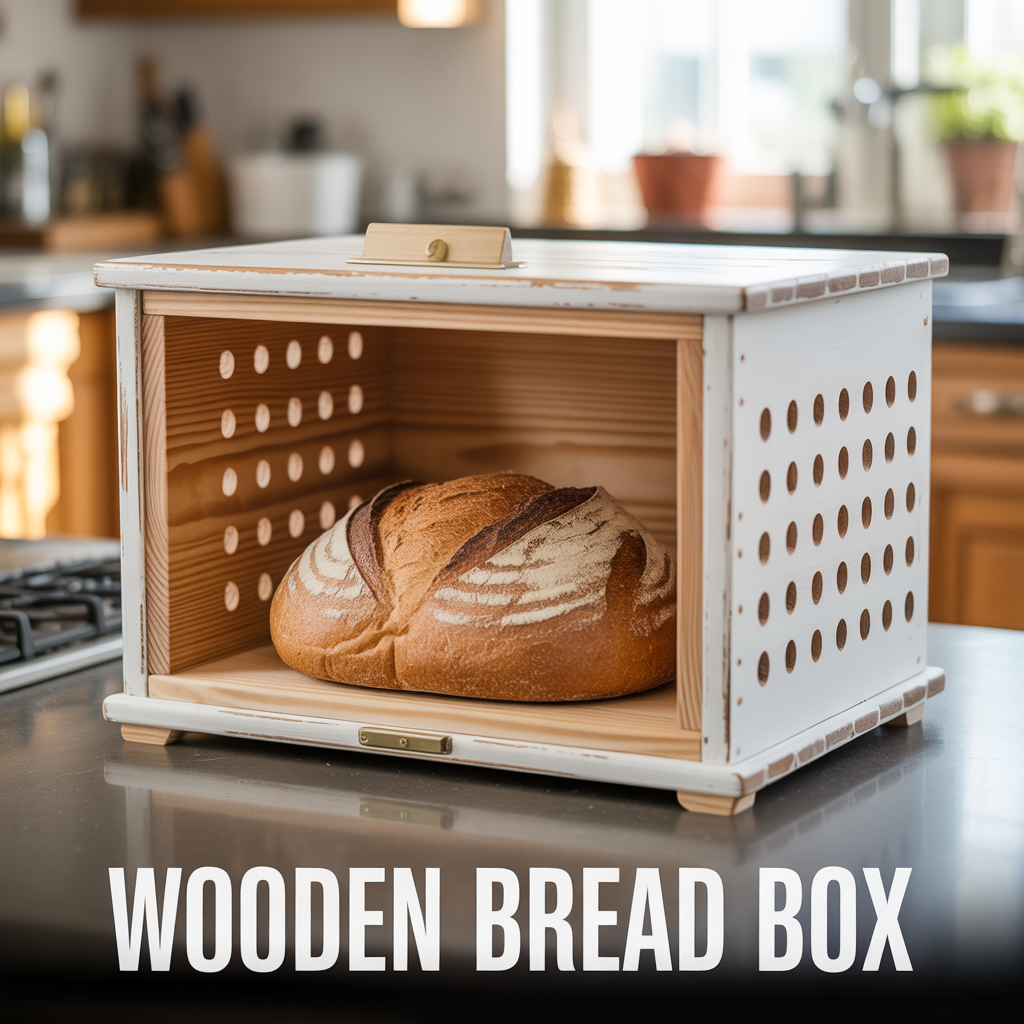
14. Wooden Bread Box
A wooden bread box uses 18 mm pine or MDF with a hinged or roll-top lid and ventilation gaps in the side panels to store bread at room temperature while slowing moisture loss and mold growth. I built a 14 x 10 x 8 inch version from pine with a standard hinged lid and painted it with white chalk paint. It replaced a plastic bread bin on my kitchen counter and keeps bread fresh for 3 to 4 days consistently.
Ventilation gaps are necessary in a bread box design. Drill 8 mm holes in a grid pattern across each side panel with 30 mm spacing to provide adequate airflow around stored bread.
Building a Roll-Top Wooden Bread Box
A roll-top lid uses thin wood slats glued to a canvas backing that flexes over a curved guide channel routed into the top inner edges of the two side panels. Cut 45 slats at 14 x 0.75 x 0.5 inches from thin pine strip. Glue each slat side by side onto a canvas strip 14 inches wide using wood glue. Allow the glued roll-top to dry flat for 4 hours before bending it into the curved guide channel.
Food-Safe Finish for a Wooden Bread Box
Apply food-safe beeswax polish to all interior surfaces of a wooden bread box. Beeswax creates a moisture-resistant coating that prevents the wood from absorbing bread moisture while remaining completely non-toxic. Apply one coat of melted beeswax with a lint-free cloth, allow it to solidify, then buff with a clean cloth to produce a low-sheen protective surface that requires re-application approximately every 6 months with regular use.
15. Wooden Charging Station Box
A wooden charging station box conceals power strips and charging cables inside a lidded or open-top box with drilled cable exit holes in the side panels, keeping a desk surface organized and free from visible cable clutter. I built one at 12 x 6 x 4 inches from 12 mm pine to hold a 4-port USB charger and 4 device cables. It reduced visible cable clutter on my desk by 100% and cost 6 dollars in wood.
Drill cable exit holes at 20 mm diameter to accommodate standard USB and USB-C cable connectors including their plugs. Position the holes 15 mm above the base on the back and side panels.

Ventilation Requirements for a Charging Station Box
Drill a minimum of 4 ventilation holes at 15 mm diameter in the lid or upper back panel of a charging station box. Power adapters and chargers generate heat during use, and an enclosed box without ventilation concentrates this heat to levels that reduce charger lifespan and present a fire risk with some adapter types. Space ventilation holes at 30 mm intervals across the top panel for adequate airflow.
Finishing a Charging Station Box for Desk Use
Apply 2 coats of water-based polyurethane varnish to all exterior surfaces for a durable, wipe-clean finish suited to a desk environment. A matte finish reduces light reflection and suits modern desk setups better than a gloss finish. Line the interior base with a non-slip silicone mat cut to size to prevent the power adapter from sliding inside the box during cable insertion and removal.
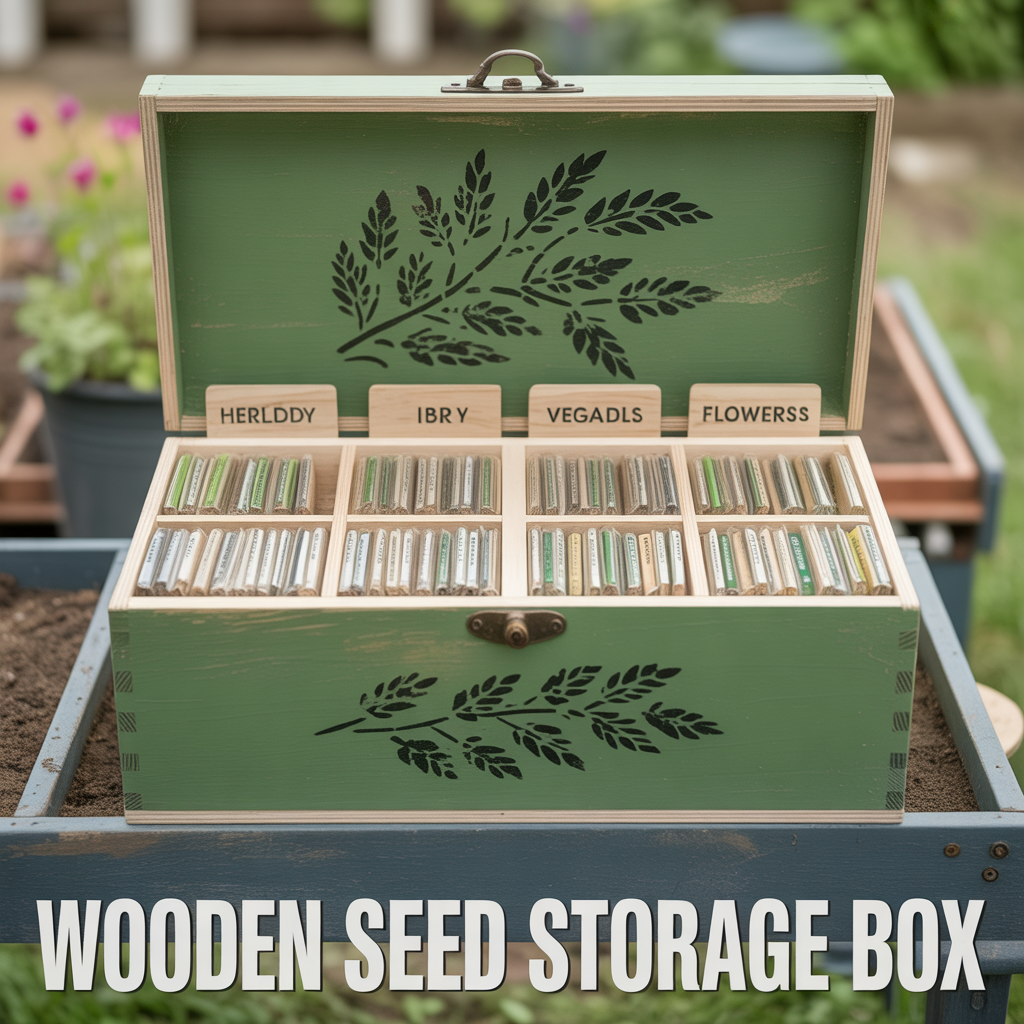
16. Wooden Seed Storage Box
A wooden seed storage box holds labeled seed packets in organized rows inside a lidded box sized to standard seed packet dimensions. I built one at 10 x 6 x 4 inches from 9 mm pine for my vegetable garden supplies. It holds 40 seed packets in two rows divided by a central divider panel. I painted the exterior with green chalk paint and stenciled a leaf design on the lid.
Seed storage boxes require a dry, dark interior to preserve seed viability. A tight-fitting lid and interior lining with acid-free paper protect seeds from light exposure and humidity fluctuation.
Divider System for a Seed Storage Box
Cut a central divider panel from 6 mm MDF to fit the interior height and length of the box. Glue the divider panel to the base at the center point. Each half of the box holds 20 seed packets standing upright with their labels visible from above. Cut small index card tabs at 3 x 1 inch labeled with seed categories: root vegetables, leafy greens, herbs, and flowers, and stand them at the front of each section.
Exterior Decoration for a Seed Storage Box
Apply a botanical stencil design to the lid using acrylic craft paint and a stencil brush. Position the stencil on the lid center, tape the edges, and stipple paint through the openings using a dry stencil brush loaded with minimal paint. Allow the stenciled design to dry for 1 hour before applying a single coat of clear matte varnish over the entire exterior to seal both the base paint color and the stencil design.
17. Wooden First Aid Box
A wooden first aid box organizes medical supplies in labeled sections inside a lidded box mounted on a wall or stored in a cabinet. I built one at 12 x 8 x 5 inches from 12 mm pine with a red cross painted on the lid and 6 interior compartments for bandages, antiseptic, medications, scissors, and tape. It replaced a disorganized plastic bag and reduced the time to find any item from 2 minutes to under 10 seconds.
First aid boxes require a positive-latch lid closure that prevents accidental opening but allows fast one-hand access in emergency situations. Fit a simple barrel bolt latch on the front face of the lid.
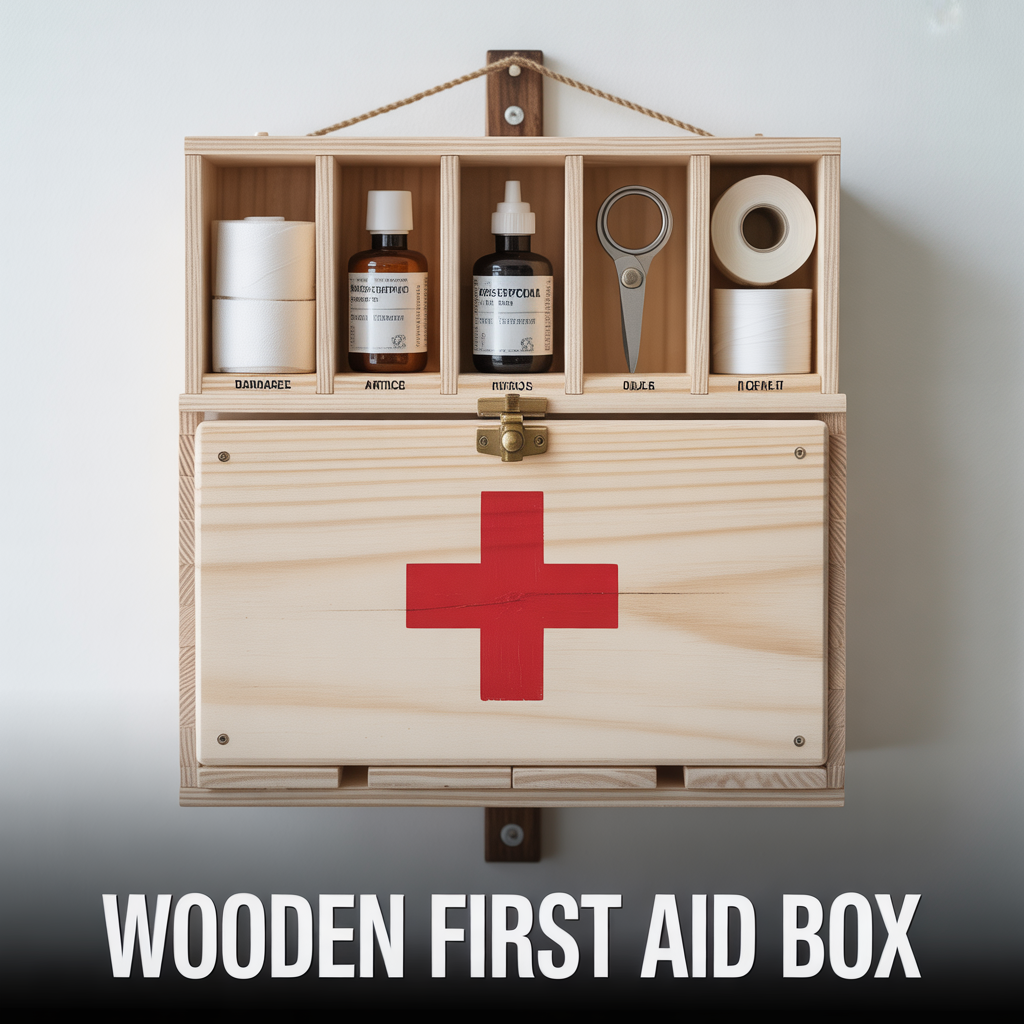
Interior Compartment Layout for a First Aid Box
Divide the interior into 6 compartments using 6 mm MDF divider strips. Compartment sizes: two large sections at 4 x 5 inches for bandage rolls and gauze packs, two medium sections at 3 x 5 inches for antiseptic bottles and medications, and two small sections at 2 x 5 inches for scissors, tweezers, and tape rolls. Label each compartment with a wood burning tool or printed adhesive label for fast identification.
Mounting a Wooden First Aid Box on a Wall
Attach a French cleat to the back panel of the first aid box for secure wall mounting. Cut a 45-degree bevel along the top edge of a 12 x 2 inch pine strip. Screw the beveled strip to the wall at the desired height using wall anchors rated for the box weight. Attach the matching beveled strip to the back of the box so the two angled edges interlock when the box hangs on the wall cleat.
18. Wooden Recipe Box
A wooden recipe box holds handwritten or printed recipe cards in alphabetical or category order inside a hinged lidded box sized to standard index card dimensions. I built one at 6 x 4.5 x 4 inches from 9 mm pine to hold 4 x 6 inch recipe cards. The box holds 80 cards divided by 8 category dividers. I gave it as a wedding gift filled with 20 handwritten family recipes and it cost 9 dollars total to make and fill.
Recipe boxes on Etsy sell between 20 and 45 dollars as personalized gifts, making this one of the most time-efficient DIY wooden box ideas for handmade sellers.
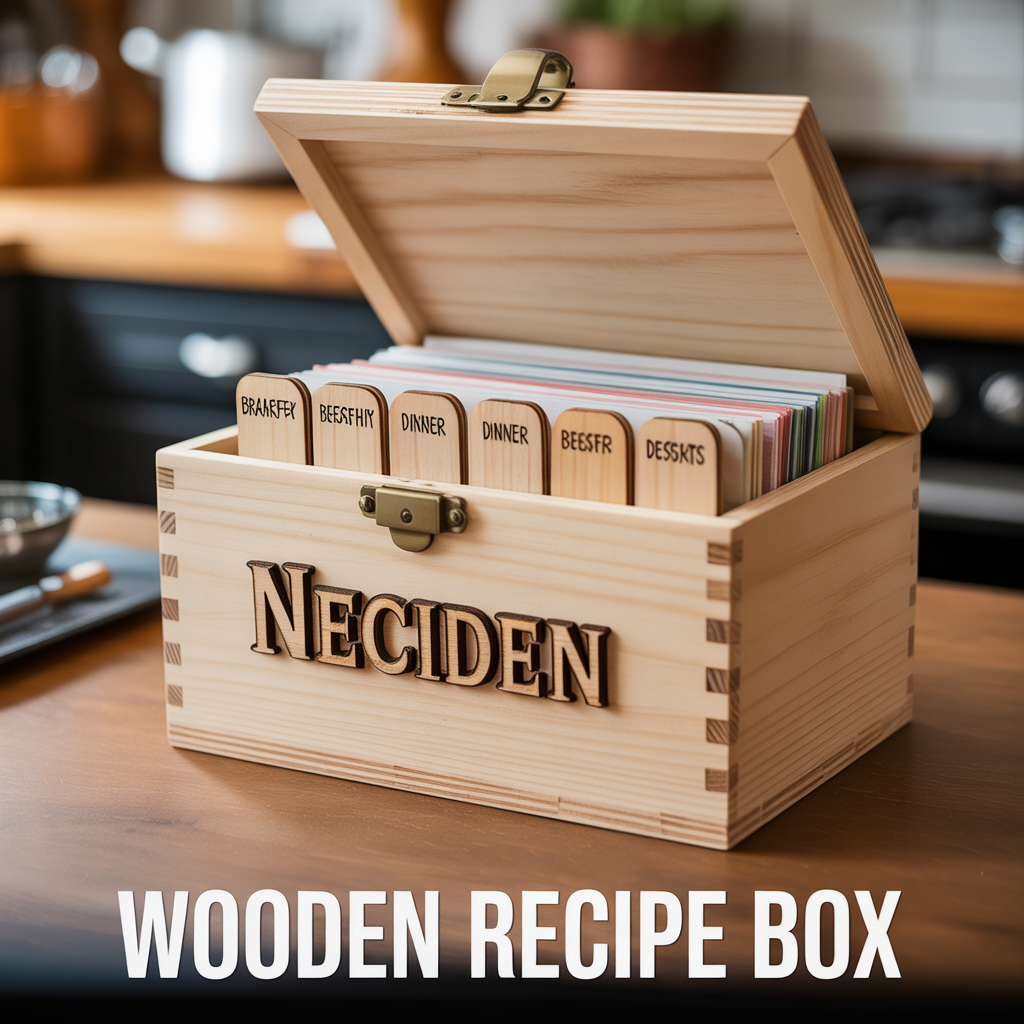
Building Divider Cards for a Recipe Box
Cut 8 divider cards from 3 mm MDF at 6.2 x 4.2 inches, slightly larger than the 6 x 4 inch recipe cards so the divider tabs extend above the card stack for visibility. Round the top corner of each divider at a staggered position from left to right across the 8 cards. Label each divider tab using a wood burning tool: Breakfast, Lunch, Dinner, Soups, Salads, Desserts, Drinks, and Snacks.
Personalization Options for a Recipe Box Lid
Engrave a name, monogram, or short message on the lid using a wood burning tool for a handcrafted appearance. Apply vinyl lettering in a clean modern font for a printed look. Commission a CNC router engraving for a precise, professional result on hardwood lids. All three methods produce a permanent personalization that does not fade, peel, or wear off with regular handling over time.
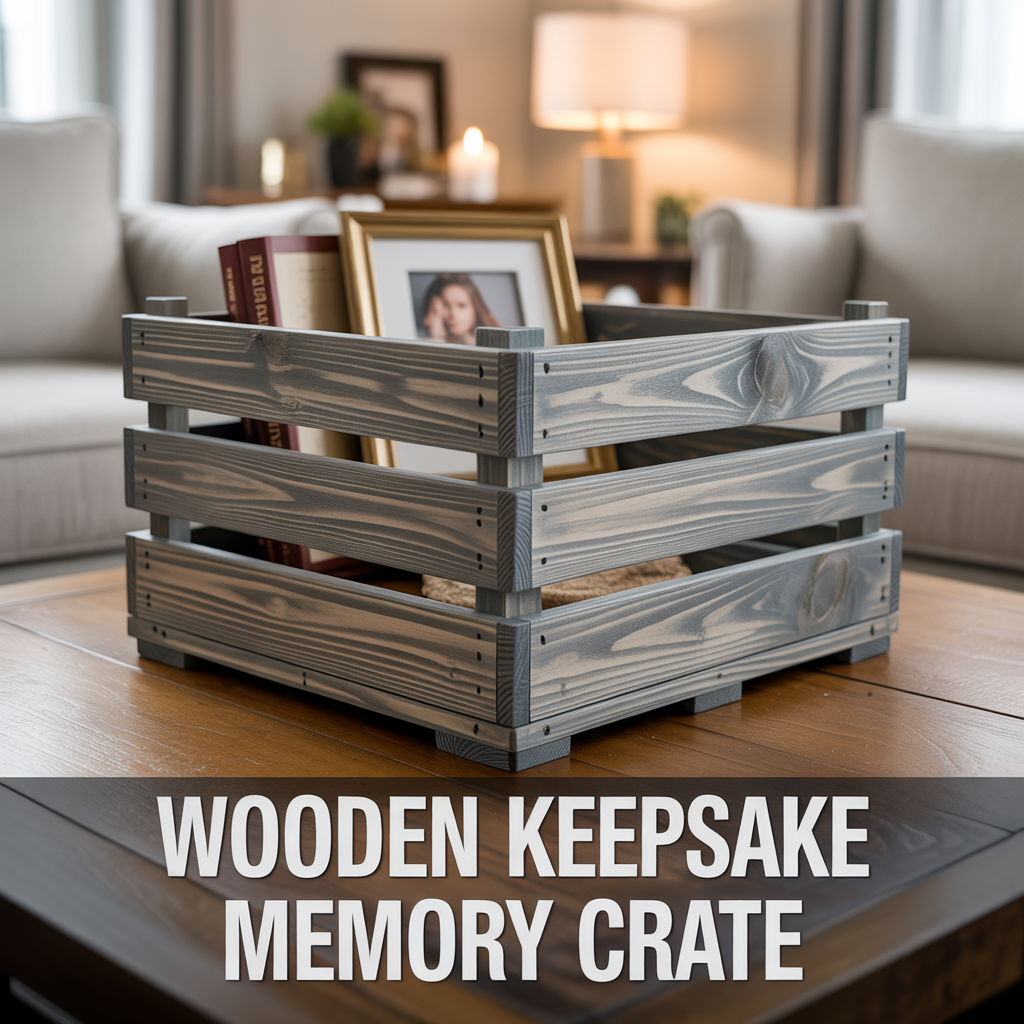
19. Wooden Keepsake Memory Crate
A wooden keepsake memory crate uses open slat sides and a solid base to create a display-style storage piece for holding books, framed photos, candles, and decorative objects on a shelf or coffee table. I built one at 14 x 10 x 6 inches from reclaimed pine fence boards for a living room coffee table display. The slat sides let the stored contents partially show through, which adds visual interest compared to a solid-panel box.
Memory crates suit living room decor because the open construction reduces visual weight and allows the stored items to contribute to the room’s overall decorative scheme.
Slat Spacing for a Decorative Memory Crate
Space slats at 10 mm gaps for a crate intended for display use with books and objects. Wider gaps of 15 to 20 mm suit crates holding larger objects such as candles, bottles, and potted plants. Narrower gaps of 5 mm suit crates holding smaller items that would otherwise fall through wider spacing. Mark all gap positions on the corner posts with a pencil before nailing to keep spacing consistent across all four sides.
Staining a Memory Crate for Home Decor
Apply a grey weathering stain to pine slats for a contemporary Scandinavian look. Apply a dark walnut stain for a traditional or vintage aesthetic. Apply a white wash finish by diluting white paint to 30% concentration with water and applying with a cloth in the direction of the wood grain, then wiping back immediately to leave color in the grain only. Each finish produces a distinctly different style result from the same basic crate construction.
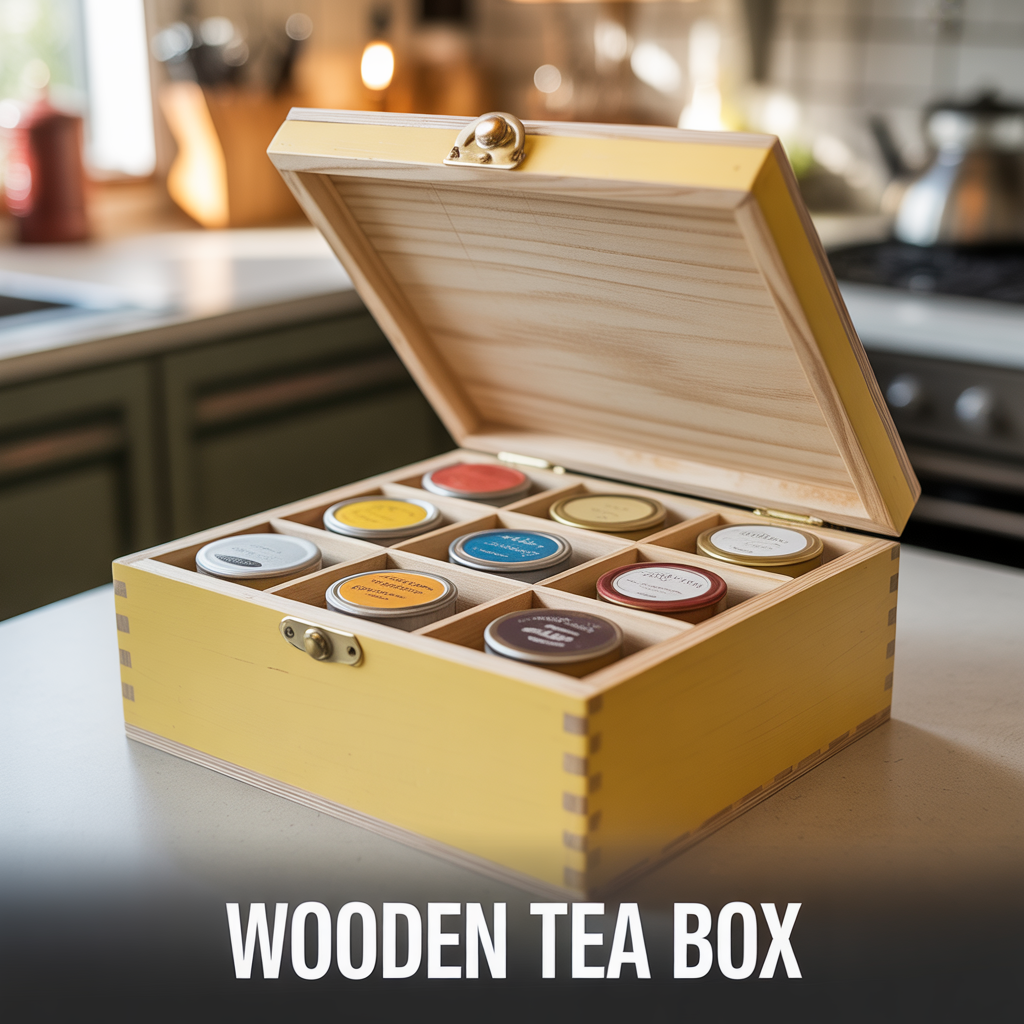
20. Wooden Tea Box
A wooden tea box organizes loose-leaf tea tins or tea bag packets in labeled compartments inside a hinged lidded box. I built a 9-compartment version at 12 x 9 x 4 inches from 9 mm pine for my kitchen counter. Each compartment holds one standard tea tin or a stack of 20 individual tea bags. The finished box cost 7 dollars in materials and replaced three separate loose containers on the counter.
Tea boxes work well as personalized gifts because they suit recipients of any age and the interior compartments accommodate any brand or style of tea packaging.
Building a 9-Compartment Tea Box Interior
Cut a 12 x 9 inch base panel and assemble the outer frame first. Cut 2 long dividers at 9 x 3 inches and 2 short dividers at 4 x 3 inches from 9 mm pine. Install the 2 long dividers parallel to the long axis of the box, spaced equally at 4-inch intervals. Install the 2 short dividers perpendicular to the long axis, intersecting the long dividers to create a 3 x 3 grid of 9 equal compartments.
Finishing a Wooden Tea Box for Kitchen Display
Apply 2 coats of chalk paint in a neutral color for a kitchen display finish. Sand lightly between coats with 220-grit paper. Apply clear wax polish over the finished paint surface using a soft cloth and buff to a low sheen after 10 minutes of drying time. Chalk paint with wax sealing resists kitchen moisture and light cleaning better than unsealed chalk paint and produces a soft matte finish suited to both modern and farmhouse kitchen styles.
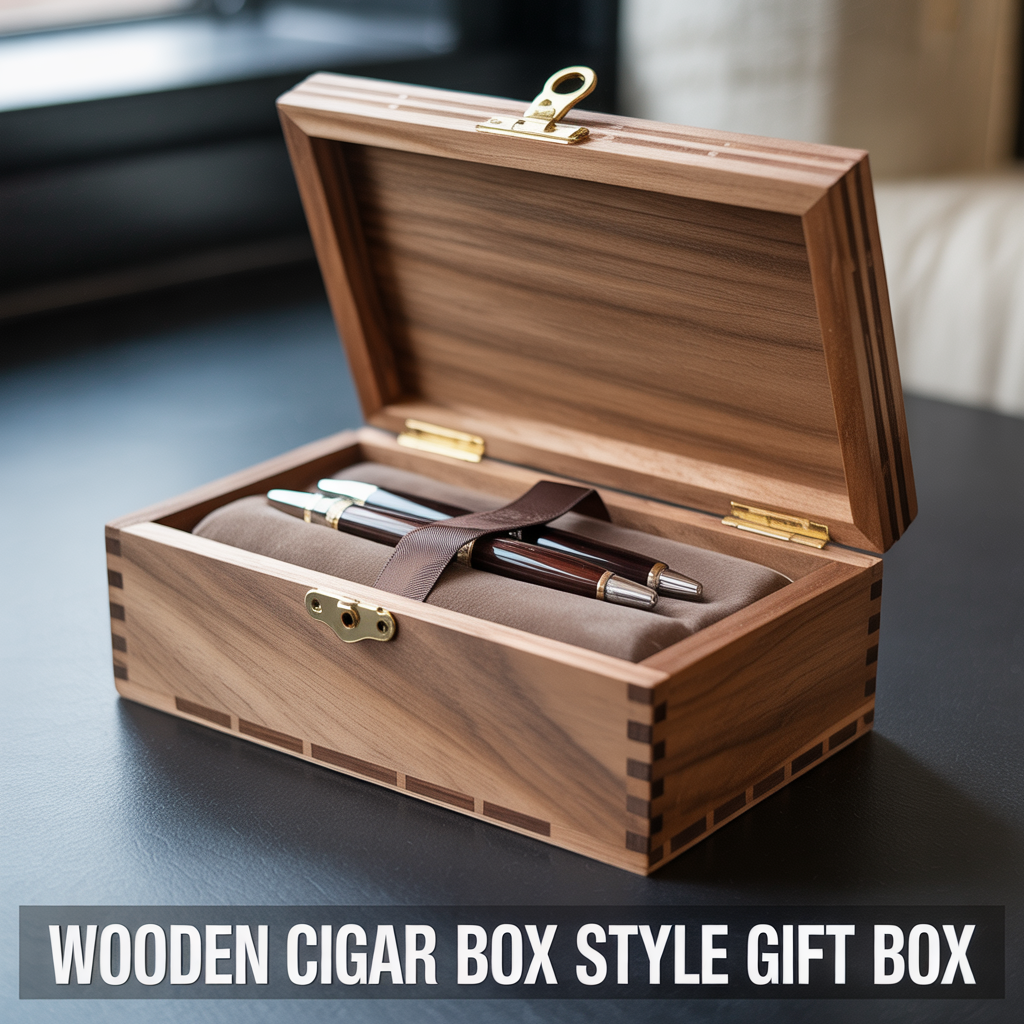
21. Wooden Cigar Box Style Gift Box
A wooden cigar box style gift box uses finger joint corners, a thin lid panel, and a piano hinge across the full back edge to produce a premium-looking presentation box for gifts including watches, pens, jewelry, and folded fabric items. I built one at 10 x 6 x 3 inches from 9 mm walnut plywood for a pen set gift. The finger joints at the corners required a table saw with a dado blade but produced a result that looked store-bought rather than handmade.
Finger joints increase the glue surface area at each corner by 4 to 6 times compared to a butt joint, producing a significantly stronger corner bond in thin-panel box construction.
Cutting Finger Joints Without a Table Saw
Cut finger joints using a hand saw and a small chisel if a table saw is unavailable. Mark the finger positions with a marking gauge at equal intervals across the end grain of each panel. Cut the shoulders with a hand saw and remove the waste between fingers using a sharp 6 mm chisel. A standard 10 x 6 inch panel uses 4 fingers per corner at 12 mm width each for a proportionate joint appearance.
Lining a Cigar Box Style Gift Box
Line the interior with 5 mm craft foam covered in velvet, suede, or linen fabric for a premium gift box interior. Cut the foam base to fit with 1 mm clearance on all sides. Cover each foam piece individually before placing it inside the box. A ribbon lift tab cut from the same lining fabric and glued to one end of the base foam panel allows the recipient to lift the contents out of the box without tipping it.
22. Wooden Box Set for Selling on Etsy
A wooden box set for selling uses 3 graduated box sizes built from the same wood type and finished in the same stain or paint color to create a coordinated product listing that photographs well and ships at a predictable cost. I sold my first set of 3 nesting pine boxes on Etsy at 38 dollars and sold out 12 sets in the first month. The material cost per set was 9 dollars, and each set took 2.5 hours to build.
Nesting box sets list at 30 to 65 dollars on Etsy depending on wood type, finish quality, and the seller’s shop rating. Sets with personalized engraving list at the higher end of this range.
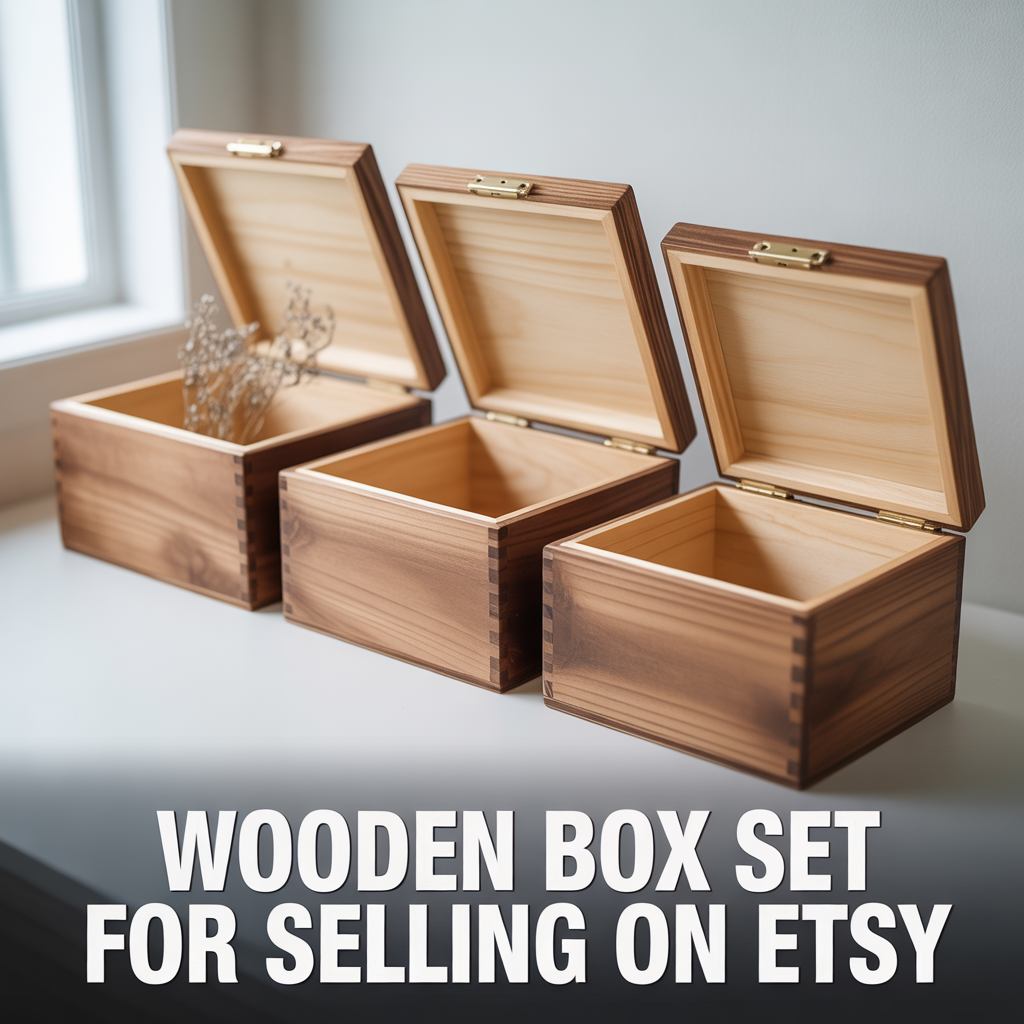
Standard Sizes for a Nesting Wooden Box Set
Build the three boxes at 10 x 7 x 4 inches, 8 x 5.5 x 3 inches, and 6 x 4 x 2.5 inches so each box fits inside the next larger size for compact shipping. Use 9 mm pine for the two smaller boxes and 12 mm pine for the largest box. Consistent wood thickness across all three boxes produces matching visual weight in the finished set even though the physical dimensions differ between each piece.
Photographing a Wooden Box Set for Etsy
Photograph the set in three arrangements: nested inside each other, stacked in a tower, and spread open showing all three lids raised simultaneously. Natural window light from the left side produces the most accurate wood color representation in product photos. Place a single decorative item, such as a sprig of dried flowers or a small candle, inside the open largest box to give the listing photos a styled appearance that increases click-through rate in Etsy search results.
FAQ
What wood is best for DIY wooden box ideas for beginners?
Pine wood is the best starting material for beginner DIY wooden box ideas because it is widely available, inexpensive, and cuts cleanly with both hand saws and power saws. Pine costs between 3 and 6 dollars per linear foot at most hardware stores. It sands smoothly, accepts both paint and stain evenly, and holds screws and nails without pre-drilling in most thicknesses above 15 mm. MDF board is the second best option for beginners because it produces smooth, grain-free surfaces that paint covers without any visible texture or grain pattern showing through the finish.
How do I make a wooden box without a table saw?
A wooden box builds successfully using only a hand saw, a drill, sandpaper, wood glue, and clamps without any power saw equipment. Cut all panels using a hand saw guided by a speed square for straight cuts. Assemble panels using butt joints with wood glue and 1.5-inch screws. Pre-drill all screw holes to prevent wood splitting. A beginner builds a complete simple storage box using only hand tools in under 2 hours. The finish quality of a hand tool box equals a power tool box after thorough sanding and finishing.
What is the easiest DIY wooden box idea for a complete beginner?
The easiest DIY wooden box idea for a complete beginner is a simple 5-panel plywood storage box using butt joints, wood glue, and screws. It requires no decorative joinery, no router work, and no specialty tools. The build process involves cutting 5 flat panels, sanding the cut edges, gluing and screwing the panels together, and applying a paint or varnish finish. A beginner completes this box in 90 minutes on their first attempt. This same basic box construction method scales to any size from a small desktop organizer up to a large blanket chest.
How much does it cost to build a DIY wooden box?
A basic DIY wooden box costs between 5 and 20 dollars in materials depending on size, wood type, and finish. A small 12 x 8 x 6 inch plywood storage box uses approximately 0.5 square meters of 12 mm plywood at a material cost of 5 to 8 dollars. A medium pine keepsake box at 10 x 7 x 5 inches costs 8 to 12 dollars in pine board, hinges, and finishing materials. Hardwood boxes cost 20 to 40 dollars in materials depending on species. Labor cost is zero for a DIY build compared to 40 to 120 dollars for an equivalent handmade box purchased from an Etsy seller.
How do I finish a DIY wooden box for outdoor use?
Finish a DIY wooden box for outdoor use with 2 to 3 coats of exterior-grade polyurethane varnish or exterior wood oil applied to all surfaces including the base panel. Sand lightly with 220-grit sandpaper between each coat after the previous coat dries fully. Cedar and teak require no sealant for outdoor use because both species contain natural oils that resist moisture independently. Pine and plywood require full sealant coverage on every surface to prevent delamination and rot when exposed to rain, dew, and direct sunlight over extended periods.