18 Furniture Makeover Ideas That Are Seriously Stunning
I used to walk past my old wooden dresser every single day and pretend it did not exist. It was scratched, dull, and honestly a little embarrassing. Then one weekend, I decided to actually do something about it and the result stopped three of my neighbors in their tracks.
Furniture makeover ideas are ways to refresh, repaint, or rebuild old furniture pieces so they look new without buying replacements. I learned this the hard way after spending way too much at a furniture store, only to find out that my beat-up thrift find could have looked just as good with some chalk paint and sandpaper.
The good news is that most of these projects cost under $50. I have personally tried several of them, and I can tell you that the before-and-after difference is genuinely shocking. Whether you have an old chair collecting dust or a cabinet that looks like it survived a war, there is a makeover idea on this list for you.
I also noticed that bedroom furniture makeover ideas get the most attention on Pinterest and home decor blogs, so I made sure to include plenty of those. By the end of this article, you will know exactly which project to start first.
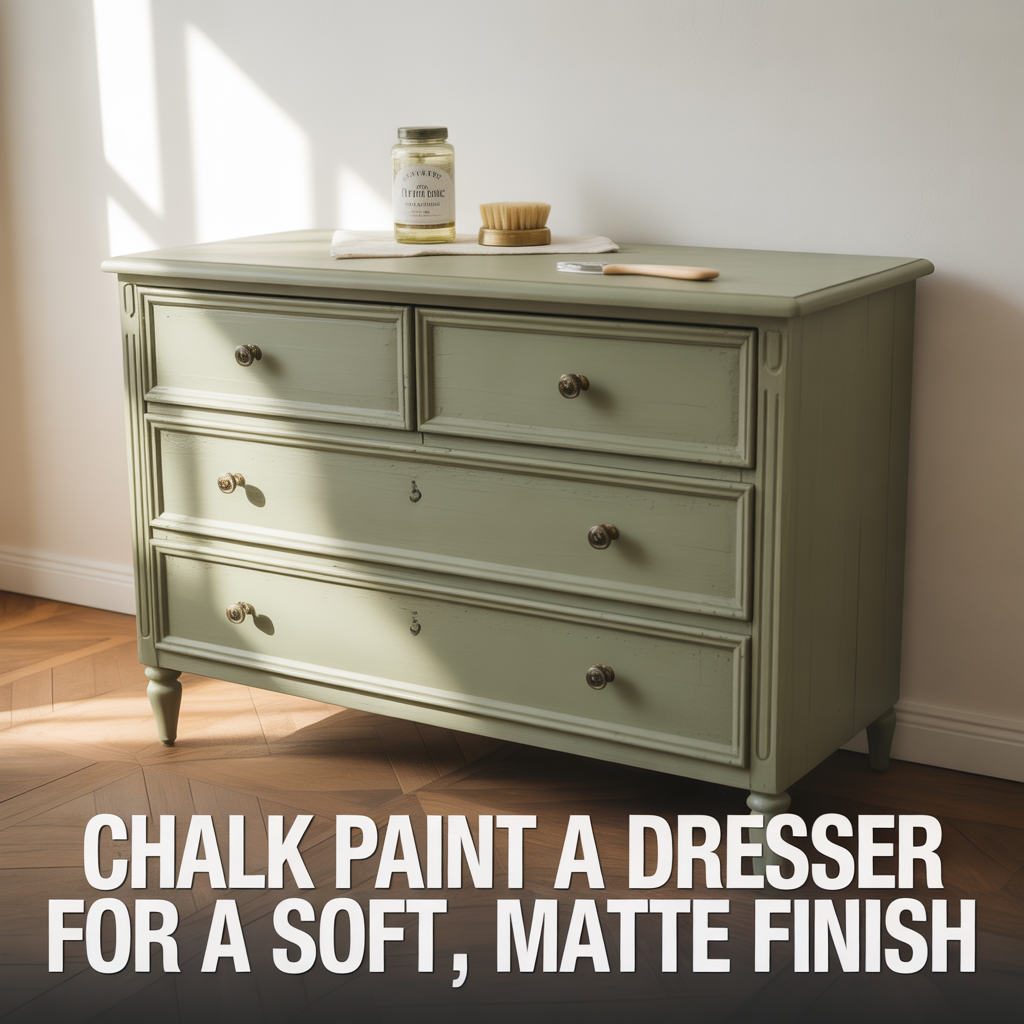
1. Chalk Paint a Dresser for a Soft, Matte Finish
Chalk paint is one of the most forgiving materials I have ever used on furniture. It sticks to almost any surface without priming, dries fast, and gives a smooth matte finish that looks expensive. I painted a thrift store dresser in sage green using chalk paint, and it now looks like something from an interior design magazine. The total cost was under $30, including the wax sealant I applied on top.
What Makes Chalk Paint So Easy to Work With
Chalk paint requires no sanding before application in most cases. It bonds directly to wood, metal, and even laminate surfaces. I applied two thin coats with a wide brush, let each coat dry for about 30 minutes, and then sealed it with clear furniture wax. The wax protects the finish and adds a very slight sheen. Beginners get great results on their very first try with this method.
Best Colors to Choose for a Chalk-Painted Dresser
Neutral tones like white, grey, and sage green work best for bedroom furniture makeover ideas. I personally chose sage green because it photographs well and matches almost any bedding. Darker shades like navy and forest green also photograph well for painted furniture ideas before and after pictures. Stay away from very bright colors unless the piece is small, because large painted furniture in bold colors can easily overpower a room.
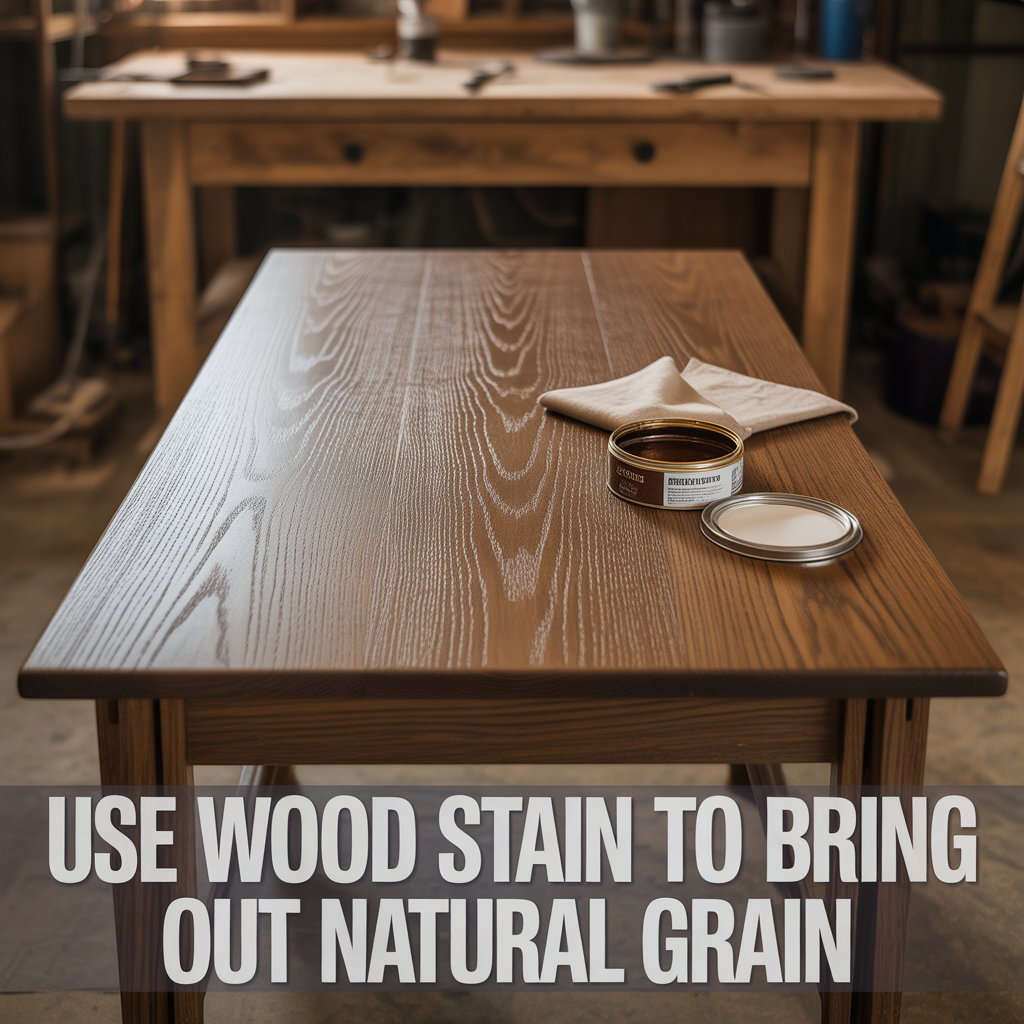
2. Use Wood Stain to Bring Out Natural Grain
Wood stain is the right choice when the furniture has a beautiful grain underneath old paint or grime. I stripped an old oak coffee table once, and the grain underneath was stunning. Staining it in a walnut tone took about two hours total and made the table look like a brand-new, high-end piece. This is one of the most satisfying old furniture makeover ideas because the wood does most of the visual work for you.
How to Apply Wood Stain Without Streaks
Sand the furniture with 120-grit sandpaper first, then wipe it clean with a damp cloth. Let it dry fully before applying stain with a lint-free cloth in the direction of the grain. I wiped off the excess after about five minutes to avoid dark patches. Always test the stain on a hidden area first. One coat gives a lighter tone; two coats give a deeper, richer result.
Which Wood Types Respond Best to Staining
Oak, pine, and ash absorb stain evenly and show grain detail clearly. I stained both pine and oak pieces, and oak gave the richer final result. Maple can be tricky because it absorbs stain unevenly and may look blotchy. Always use a wood conditioner before staining maple or cherry. Avoid staining painted furniture without stripping it completely first, or the stain will not penetrate the surface properly.
3. Reupholster a Chair With New Fabric
Reupholstering a chair sounds difficult, but for most dining chairs it takes less than 20 minutes. I reupholstered four dining chairs using a staple gun, new foam, and a fabric I bought for $8 per yard. The chairs went from looking worn and outdated to looking like they belonged in a styled dining room photo shoot. This is one of the best budget furniture makeover ideas because the materials cost very little.
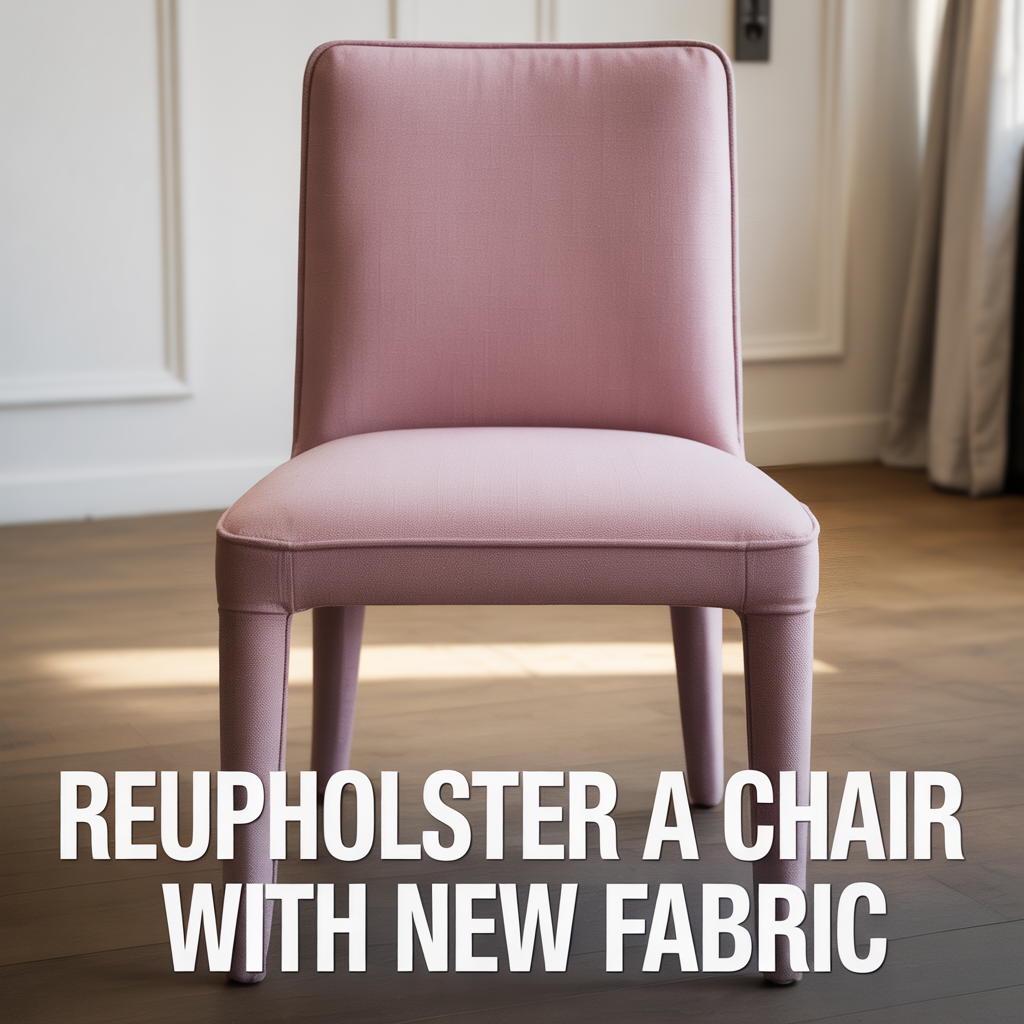
What Fabric Works Best for Chair Seats
Upholstery-grade fabric, velvet, and canvas hold up well under daily use. I used a thick canvas fabric in a dusty pink tone, and it has held up through heavy daily use for over a year now. Avoid thin cotton or linen for seats because they wear out quickly. For dining chairs specifically, I also recommend choosing a fabric that can be spot-cleaned easily. Darker fabrics hide everyday stains better than light ones.
Step-by-Step Process for Reupholstering a Seat
Remove the seat by unscrewing it from underneath the chair frame. Pull off the old fabric and staples using a flathead screwdriver and pliers. Cut new foam to size if the old foam has flattened. Lay your fabric face-down, place the seat on top, pull the fabric tightly around the edges, and staple it in place every two inches. Screw the seat back onto the frame. I completed all four chairs in under 90 minutes total.
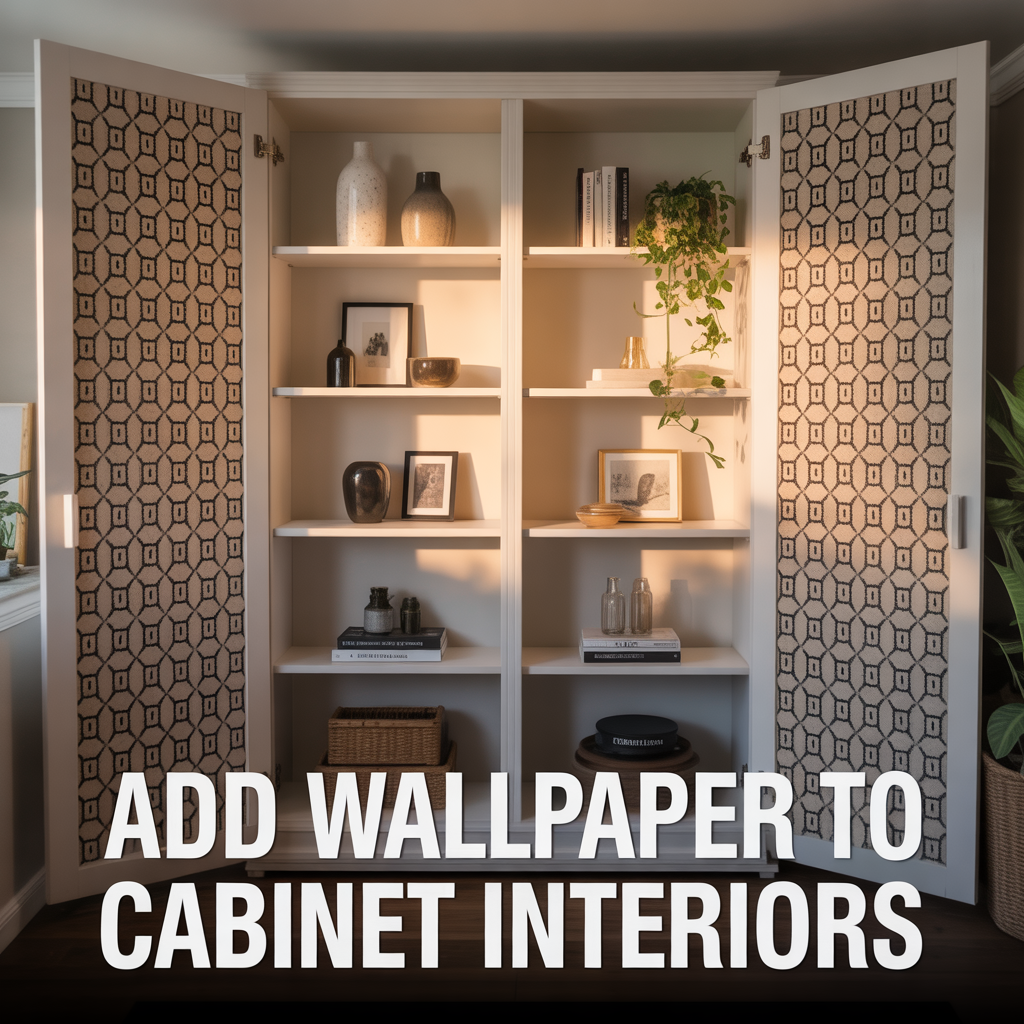
4. Add Wallpaper to Cabinet Interiors
This is one of those furniture makeover ideas that looks like it required a professional but actually takes about an hour. I lined the back interior panels of a bookshelf with a geometric patterned wallpaper, and the result was incredible. Every item I placed on the shelf suddenly looked intentional and styled. This technique works especially well for open-shelving units, glass-front cabinets, and bookshelves.
How to Choose the Right Wallpaper for Furniture
Peel-and-stick wallpaper is the easiest option for furniture projects. It requires no paste, no soaking, and peels off cleanly if you change your mind. I used a black-and-white geometric print, which worked well against the white painted exterior of the bookshelf. Floral prints work well in vintage or boho-styled rooms. Avoid very busy patterns for small furniture pieces because they can look overwhelming in a small space.
How to Apply Wallpaper Inside a Cabinet Cleanly
Measure the interior panel carefully and cut the wallpaper slightly larger than needed. Peel the backing slowly and press from top to bottom using a flat card or squeegee to remove air bubbles. Trim the excess with a sharp craft knife along the edges. I completed three shelving panels in about 40 minutes. If the wallpaper lifts at corners, use a small amount of craft adhesive to press it back down.
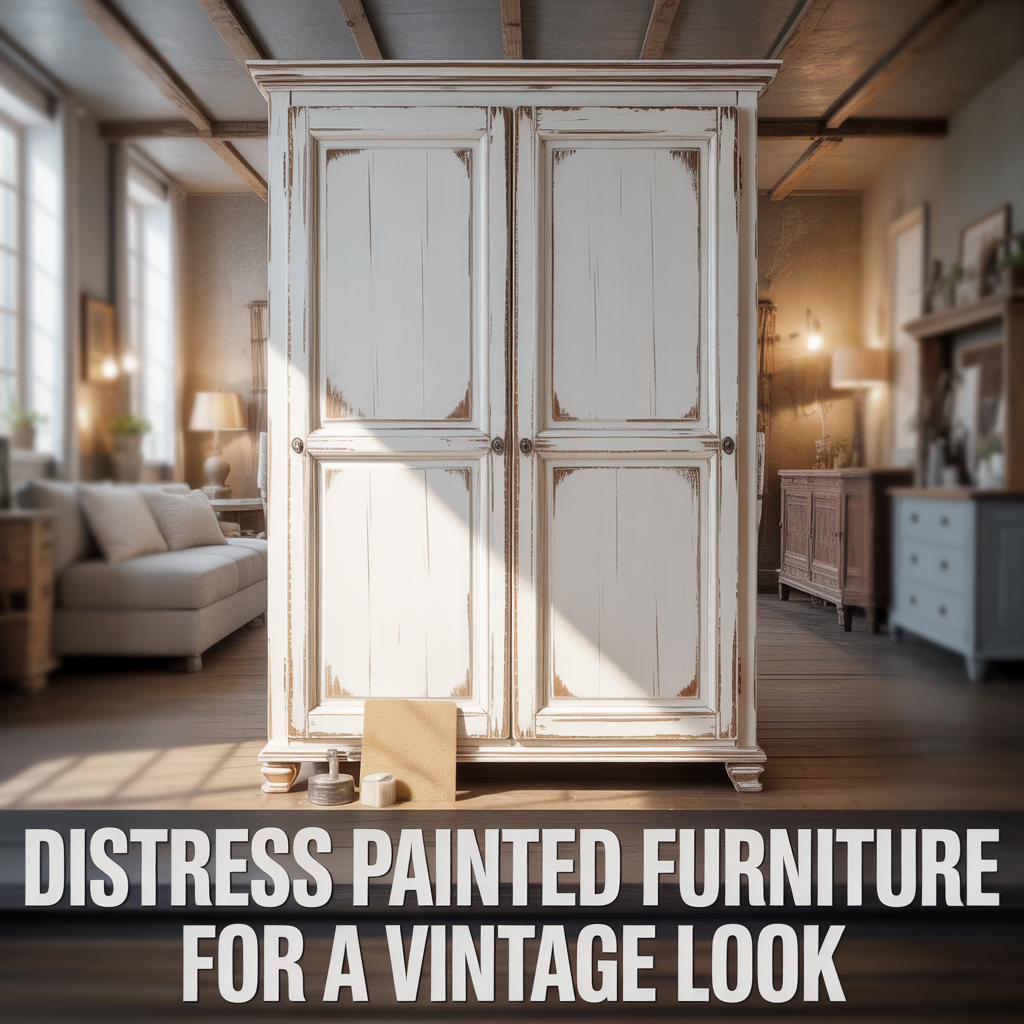
5. Distress Painted Furniture for a Vintage Look
Distressed furniture has a deliberately aged appearance that fits rustic, farmhouse, and vintage interior styles very well. I distressed an old wardrobe using chalk paint and sandpaper, and it looked like something pulled from a French countryside home. The process is straightforward, and the results are forgiving because imperfections actually make the piece look better, not worse.
How to Create a Distressed Finish on Wood
Paint the piece in your chosen color and let it dry completely. Then sand lightly along the edges, corners, and raised details where natural wear would occur over time. I used 220-grit sandpaper for this step because it removes paint gently without gouging the wood. The goal is to reveal small amounts of the wood or a base coat underneath. Seal the finished piece with a matte wax or clear matte varnish to protect the finish.
Which Furniture Pieces Look Best When Distressed
Dressers, wardrobes, dining tables, and wooden chairs all respond well to distressing. I distressed a small nightstand in white chalk paint, and it became the most-admired piece in my bedroom. Avoid distressing modern, flat-panel furniture because the technique needs raised details and wood edges to look realistic. Pieces with carved legs or panel detailing show the distressed effect more clearly and more attractively.
6. Replace Cabinet Hardware for an Instant Update
Replacing handles and knobs is the fastest furniture makeover idea on this entire list. I swapped out the old brass handles on a dark wood dresser for matte black bar pulls, and the piece looked completely different in under 15 minutes. New hardware costs between $2 and $10 per piece depending on the finish, and the visual impact is far greater than the price suggests.

Best Hardware Styles for Different Furniture Types
Matte black bar pulls suit modern and industrial furniture styles. Brass knobs work well with vintage and boho pieces. I used ceramic knobs with a hand-painted floral detail on a white cottage-style dresser, and the result matched a painted furniture ideas before and after picture I had saved for months. Brushed nickel hardware suits minimalist and Scandinavian-style furniture. Always measure the existing hole spacing before purchasing new hardware.
How to Install New Furniture Hardware Correctly
Use the existing holes where possible to avoid filling and repainting. If the new hardware has a different hole spacing, fill the old holes with wood filler, sand smooth, repaint, and then drill new pilot holes. I made the mistake of skipping the pilot holes once and cracked the drawer front. Always use a power drill on a low torque setting when driving screws into wood furniture to avoid splitting.
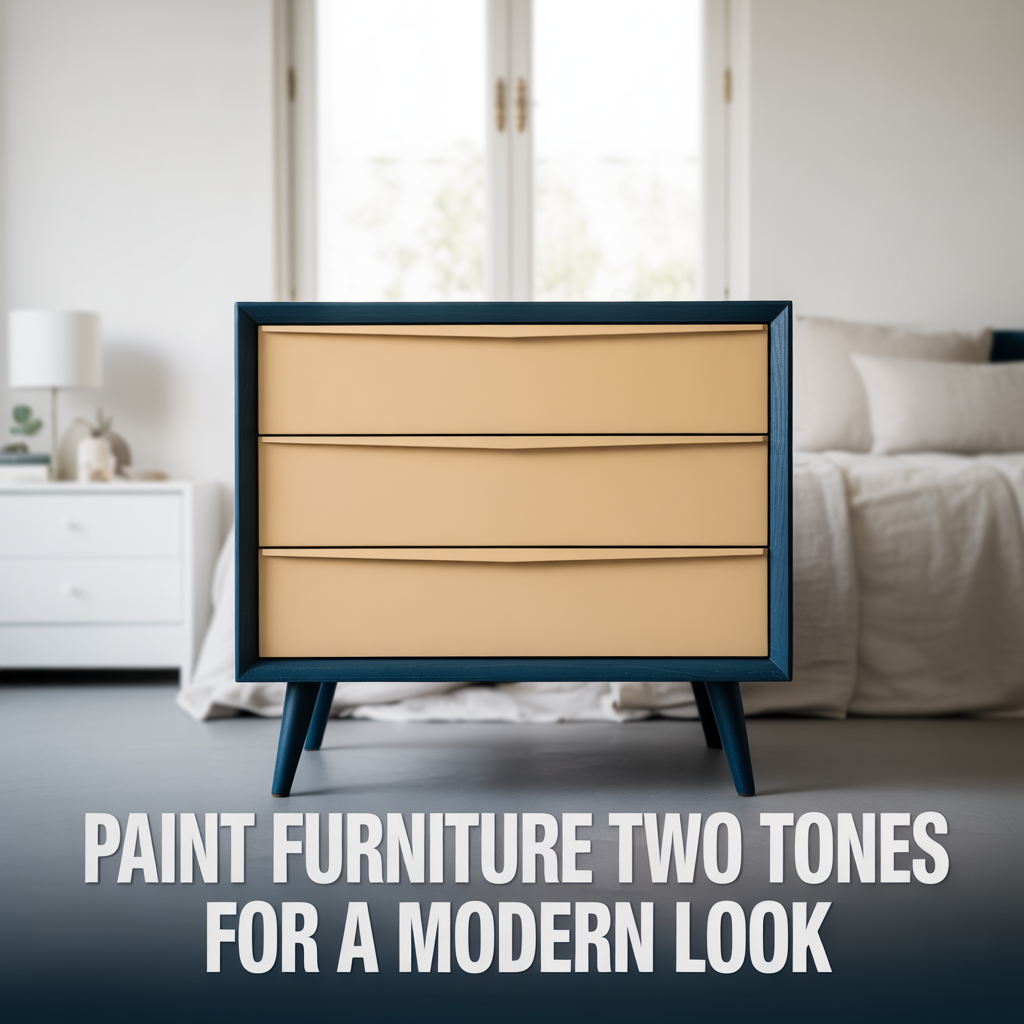
7. Paint Furniture Two Tones for a Modern Look
Two-tone furniture involves painting the body of a piece in one color and the legs or trim in a contrasting color. I painted a dresser in a warm cream on the drawers and a deep navy on the frame and legs. The result looked like a piece from a high-end home decor shop. This is one of the most effective DIY furniture makeover ideas for anyone who wants a modern or contemporary look without buying new furniture.
How to Choose Two Colors That Work Together
Use a color wheel to find complementary or analogous color pairings. I paired warm white with soft terracotta on a small cabinet, and it photographed beautifully for a home decor blog feature. Neutral-plus-bold combinations like cream and black, or white and forest green, are the safest choices for beginners. Avoid pairing two equally bold colors on large furniture pieces because the result can feel visually heavy and distracting.
How to Get Clean Lines Between Two Paint Colors
Apply painter’s tape along the line where the two colors meet before painting. Press the tape edge down firmly with a fingernail or a flat tool to prevent paint bleed. Paint the lighter color first, let it dry, then tape and apply the darker color. I peel the tape slowly at a 45-degree angle while the paint is still slightly tacky for the cleanest edge. Practice this technique on a test board first if it is your first time.
8. Add Legs to a Legless Piece of Furniture
Adding legs to a low or legless furniture piece changes its proportions completely and makes it look more refined. I added tapered mid-century legs to a basic storage unit, and it went from looking like a storage box to looking like a statement sideboard. Furniture legs are available at hardware stores and online for between $10 and $40 for a set of four, depending on the style and material.

Which Leg Styles Suit Which Furniture Types
Tapered wooden legs suit mid-century modern and Scandinavian-style furniture. Hairpin legs in metal suit industrial and minimalist styles. I attached hairpin legs to a low wooden storage unit and the result was exactly the industrial-modern look I was after. Bun feet suit farmhouse and cottage-style furniture pieces. Always check the weight rating of the legs before attaching them to heavier pieces like bookshelves or large storage units.
How to Attach Furniture Legs Securely
Most furniture legs attach using a threaded mounting plate that screws into the underside of the furniture. Mark the position of each leg using a tape measure so all four legs sit at equal distances from the corners. Pre-drill pilot holes before screwing in the mounting plates. I tighten each plate with a screwdriver and then check stability by pressing down on the corners of the furniture. Test the piece on a flat floor before placing any weight on it.
9. Use Fabric to Cover a Damaged Table Surface
A table with a scratched or damaged surface can be covered entirely with fabric for a completely new look. I stretched a thick canvas fabric over a damaged coffee table top and stapled it underneath the edges. The result looked intentional and styled, not like a repair job. This technique also works well with decorative paper, contact paper, or leather offcuts for a more polished result.

What Materials Work Best for Table Surface Covers
Thick canvas, upholstery fabric, and faux leather all hold up well on table surfaces. I used a linen-texture contact paper on a side table once, and it lasted over 18 months before showing any wear at the edges. Avoid thin fabrics on table surfaces because they wrinkle and lift quickly under daily use. For kitchen or dining tables, always choose a wipe-clean material so the surface stays hygienic and easy to maintain.
How to Apply Contact Paper Without Bubbles
Clean the table surface completely and let it dry before starting. Cut the contact paper slightly larger than the surface. Peel a few inches of the backing at a time and press from one edge across, using a flat card to smooth each section before peeling more. I work in sections of about six inches at a time to keep control of the application. Trim the excess with a sharp craft knife along the table edge for a clean finish.
10. Create an Ombre Paint Effect on a Bookshelf
An ombre effect uses two or more shades of the same color blending from light to dark across a furniture piece. I painted a tall bookshelf in three shades of blue, lightest at the top and darkest at the bottom. The piece became a focal point in the room without adding any additional decor. This technique is one of the most visually striking DIY furniture makeover ideas for large furniture pieces.
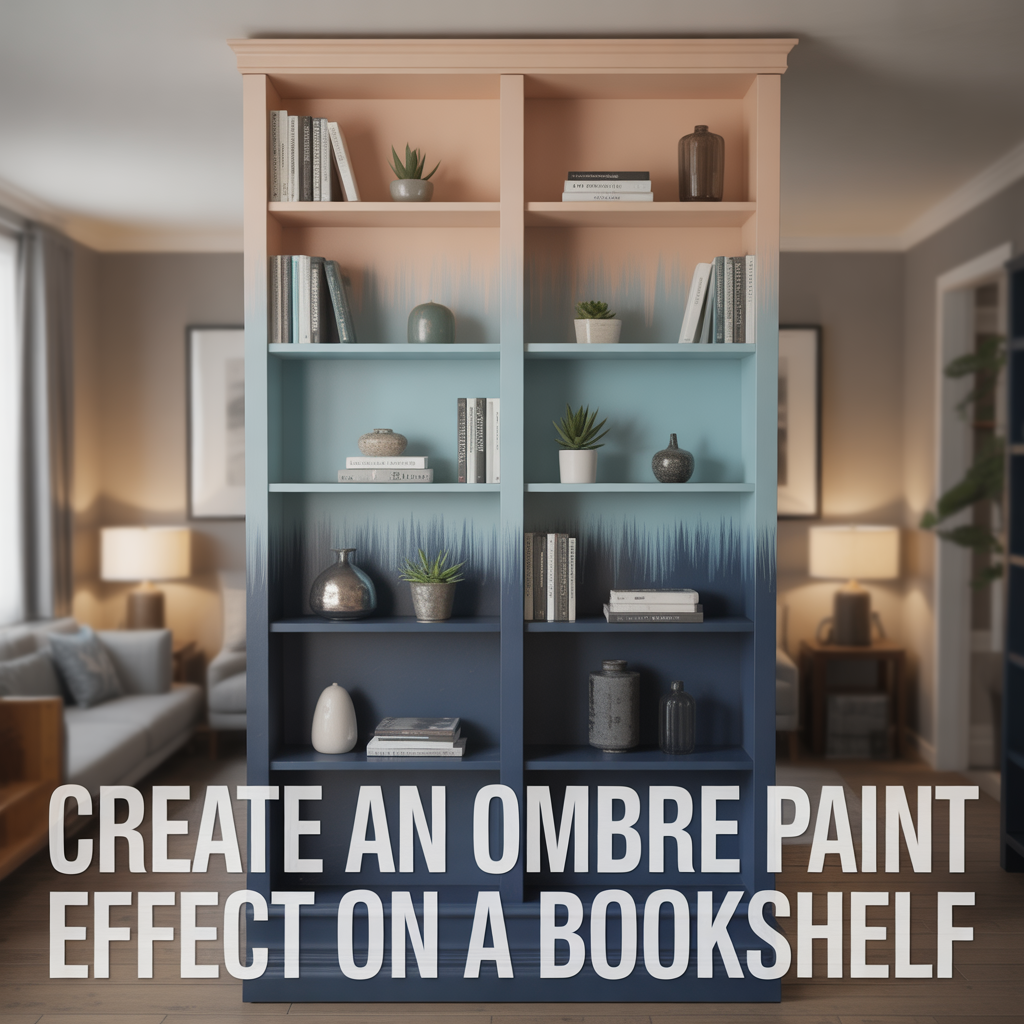
How to Blend Paint Colors for an Ombre Effect
Choose two or three shades from the same color family. Paint each shade in a horizontal band, leaving a few inches of overlap between each band while both colors are still wet. Use a dry brush in quick, short strokes to blend the overlapping area. I worked quickly because acrylic paint dries fast. If a blend looks uneven after drying, apply a thin second coat to the overlap area and blend again while it is still wet.
Which Furniture Pieces Work Best for Ombre Painting
Tall bookshelves, wardrobes, and large dressers show an ombre effect most clearly because they have enough height for the color transition to develop gradually. I tried an ombre effect on a small nightstand once, and the height was too short for the blend to be visible. Flat, smooth surfaces give a cleaner ombre result than heavily textured ones. Sand and prime the surface before painting to get the smoothest base possible.
11. Line Drawer Interiors With Decorative Paper
Lining drawer interiors with decorative paper is a simple, low-cost furniture makeover idea that adds a personal detail most people notice when they open a drawer. I lined all six drawers of my old white dresser with a black-and-white botanical print paper, and it made opening the drawers feel like a small, enjoyable moment every single day. This project costs as little as $5 for an entire dresser.

Best Paper Types to Use for Drawer Lining
Peel-and-stick shelf liner paper is the most practical option because it stays flat and does not slide around inside the drawer. I also used thick gift wrap paper secured with double-sided tape for a lower-cost alternative, and it worked well for over a year. Avoid using thin wrapping paper without adhesive because it shifts and crumples with daily drawer use. Wallpaper offcuts also work well and come in a wider range of patterns than standard shelf liner options.
How to Measure and Cut Drawer Liner Paper Accurately
Remove the drawer and measure the interior base length and width. Cut the paper about half an inch smaller than each measurement so it fits flat without curling up at the edges. I use a metal ruler and a rotary cutter for straight lines every time. For peel-and-stick paper, press from the center outward to avoid trapping air bubbles. For non-adhesive paper, apply double-sided tape around the perimeter of the drawer base before pressing the paper down.
12. Apply a Metallic Finish for a Glamorous Look
Metallic paint finishes on furniture create a high-contrast, polished look without any complex technique. I applied gold metallic paint to the legs of a white side table, and the result looked deliberate and expensive. Metallic paint is available in gold, silver, copper, and bronze finishes and costs between $8 and $15 for a small tin that covers multiple furniture pieces.

How to Apply Metallic Paint Without Brush Marks
Use a soft-bristled brush or a small foam roller for metallic paint to reduce visible brush marks. I applied two thin coats rather than one thick coat, which gave a smoother, more even metallic sheen. Sand the surface lightly with 220-grit sandpaper between coats for the best result. Metallic paint does not always need a topcoat, but I applied a clear satin varnish over the gold legs to protect the finish from chipping with daily contact.
Which Furniture Details Benefit Most From Metallic Paint
Legs, handles, carved details, trim, and frame edges all respond well to metallic paint. I painted just the carved border detail on a plain mirror frame in silver metallic paint, and the frame looked like an antique from a high-end decor shop. Avoid painting large flat surfaces entirely in metallic paint because it can look overwhelming. Use metallic paint as an accent on specific details rather than as the primary finish across the entire furniture piece.
13. Repurpose an Old Ladder as a Bookshelf
A wooden ladder can become a functional and attractive bookshelf with very little effort. I sanded and stained an old wooden ladder in a dark walnut tone, leaned it against the wall at a slight angle, and placed books, plants, and small decor items across the rungs. It cost me nothing because I already had the ladder. This is one of the most resourceful upcycled furniture projects I have personally completed.

How to Prepare a Ladder for Use as a Shelf
Check all rungs for stability before starting. Sand the entire ladder with 120-grit sandpaper to remove rough spots and old paint. Wipe it clean and apply a wood stain or chalk paint in your chosen color. I used a dark walnut stain and sealed it with a matte varnish. If the ladder wobbles, attach a small L-bracket at the back top to anchor it lightly to the wall for safety, especially if it will hold heavier items like books.
How to Style a Ladder Shelf Attractively
Alternate between tall and short items across the rungs to create visual rhythm. I placed a trailing plant on the top rung, a row of books on the second, and small framed prints leaning against the wall on the third. Avoid overloading any single rung with heavy items. A ladder shelf works best in a bedroom corner, beside a sofa, or in a home office. It suits rustic, boho, and minimalist interior styles particularly well.
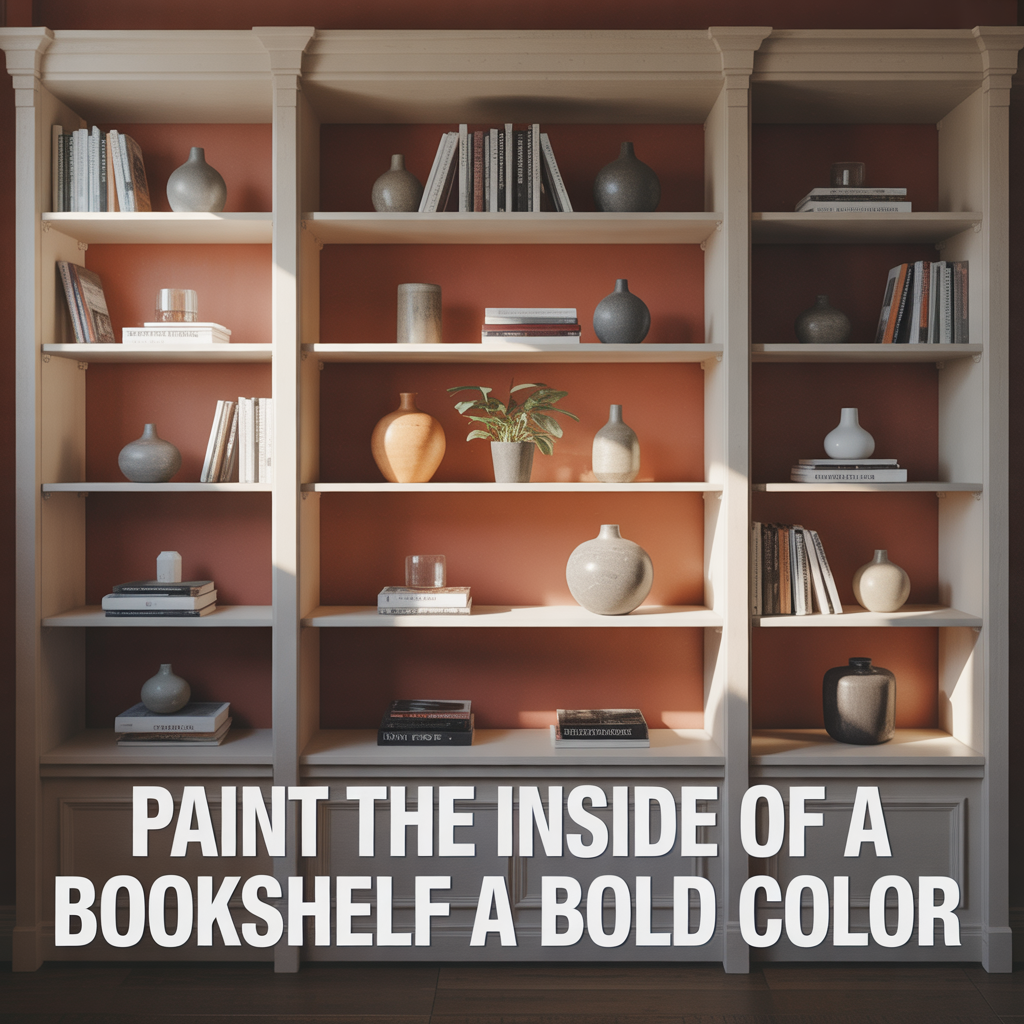
14. Paint the Inside of a Bookshelf a Bold Color
Painting the inside back panel of a bookshelf in a bold or contrasting color makes every object on the shelf pop visually. I painted the interior back of a white bookshelf in deep terracotta, and every book, plant, and frame on it suddenly looked intentional and curated. This is a low-effort furniture makeover idea that takes about 30 minutes and costs only a small amount of paint.
How to Choose the Right Interior Color for a Bookshelf
Choose a color that contrasts with the exterior of the bookshelf and also complements the room’s overall palette. I chose terracotta because my room had warm beige tones throughout. A white bookshelf with a navy interior works well in modern and coastal-style rooms. A natural wood bookshelf with a sage green interior suits boho and earthy-toned rooms. Always test the color on a piece of paper held inside the shelf before committing to a full coat.
How to Paint a Bookshelf Interior Neatly
Remove all items from the shelf and tape off the interior edges with painter’s tape. Use a small angled brush to cut in along the edges first, then fill the center with a small roller for a smooth finish. I applied two coats of eggshell finish paint for better durability, since bookshelf interiors get scraped by objects regularly. Let each coat dry fully before replacing items. A satin or eggshell finish holds up better than matte paint in this application.
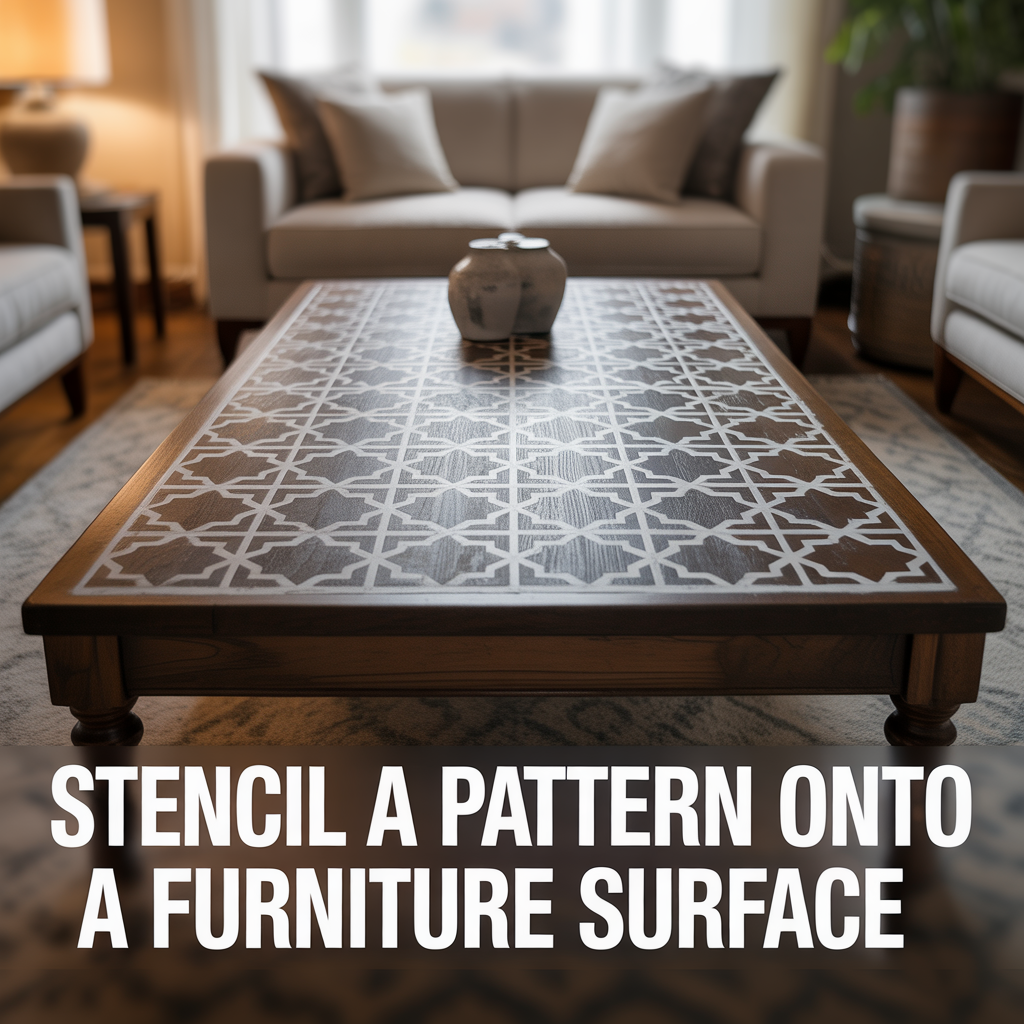
15. Stencil a Pattern Onto a Furniture Surface
Stenciling adds a repeating decorative pattern to any furniture surface using a pre-cut stencil and a small amount of paint. I stenciled a Moroccan tile pattern onto the top of a plain wooden coffee table, and it looked hand-painted and custom. Stencils cost between $5 and $20 and are reusable across multiple projects. This is one of the most affordable painted furniture ideas available for beginners.
How to Stencil Furniture Without Paint Bleed
Secure the stencil to the surface with painter’s tape and apply a very small amount of paint to the stencil brush. Dab the brush straight down in a stippling motion rather than brushing across the stencil. I made the mistake of using too much paint on my first attempt, which caused bleed under the stencil edges. Use a paper towel to remove most of the paint from the brush before applying it to the stencil. Less paint gives a cleaner and more precise result.
Which Stencil Patterns Work Best on Furniture
Geometric patterns work well on modern and minimalist furniture. Floral patterns suit vintage, boho, and cottage-style pieces. I used a repeating diamond pattern on a small wooden tray and a large floral stencil on the front of a dresser drawer. Moroccan and mandala-style patterns work well on coffee table tops because the circular design fits naturally within a square or rectangular surface. Always choose a stencil scale that fits the surface area of the furniture piece.
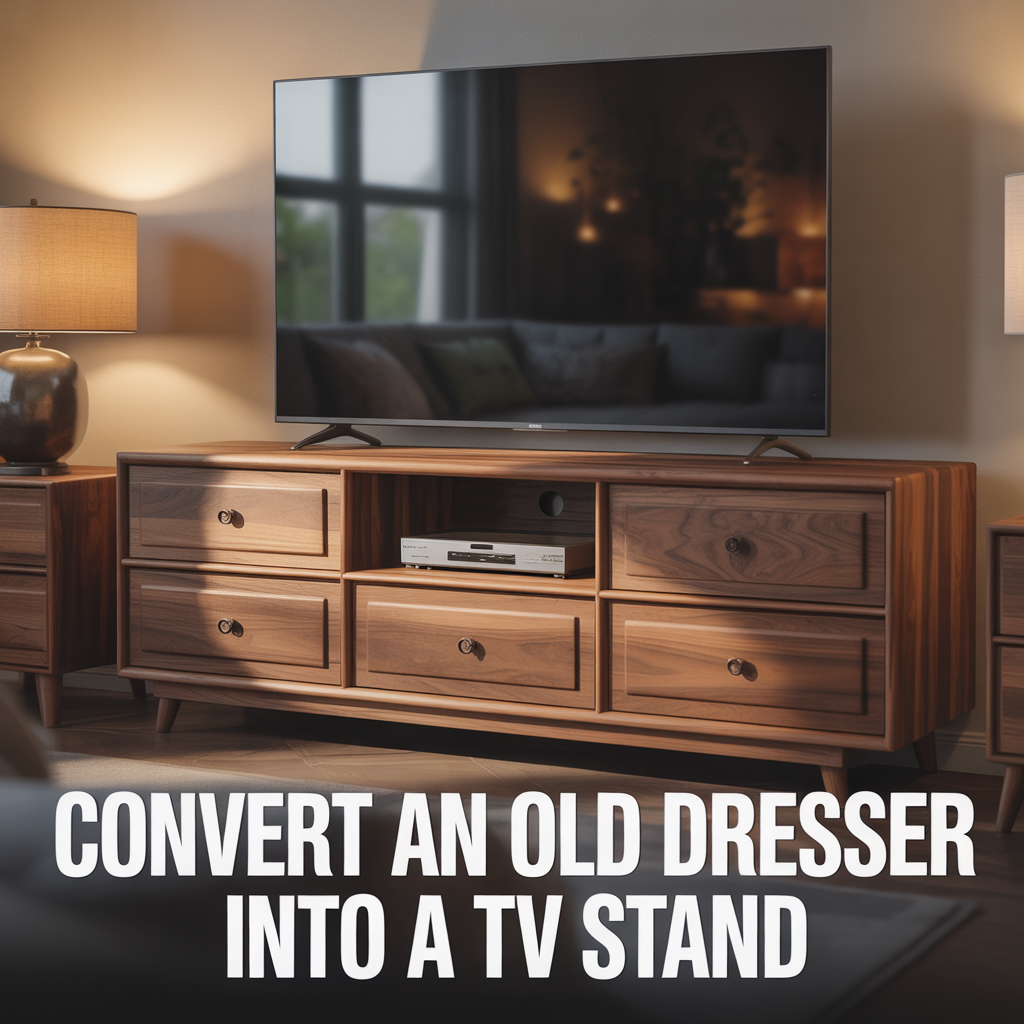
16. Convert an Old Dresser Into a TV Stand
An old dresser with deep drawers converts into a functional TV stand with very little modification. I removed the top two drawers from an old six-drawer dresser, added a piece of cut plywood to create a flat shelf in the opening, and placed the TV on top. The remaining four drawers provided useful storage for cables, remotes, and media. This is one of the most practical old furniture makeover ideas for a living room or bedroom.
How to Modify a Dresser for TV Storage
Measure the TV base and confirm the dresser top is wide enough to support it safely. Remove the selected drawers and set them aside. Cut a piece of plywood to the exact interior dimensions of the opening and slide it in to create a flat shelf. I secured mine with small corner brackets screwed into the interior sides of the dresser. Sand any rough edges and paint the interior of the opening to match the dresser exterior for a clean, finished look.
How to Manage Cables Inside a Converted Dresser TV Stand
Drill a cable management hole in the back panel of the dresser at a point that aligns with the TV’s cable connections. Use a 1.5-inch hole saw bit for a clean circular opening. I fed all TV and power cables through this single hole and connected them to a power strip inside the dresser. Use cable ties to bundle the cables neatly inside the dresser. This keeps the exterior of the converted TV stand completely cable-free and clean-looking.
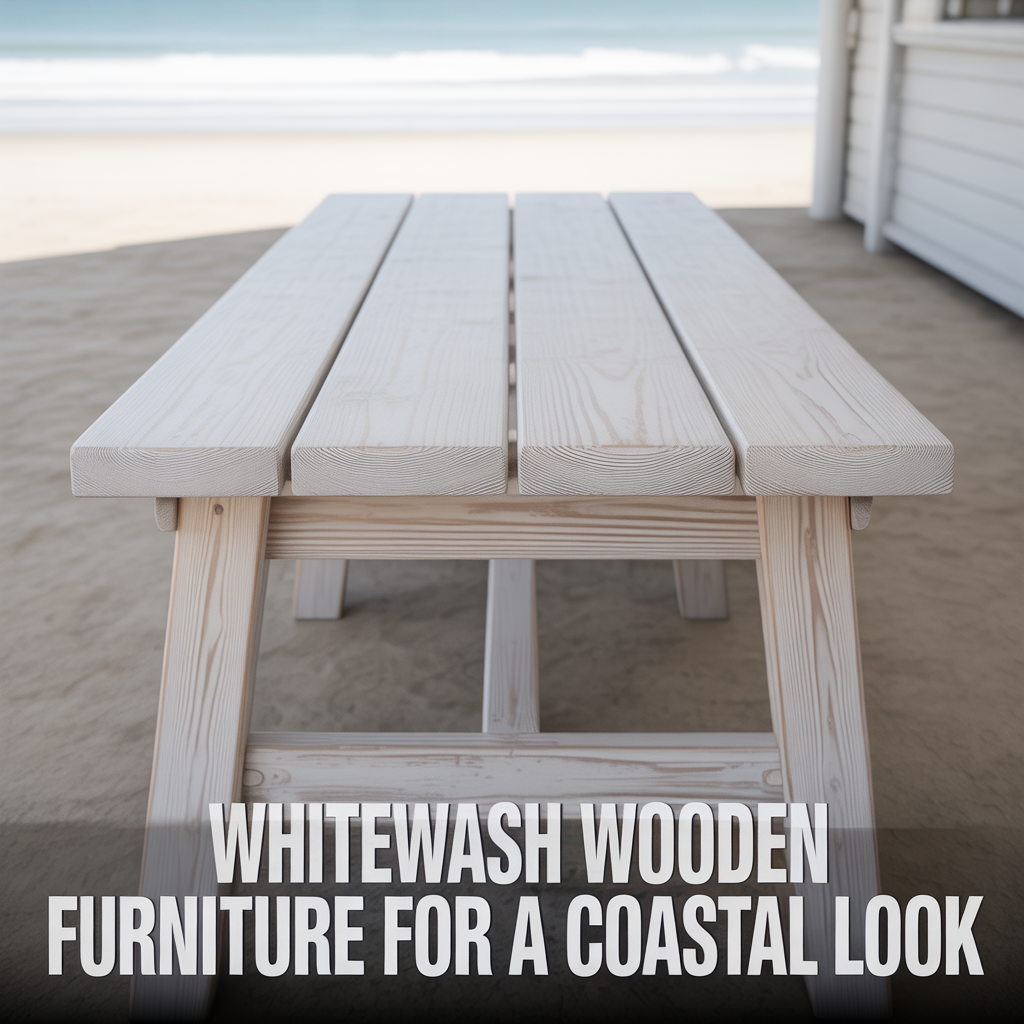
17. Whitewash Wooden Furniture for a Coastal Look
Whitewashing is a technique where diluted white paint is applied to bare wood and then wiped off, leaving a thin layer of white that still shows the natural wood grain underneath. I whitewashed a wooden dining bench using a 1:1 mixture of white chalk paint and water, and the result had a soft, beachy, coastal quality. This technique suits pine, oak, and any wood with a visible grain.
How to Mix and Apply a Whitewash Solution
Mix one part white chalk paint or flat white paint with one part water in a small container. Stir until fully combined. Apply the mixture to the sanded, bare wood surface with a wide brush, working in the direction of the grain. Wait about two minutes, then wipe the surface with a clean cloth to remove most of the solution. I wiped firmly for a lighter effect and lightly for a more opaque result. Seal the finished piece with a matte clear varnish.
Which Furniture Pieces Suit a Whitewash Finish
Pine furniture shows a whitewash finish most clearly because of its prominent grain pattern. I whitewashed a pine bookshelf and a pine dining bench, and both pieces suited the coastal-inspired room they were placed in. Oak also whitewashes well, though the grain is tighter and the result is slightly more subtle. Avoid whitewashing painted furniture without stripping it first, because the whitewash solution cannot penetrate a painted surface and will simply sit on top and peel.
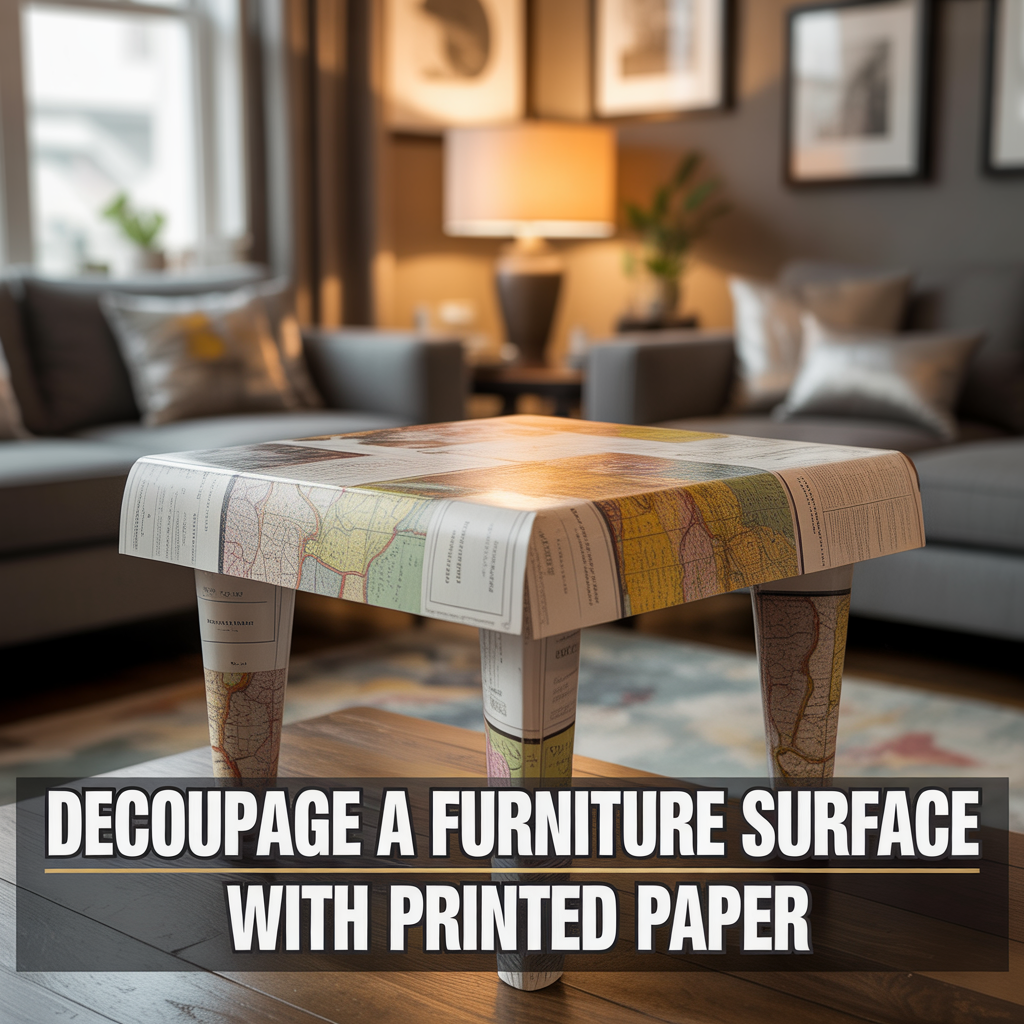
18. Decoupage a Furniture Surface With Printed Paper
Decoupage involves gluing cut or torn pieces of paper onto a furniture surface and sealing them with a decoupage medium to create a smooth, sealed finish. I decoupaged the top of a small side table with pages from an old map, and it became a conversation piece in my living room. The entire project cost less than $10 and took about two hours including drying time.
How to Apply Decoupage Correctly to Furniture
Cut or tear the paper into the desired shapes and sizes. Apply a thin, even layer of decoupage medium (such as Mod Podge) to the furniture surface, lay the paper piece on top, and apply another thin layer of decoupage medium over the paper. I work from the center outward to smooth out any air bubbles. Overlap the pieces slightly to avoid gaps. Let each layer dry fully before applying the next piece or the next coat of sealing medium.
How to Seal Decoupage Furniture for Durability
Apply at least three to four coats of decoupage medium over the finished paper surface, letting each coat dry fully between applications. I sanded very lightly with 400-grit sandpaper between the final two coats for a smoother result. The final surface should feel hard and sealed, not soft or tacky. For table surfaces that receive daily contact, I also applied two coats of clear water-based polyurethane over the final decoupage layer for added protection against scratches and moisture.
Frequently Asked Questions
What is the easiest furniture makeover idea for a beginner?
Replacing cabinet hardware is the easiest furniture makeover idea for a beginner. It requires no painting, no sanding, and no special tools beyond a screwdriver. I completed my first hardware swap in under 15 minutes and the dresser looked completely different afterward. New knobs and pulls cost between $2 and $10 per piece and are available at most hardware stores. This single change updates the style of a furniture piece more effectively than most people expect before they try it for the first time.
How much does a furniture makeover typically cost?
Most furniture makeovers cost between $10 and $80 depending on the materials used. Chalk paint costs around $15 to $25 per tin, sandpaper costs $5 to $10 for a pack, and hardware replacement costs $20 to $40 for a full set of pulls or knobs. I have completed full dresser makeovers for under $30 using chalk paint and new hardware. The most expensive makeovers involve reupholstering or adding new legs, which can bring the total closer to $60 to $80 for a single piece.
Can I do a furniture makeover without sanding?
Yes, furniture makeovers are possible without sanding when using chalk paint or self-adhesive contact paper. Chalk paint bonds to most surfaces, including wood, laminate, and metal, without requiring a sanded or primed base. I painted a laminate dresser with chalk paint once without any sanding, and the paint adhered well after two coats. However, sanding gives a smoother finish and better paint adhesion on all surface types. For the longest-lasting result, light sanding with 120-grit sandpaper before painting is always the better choice.
What type of paint is best for furniture makeovers?
Chalk paint is the best paint for most furniture makeovers because it adheres to nearly any surface, dries fast, and gives a smooth, matte finish without requiring primer. Acrylic paint is a good lower-cost alternative and works well on pre-primed or pre-sanded surfaces. I have used both on wooden furniture and chalk paint consistently gives a better first-coat result. For furniture pieces that receive heavy daily contact, like dining chairs or coffee tables, I seal the final coat with a clear water-based polyurethane for added durability and scratch resistance.
How do I make old furniture look new without painting it?
Old furniture looks new without painting by replacing the hardware, reupholstering the seat fabric, applying wood stain, adding peel-and-stick contact paper, or attaching new legs. I refreshed a scratched wooden coffee table entirely by applying a dark walnut wood stain without any paint. The stain covered the scratches and brought the grain back to life. For furniture with intact paint but outdated hardware, simply swapping the knobs and pulls creates an immediately noticeable improvement without touching the painted surface at all.
Are furniture makeover ideas suitable for rental homes?
Yes, several furniture makeover ideas are fully suitable for rental homes because they require no permanent modification to the furniture or the walls. Peel-and-stick contact paper, drawer liner paper, new hardware, and new fabric on seat cushions are all removable or reversible. I refreshed three pieces of furniture in a rented apartment using only peel-and-stick methods, and I removed everything cleanly when I moved out. Avoid cutting, drilling, or permanently altering furniture in a rental without the landlord’s written permission.